
BPM
BPM (Business Process Management) is the core part of Genius platform. It allows the user to model, execute, and monitor business processes.
Business processes are supported throughout their entire life cycle: from design by graphical editing, to monitoring status accessing process instances, from user's tasks for human interactions and dashboards to reporting.
Genius BPM offers the unique advantage of integrating the multichannel approach into one place: while designing the process flow, you can design the necessary form, which allows user interaction.
Once the process is deployed on the supported platform (MFP, Mobile, Web), the client interprets BPM definition and, according to the platform's strength, it shows the user the best interface. If, for example, a user is checking their tasks on an MFP and the task requires human interaction to complete said task, the scanner widget will be ready for use. If the user is using a mobile phone, the acquisition of the document is necessary.
Genius BPM creates the connection between business analysts and end users offering both process management features and tools directly joint by business users. To fulfill business requirements, specific nodes can be used from the palette.
Genius BPM can be triggered from MFP, Mobile or Web or from the system event using the BPM Starter. The Hotfolder is an example of BPM Starter: it can trigger a specific BPM activation once a file appears in a specific folder. For further details, refer to the BPM Starter section.
Definition
A BPM definition is a set of steps in a process.
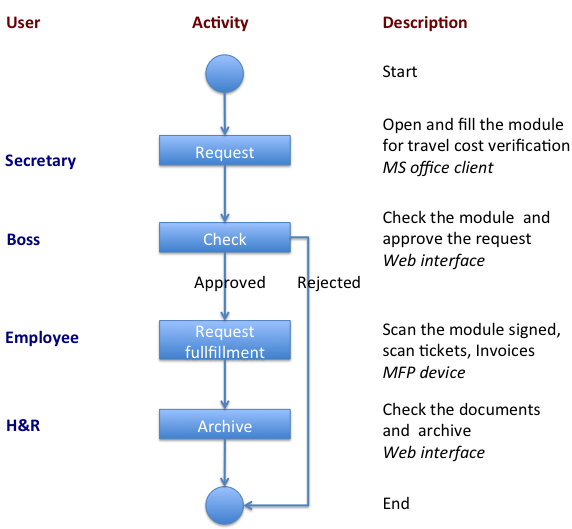
For example, a simple process can be the travel cost management for a company employees. A definition describes the process, while the steps of the process represent the tasks to be accomplished. The following image describes the process workflow through a device interaction.
Genius Process Definition Language
The Genius Process Definition Language (short GPDL) is a set of rules that Genius Server uses for syntax checking, e.g., for checking the validity of variable names.
The rules are:
Variable names need to follow the pattern
([a-zA-Z][a-zA-Z0-9_]*).BPM Node Names need to follow the pattern
(Variable Names ([a-zA-Z][a-zA-Z0-9_]*).
Creating new BPM Definition
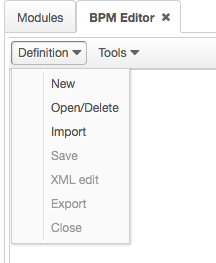
To create a new BPM flow, go to the BPM and then BPM Editor. Click on Definition in the toolbar and from the dropdown list select New.
A new BPM workspace editor opens.
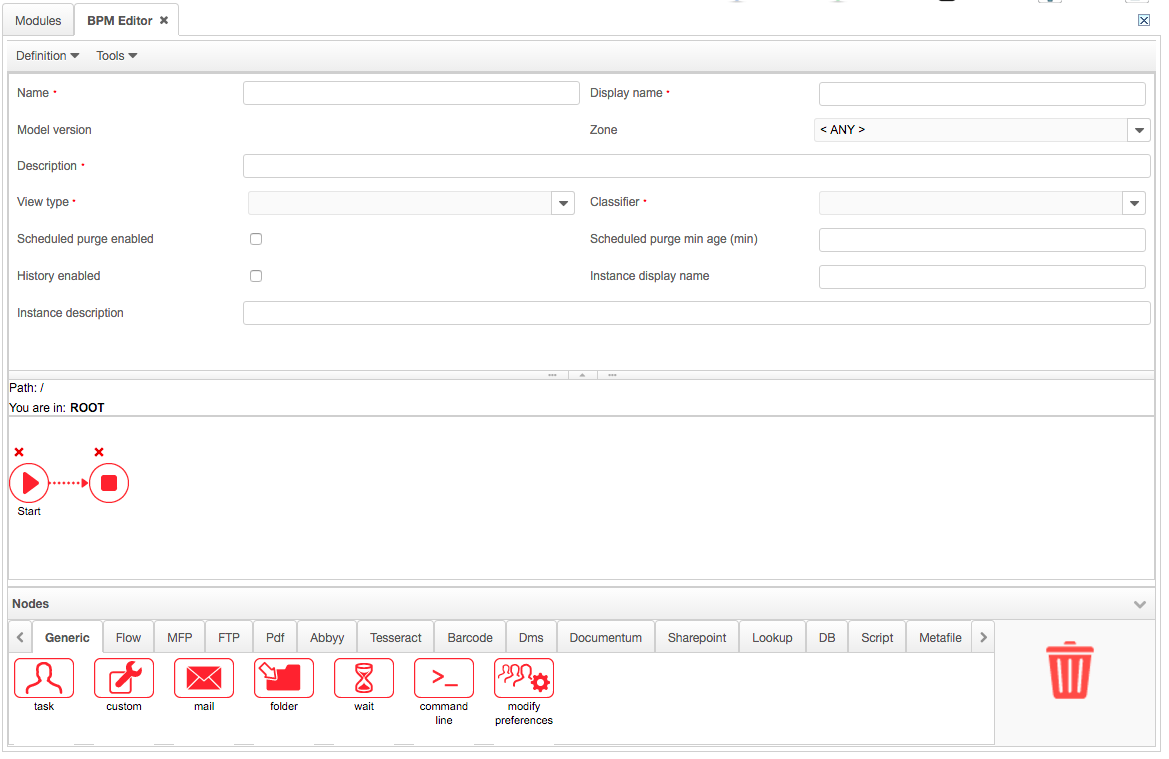
Now enter BPM definition main information:
Name: the logical name to identify the definition (required). It appears in the instances and in a process that refers to another process.
Display name: the displayed name of the definition (required). It is shown to the end user and it appears on Gweb and on MFP devices.
ID: the BPM automatically generates an ID. This field cannot be filled in and will only be used for troubleshooting issues.
Model version: the model version of the BPM definition.
Zone: the location which the definition is assigned. If a company has different branches, the process can be assigned to a specific branch or to all branches (ANY).
Description: the description of the definition (required).
View type: (required)
NORMAL: the process is shown in the "New Activities" section on Gweb and MFP devices.
SHORTCUT: the start node is shown in the "All Activities" section on Gweb and the main menu of Genius MFP client applications.
USER_SHORTCUT: the definition is shown in the user menu on Gweb and the main menu's context menu of Genius MFP Client applications.
HIDDEN: the definition is not visible (it is used for automatic processes where user interaction is not needed).
Classifier: it clusters the definition in a certain area of the company (e.g. H&R, legal department, Administration department,etc.) (required).
Scheduled purge enabled: if checked, the purge is enabled (the purge happened inside instances).
Scheduled purge min age (min): the time after which instances can be purged (e.g. 2, 120,etc.).
History enabled: if checked, it enables the conservation of all status of the process.
Instance display name: the displayed name of the instance in the "Current activities" section on Gweb or in the "Monitoring" section on MFP devices.
Instance description: the description of the instance.
Viewer actor: choosing an actor from the list, the selected actor can see the instance and its status until the end.
Manager actor: choosing an actor from the list, the selected actor can see the instance and its status until the end, and he can act on the instance itself (i.e. reassign a User Task).
To start designing BPM process flow, drag and drop nodes from the node palette. For further information on nodes usage, refer to the next section.
It is possible to use built-in BPM definition, for more details refer to Built-in BPM Definition List.
The definition of variables and actors is required. For further information, refer to the following sections.
Tools
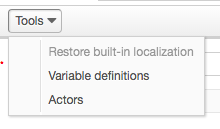
This drop down menu in the BPM overview allows administrators to add Actors (Actors), modify variables (Defining BPM Variables), restore built-in localization or update built-in BPMs to last version.
Warning
The setting Update built-in to last version will completely reset all built-in BPM definitions and update them to the current Genius Server version. This setting is useful to migrate built-in BPM processes but it also means, all assigned actors, device groups or other configured elements will be lost. This button only affect built-in BPMs, not custom BPMs. Please make sure to backup your configuration to re-assign actors, device groups and other configured elements after updating.
Defining BPM Variables
When looking at a BPM process, you need to take a data perspective into consideration. Throughout the execution of a process, data can be retrieved, stored, send, and used.
During the execution of the BPM process, for the runtime data storage, variables can be used.
A variable is defined by a name and a data type such as Text, Number, Date, or complex object. Variables are defined in the BPM Editor.
To create or modify a BPM variable click on Tools --> Variable definition.
The BPM variable definition list popup opens.
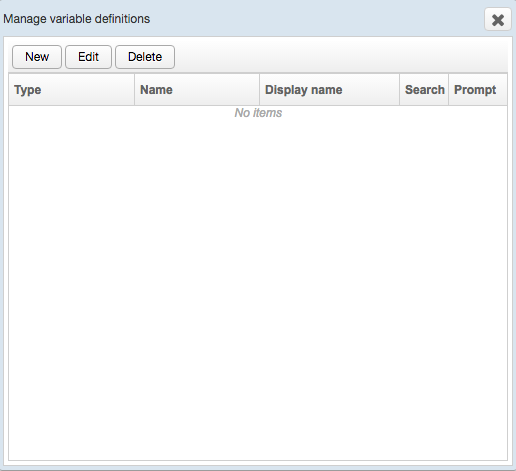
You can add, edit or delete one or more BPM variables.
Required information is:
Type: the nature of the variable:
GENERIC_TEXT: text or string.
GENERIC_PASSWORD: set of number and/or letters.
GENERIC_SELECT: selection list.
GENERIC_NUMBER: decimal numbers.
GENERIC_DATE: date.
DOCUMENT_OBJECT: document type such as pdf file, image or word document.
AUTH_IDENTITY: user ID.
EMAIL_ADDRESS: email address.
TELEPHONE_NUMBER: telephone number.
ADVANCED_SELECT: selection list.
DMS_NODE: folder or document of the DMS.
ADVANCED_TREE: dynamic folder browsing.
FORMULA: sum of numbers.
Name: the logic name of the variable displayed in a node.
Display name: the displayed name of the variable that the end user can see on Gweb or on MFP devices.
Description: the description of the variable.
Not required fields are:
Searchable: if checked, a variable can be used as a filter when you search instances. For further details, refer to Filters (variable definition) section.
Request for optional values: If enabled, the variable is shown even if it is not mandatory or the mandatory value (e.g. 1:3) has been already entered.
Note
The Request for optional values setting works only if the wizard has been enabled.
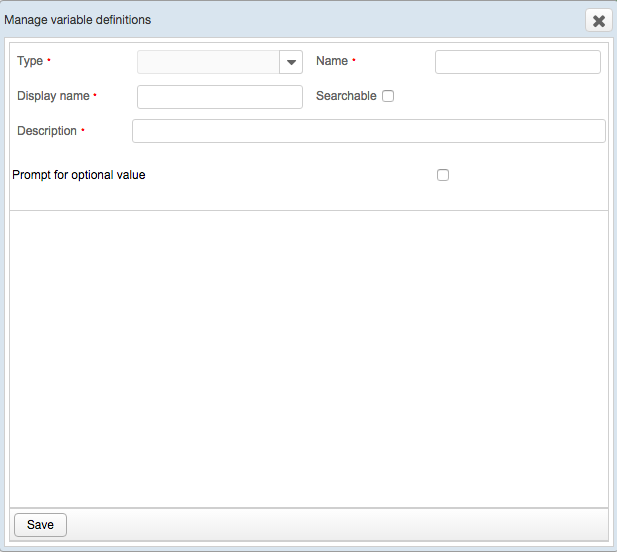
GENERIC_TEXT
The GENERIC_TEXT variable is used to add a text or an alphanumeric string (e.g. email object).
When you select GENERIC_TEXT in the type field, the following screen displays:
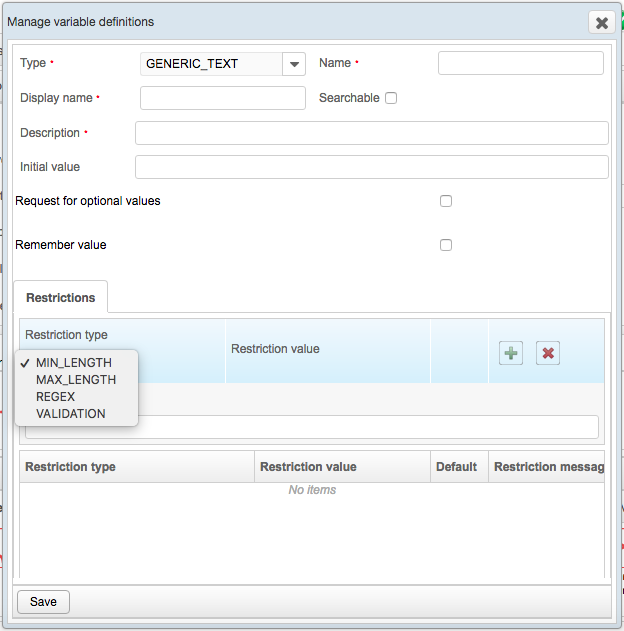
Initial value: initial value associated to the variable.
Remember value: remember the default value associated to the variable (e.g. automatic email).
Remember scope:
SERVER_SIDE: on the Server in the user preferences table.
CLIENT_ SIDE: on the MFP or the Gweb, according to the tool that the user is using.
Restriction type can be:
MIN_LENGTH: minimum length of the text (it must be minor of 255).
MAX_LENGTH: maximum length of the text (it must be major of 0 and minor of 255):
REGEX: a regular expression. For regular expression constructs, refer to The Official Java documentation.
VALIDATION: evaluates a conditional expression, if TRUE is returend the validation is passed. E.g., Variable a = test. Validation expression: ${a[0].value == 'test'} returns 'TRUE', the validation is passed.
Warning
The validation restriction does not work in instances started from a MFP device.
Restriction value: enter a number or an expression language related to the chosen restriction type.
Restriction message: the message displayed when the value entered does not respect the restriction. If no message is entered, a default message is displayed.
Once entered the value, press the "plus" sign to add it to the list.
To remove a restriction from the list, select it and press the "cross" sign.
To use this variable into a BPM process, write the following expression language: ${variable_name[0].value}.
Example of usage: ${generic_text[0].value}.
For further details about expression languages, refer to Placeholder and Expression Language.
Once everything is filled in do not forget to press Save.
GENERIC_PASSWORD
The GENERIC_PASSWORD variable is used to perform an authentication (e.g. before to scan a document, an authentication is needed).
When you select GENERIC_PASSWORD in the type field, the following screen displays:
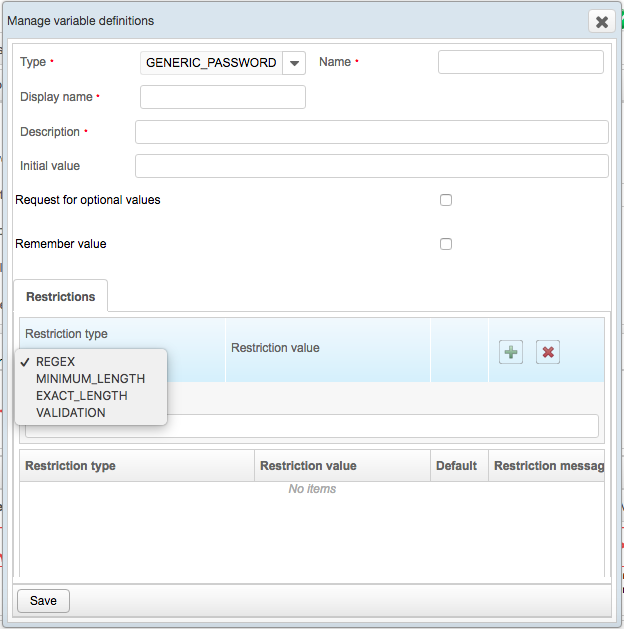
Initial value: the default value associated to the variable (e.g. test123).
Restriction type can be:
REGEX: a regular expression. For regular expression constructs, refer to The Official Java documentation.
MIN_LENGTH: minimum length of the password.
EXACT_LENGTH: exact length of the password.
VALIDATION: evaluates a conditional expression, if TRUE is returend the validation is passed. E.g., Variable a = test. Validation expression: ${a[0].value == 'test'} returns 'TRUE', the validation is passed.
Warning
The validation restriction doesn't work in instances started from an MFP device.
Restriction value: enter a number or an expression language related to the chosen restriction type.
Restriction message: the message displayed when the value entered doesn't respect the restriction. If no message is entered, a default message is displayed.
Once entered the value, press the "plus" sign to add it to the list.
To remove a restriction from the list, select it and press the "cross" sign.
To use this variable into a BPM process, write the following expression: ${variable_name[0].value}.
Example of usage: ${generic_password[0].value}.
For further details about expression languages, refer to Placeholder and Expression Language.
Once everything is filled in don't forget to press Save.
GENERIC_SELECT
The GENERIC_SELECT variable is used to create a list where the end user can choose an option.
When you select GENERIC_SELECT in the type field, the following screen displays:
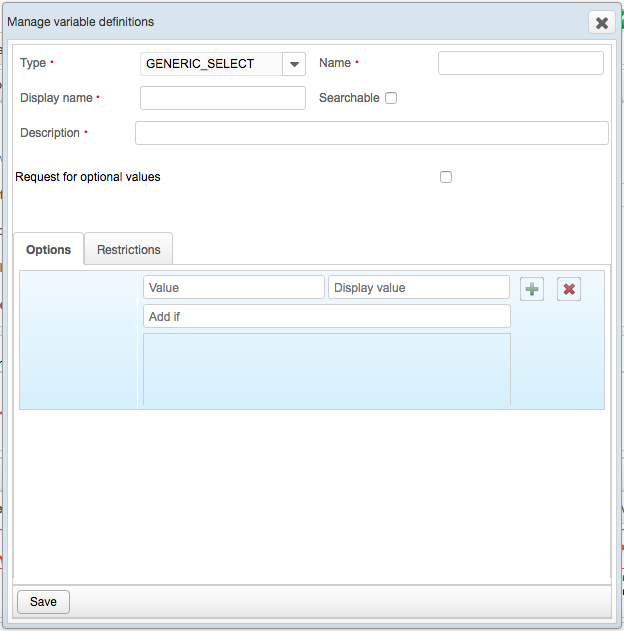
Options: are:
Value: the logic value of the variable displayed in a node.
Display value: the displayed value of the variable that the end user can see on Gweb or on MFP devices.
Add if: a variable that filters and shows only the entries related to the previous selections.
Restriction type is:
VALIDATION: evaluates a conditional expression, if TRUE is returend the validation is passed. E.g., Variable a = test. Validation expression: ${a[0].value == 'test'} returns 'TRUE', the validation is passed.
Restriction value: enter an expression language related to the chosen restriction type.
Restriction message: the message displayed when the value entered doesn't respect the restriction. If no message is entered, a default message is displayed.
Once entered the value, press the "plus" sign to add it to the list.
To remove a restriction from the list, select it and press the "cross" sign.
Warning
The options and the validation restriction don't work in instances started from a MFP device.
Once everything is filled in don't forget to press Save.
GENERIC_NUMBER
The GENERIC_NUMBER variable is used to enter a certain number of something (e.g. number of pages to scan).
When you select GENERIC_NUMBER in the type field, the following screen displays:
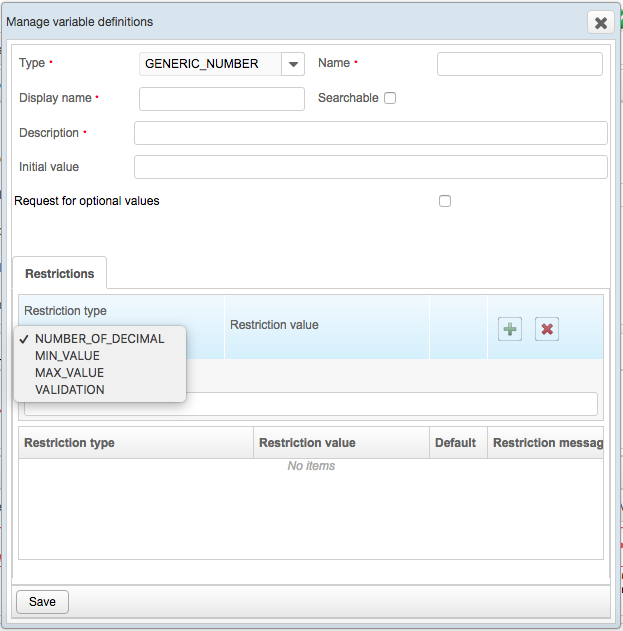
Initial value: the default value associated to the variable (e.g. 1)
Restriction type are:
NUMBER_OF_DECIMAL: decimal number.
MIN_VALUE: minimum value.
MAX_VALUE: maximum value.
VALIDATION: evaluates a conditional expression, if TRUE is returend the validation is passed. E.g., Variable a = test. Validation expression: ${a[0].value == 'test'} returns 'TRUE', the validation is passed.
Warning
The validation restriction doesn't work in instances started from a MFP device.
Restriction value: enter a number or an expression language related to the chosen restriction type.
Restriction message: the message displayed when the value entered doesn't respect the restriction. If no message is entered, a default message is displayed.
Once entered the value, press the "plus" sign to add it to the list.
To remove a restriction from the list, select it and press the "cross" sign.
To use this variable into a BPM process, write the following expression language: ${variable_name[0].value}.
Example of usage: ${number[0].value}.
For further details about expression languages, refer to Placeholder and Expression Language.
Once everything is filled in don't forget to press Save.
GENERIC_DATE
The GENERIC_DATE variable is used to add a date (e.g. the date from which the holidays start).
When you select GENERIC_DATE in the type field, the following screen displays:
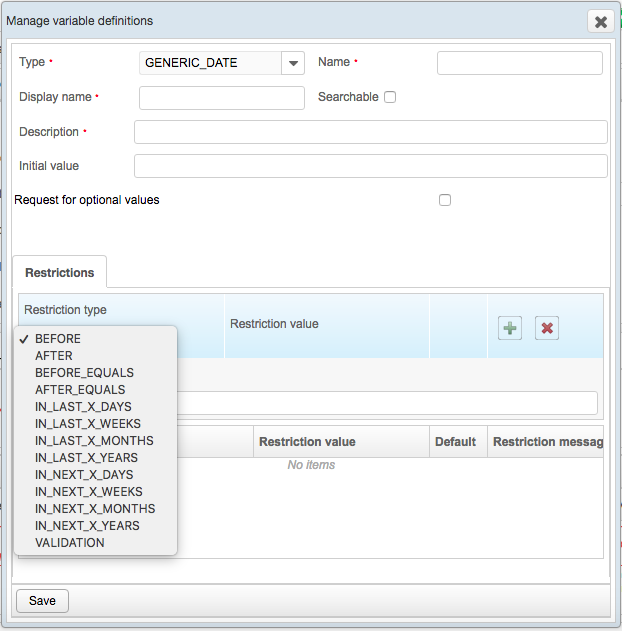
Initial value: the default value associated to the variable (e.g. 1).
Restriction type are:
BEFORE: before a date.
AFTER: after a date.
BEFORE_EQUALS: before or equals to a date.
AFTER_EQUALS: after or equals to a date.
IN_LAST_X_DAYS: number of days.
IN_LAST_X_WEEKS: number of weeks.
IN_LAST_X_MONTHS: number of months.
IN_LAST_X_YEARS: number of years.
IN_NEXT_X_DAYS: number of days.
IN_NEXT_X_WEEKS: number of weeks.
IN_NEXT_X_MONTHS: number of months.
IN_NEXT_X_YEARS: number of years.
VALIDATION: evaluates a conditional expression, if TRUE is returend the validation is passed. E.g., Variable a = test. Validation expression: ${a[0].value == 'test'} returns 'TRUE', the validation is passed.
Warning
The validation restriction doesn't work in instances started from a MFP device.
Restriction value: for the restriction type BEFORE, AFTER, BEFORE_EQUALS, AFTER_EQUALS, it is possible to enter a fixed date (accepted date format: dd/MM/yyyy, dd/MM/yyyy HH:mm, dd/MM/yyyy HH:mm:ss, yyyy/MM/dd e.g. 23/05/2017) or an expression language that returns a date (e.g. ${my_date_varibale[0].value}). For the restriction type VALIDATION, enter an expression language. Enter a number for the other restriction types.
Restriction message: the message displayed when the entered value doesn’t respect the restriction. If no message is entered, a default message is displayed.
Warning
In the Restriction value field cannot be used variables excepted for the ones specified before.
Once everything is filled in don't forget to press Save.
DOCUMENT_OBJECT
The DOCUMENT_OBJECT variable is used to add a document (e.g. a document to sign).
When you select DOCUMENT_OBJECT in the type field, the following screen displays:
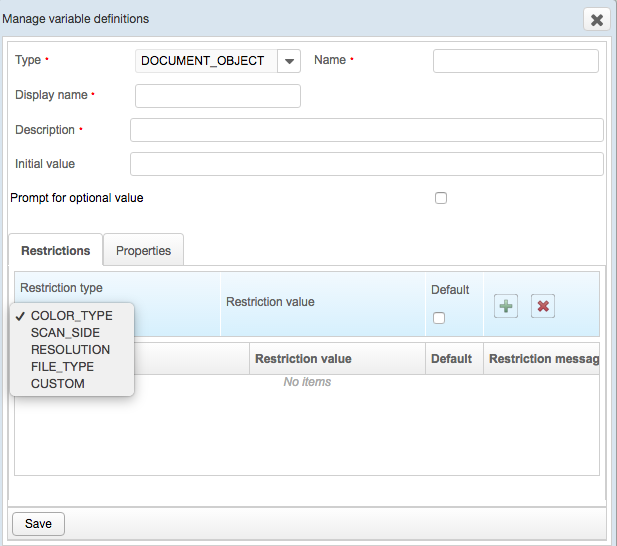
Initial value: initial value associated to the variable (${document[0].displayValue}).
Variable display mode: the display mode of the document. Once you have set the DOCUMENT_OBJECT as output in the "Task node", you can visualize the preview on GWEB. There are two view types:
INLINE: the document is automatically displayed on GWEB where it can also be downloaded.
STANDARD: only the document name is displayed. To have it totally displayed, press the Eye icon. The document can also be downloaded.
Restriction type and restriction value: type and value of the restriction on a document.
COLOR_TYPE: color of the document (applicable to MFP devices).
Restriction values:
COLOR: a color document.
GRAYSCALE: a document in gray scale.
BW: a black/white document.
SCAN_SIDE: scanning side for MFP devices (applicable to MFP devices).
Restriction values:
SIMPLEX: to scan on one side.
DUPLEX: to scan on both sides.
DUPLEX_SHORT_EDGE: to scan on both sides along the short edge of the paper.
RESOLUTION: resolution value (applicable to MFP devices).
Restriction values:
100_DPI to 600_DPI: level of the resolution.
Restriction type |
Restriction value |
|
COLOR: document in color
GRAYSCALE: document in gray scale BW: document in black&white
|
|
SIMPLEX: one-sided scanning DUPLEX: two-sided scanning DUPLEX_SHORT_EDGE: two-sided scanning on the short edge of the paper
DUPLEX_TUMBLE: two-sided scanning on the edge of the paper that is on the opposite side of the feeder |
|
The resolution level:
|
|
PDF_MULTI: multipage PDF (.pdf) PDF_MONO: one page PDF (.pdf) PDF_A: compressed PDF PDF_HC: high compression PDF (.pdf) PDF_SEARCHABLE: searchable PDF (the combination of image layer and text layer) DOC: MS Office document (.doc) DOCX: MS Office document (.docx) JPG: image (.jpg) TIFF_MULTI: multipage TIFF (image .tiff, .tif) TIFF_MONO: one page TIFF (image .tiff, .tif) |
(applicable to MFP devices) |
Ask the Genius Bytes support for assistance regarding this value |
Restriction values:
PDF_MULTI: multipage PDF (.pdf).
PDF_MONO: one page PDF(.pdf).
PDF_HC: high compression PDF (.pdf).
PDF_SEARCHABLE: searchable PDF is a combination of two layers: Image-Layer and Text-Layer.
DOC: MS Office document (.doc).
DOCX: MS Office document (.docx).
JPG: Image (.jpg).
TIFF_MULTI: TIFF multipage (Image .tiff, .tif).
TIFF_MONO: TIFF one page image (Image .tiff, .tif).
CUSTOM: from which device a document comes from, fill in the restriction type for the custom in the field below.
Properties: properties on the document file name (endorsement models only):
FILENAME: the default name of the document. The name is displayed on the MFP devices.
CAN_EDIT_FILENAME: filename is modifiable from MFP devices.
AUTO_START_SCAN: if true, a scan job will start directly without the option to change or save settings. If the document variable is the only required value, the scan job will start after opening the process.
Once everything is filled in don't forget to press Save.
AUTH_IDENTITY
The AUTH_IDENTITY variable is used to add a user (e.g. the assignment of a task).
When you select AUTH_IDENTITY in the type field, the following screen displays:
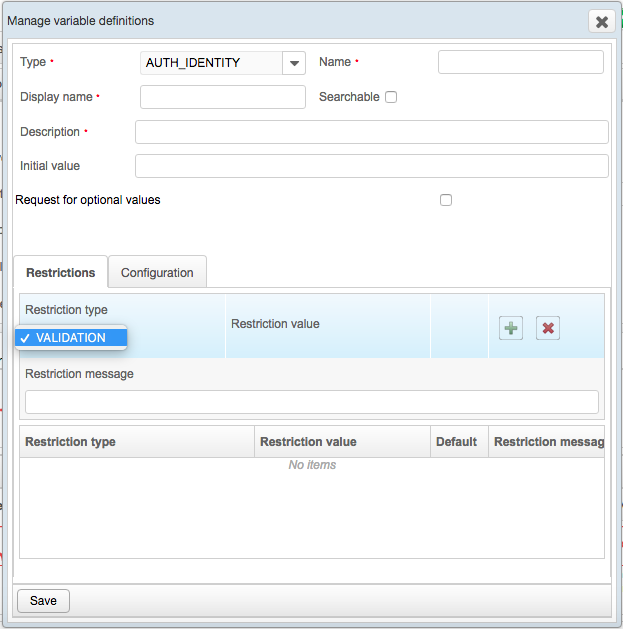
Initial value: the default username associated to the variable (a username existing in the active directory or in the internal Genius Server provider). It can be also written as expression (e.g. ${startUser.username}).
Provider name: chose a provider from the list. If an authentication provider has been configured in the Configuration Tool, it is displayed in the drop down list in addition to the Internal provider.
Note
If no provider name is selected, the research is performed into all providers.
Following an example of expression languages that can be wrote to use this variable into a BPM process:
${variable[0].username}
${variable[0].email}
${variable[0].displayName}
For further details about expression languages, refer to Placeholder and Expression Language.
Restriction type is:
VALIDATION: evaluates a conditional expression, if TRUE is returend the validation is passed. E.g., Variable a = test. Validation expression: ${a[0].value == 'test'} returns 'TRUE', the validation is passed.
Warning
The validation restriction doesn't work in instances started from a MFP device.
Restriction value: enter an expression language related to the chosen restriction type.
Restriction message: the message displayed when the value entered doesn't respect the restriction. If no message is entered, a default message is displayed.
Once entered the value, press the "plus" sign to add it to the list.
To remove a restriction from the list, select it and press the "cross" sign.
In the Configuration tab it is possible to configure the following setting:
Provider name: chose a provider from the list an authentication provider has been configured in the Configuration Tool, it is displayed in the drop down list in addition to the Internal provider.
EMAIL_ADDRESS
The EMAIL_ADDRESS variable is used to add an email address (e.g. using the Scan2mail process).
When you select EMAIL_ADDRESS in the type field, the following screen displays:
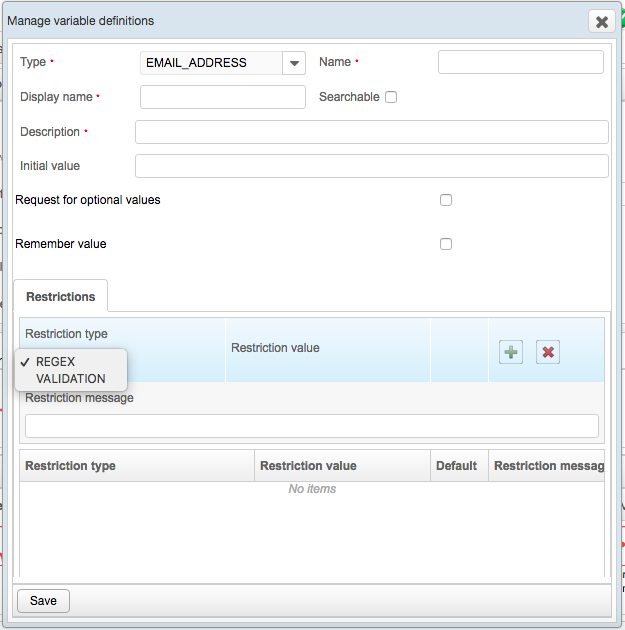
Initial value: the default email address associated to the variable. It can be also written as expression (e.g. ${startUser.email})
Remember value: if checked, the value is memorized, thus when the same user performs for a second time the same process, he can find the field precompiled.
Remember scope: the place where memorize the entry. it can be:
SERVER_SIDE: on the Server in the user preferences table.
CLIENT_ SIDE: on the MFP or the Gweb, according to the tool that the user is using.
Restriction type can be:
REGEX: a regular expression. For regular expression constructs, refer to The Official Java documentation.
VALIDATION: evaluates a conditional expression, if TRUE is returend the validation is passed. E.g., Variable a = test. Validation expression: ${a[0].value == 'test'} returns 'TRUE', the validation is passed.
Warning
The validation restriction doesn't work in instances started from a MFP device.
Restriction value: enter an expression language related to the chosen restriction type.
Restriction message: the message displayed when the value entered doesn't respect the restriction. If no message is entered, a default message is displayed.
Once entered the value, press the "plus" sign to add it to the list.
To remove a restriction from the list, select it and press the "cross" sign.
To use this variable into a BPM process, write the following expression language: ${variable_name[0].value}.
Example of usage: ${email[0].value}.
For further details about expression languages, refer to Placeholder and Expression Language.
Once everything is filled in don't forget to press Save.
TELEPHONE_NUMBER
The TELEPHONE_NUMBER variable is used to add a telephone number (e.g. using Scan2fax).
When you select TELEPHONE_NUMBER in the type field, the following screen displays:
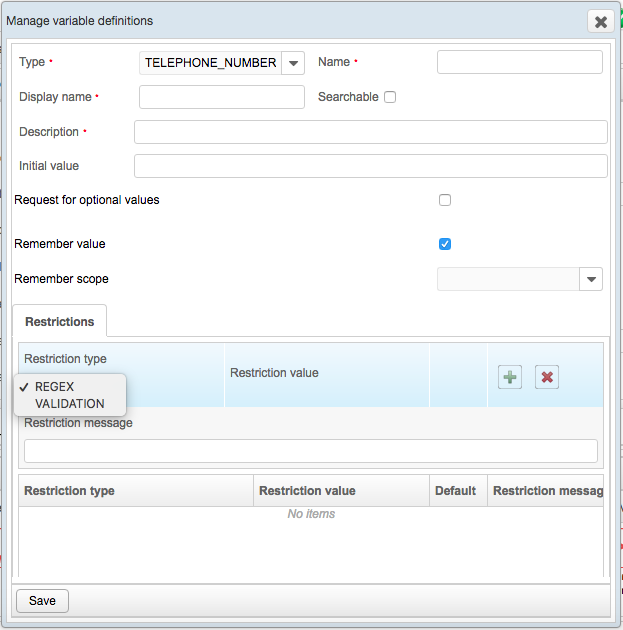
Initial value: the default telephone number associated to the variable. It can be also written as expression (e.g. ${startUser.customField0}).
Remember value: if checked, the value is memorized, thus when the same user performs for a second time the same process, he can find the field precompiled.
Remember scope: the place where memorize the entry. it can be:
SERVER_SIDE: on the Server in the user preferences table.
CLIENT_ SIDE: on the MFP or the Gweb, according to the tool that the user is using.
Restriction type can be:
REGEX: a regular expression. For regular expression constructs, refer to The Official Java documentation.
VALIDATION: evaluates a conditional expression, if TRUE is returend the validation is passed. E.g., Variable a = test. Validation expression: ${a[0].value == 'test'} returns 'TRUE', the validation is passed.
Warning
The validation restriction doesn't work in instances started from a MFP device.
Restriction value: enter a number or an expression language related to the chosen restriction type.
Restriction message: the message displayed when the value entered doesn't respect the restriction no message is entered, a default message is displayed.
Once entered the value, press the "plus" sign to add it to the list.
To remove a restriction from the list, select it and press the "cross" sign.
To use this variable into a BPM process, write the following expression language: ${variable_name[0].value}.
Example of usage: ${telephone_number[0].value}.
For further details about expression languages, refer to Placeholder and Expression Language.
Once everything is filled in don't forget to press Save.
ADVANCED_SELECT
The ADVANCED_SELECT variable is used to create a list where the end user can choose an option. The list is automatically created using the results of a query (e.g. filling in a form, the list of cities to choose in the Residence field).
When you select ADVANCED_SELECT in the type field, the following screen displays:
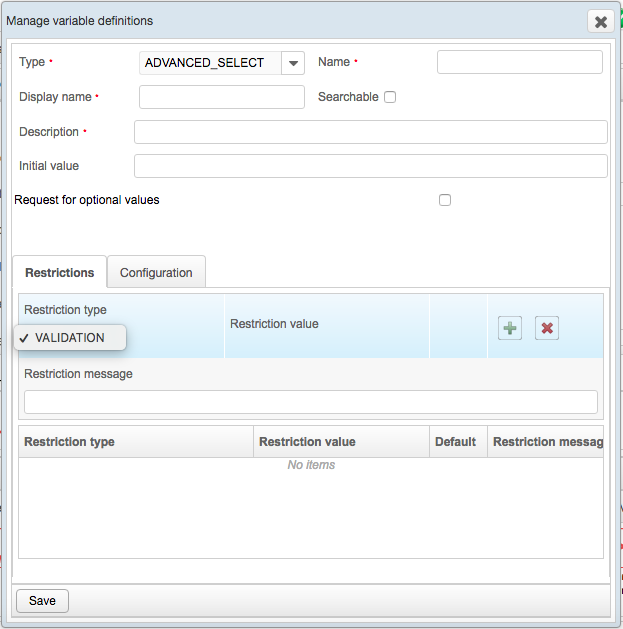
Initial value: the default value associated to the variable. It can be also written as expression (e.g. ${startUser.customField0}). it is also possible to directly enter the IP address or Serial number of a device.
Restriction type is:
VALIDATION: evaluates a conditional expression, if TRUE is returend the validation is passed. E.g., Variable a = test. Validation expression: ${a[0].value == 'test'} returns 'TRUE', the validation is passed.
Warning
The validation restriction doesn't work in instances started from a MFP device.
Restriction value: enter an expression language related to the chosen restriction type.
Restriction message: the message displayed when the value entered doesn't respect the restriction no message is entered, a default message is displayed.
Once entered the value, press the "plus" sign to add it to the list.
To remove a restriction from the list, select it and press the "cross" sign.
In the Configuration tab it is possible to configure the following setting:
Lookup type: from the dropdown list, select one of the lookup providers already configured in the Configuration tool: DATABASE, LDAP, CUSTOM, MFP_DEVICE (required).
To use this variable into a BPM process, write the following expression language: ${variable_name[0].value}.
Example of usage: ${advanced_select[0].value}.
For further details about expression languages, refer to Placeholder and Expression Language.
Once everything is filled in don't forget to press Save.
Here is an example configuration for provider type LDAP:
Make sure that an LDAP provider is configured in myModule -> BPM LDAP Lookup!
Configure the variable as follows:
Lookup Type: LDAP
LDAP provider: name of previously configured BPM LDAP Lookup provider
Filter enabled: true
Min length: 3 (at least 3 characters have to be entered to start the search)
Max results: 10 (a maximum of 10 results will be displayed)
Filter help text: A help text for the filter e.g., "enter first 3 letters of login name"
Fields:
  sAMAccountName, sAMAccountName, sAMAccountName
  mail, mail, mail
  cn, cn, cn
  displayName, displayName, displayName
  LDAP syntax: sAMAccountName=*{myFilter}*
  LDAP statement: ID = cn
  LDAP statement: Display name = displayName
  LDAP statement: Description= displayName
DATABASE
DB provider: from the dropdown list, select the provider already configured in the Configuration tool in BPM DB Lookup providers (required).
Filter enabled: if checked, a filter to perform researches on Gweb or MFP devices is enabled.
Filter min length: the minimum number of characters of the filter (e.g. 3).
Max results: the maximum number of results to display (e.g. 10). If the number of results is major than the number set, the "Too many results have been found, provide a more restrictive filter." error message is shown.
Filter help text: the text message that explains how to use the filter.
Fields: the fields to fill in are:
Display name: the display name of a field related to the object of a category.
Alias: the name that refers to the display name of the field and it is used into expression language.
SQL statement: the univocal identification related to the display name of the field.
SQL query: the request to get information written in a special query language, thus the SQL syntax of the DB used (required).
Reload SQL query: the request to reload information written in a special query language, thus the SQL syntax of the DB used.
SQL statement: ID: the univocal identification existing in the DB that refers to the object of a category (required).
SQL statement: Display name: the display name of the object of a category (required).
SQL statement: Description: the additional information of the object of a category (required).
Warning
The way to write queries can change according to the DB used.
Hint
Example:
On the DB there is a table that contains all clients. The table name is “Clients” and it is divided in columns as follow:
ID
Business name
Address
VAT number
E-mail address
Telephone number
Mr Tom Morrow wants to request the selection of a client using the filter “Business name”.
Following the configuration to obtain it:
Fields:
Display name: Business name
Alias: busnam
SQL statement: business_name
Display name: VAT number
Alias: vat
SQL statement: vat_number
Display name: Address
Alias: addr
SQL statement: address
SQL query: SELECT * FROM Clients WHERE business_name LIKE '%{myFilter}%'
Reload SQL query: SELECT * FROM Clients
SQL statement: ID: ID
SQL statement: Display name: Business name
SQL statement: Description: VAT || ' - ' || Address
LDAP
LDAP provider: from the dropdown list, select the provider already configured in the Configuration tool in BPM DB Lookup providers (required).
Filter enabled: if checked, a filter to perform researches on Gweb or MFP devices is enabled.
Filter min length: the minimum number of characters of the filter (e.g. 3).
Max results: the maximum number of results to display (e.g. 10). If the number of results is major than the number set, the "Too many results have been found, provide a more restrictive filter." error message is shown.
LDAP syntax: the request to get information written in a special query language, thus the LDAP syntax of the DB used (e.g., (&(|(objectClass=organizationalUnit)(objectClass=container))(distinguishedName=${myFilter}))) (required).
Filter help text: the text message that explains how to use the filter.
LDAP statement: ID: the univocal identification existing in the DB that refers to the object of a category (required).
LDAP statement: Display name: the display name of the object of a category (required).
LDAP statement: Description: the additional information of the object of a category (required).
Fields: the fields to fill in are:
Display name: the displayname of a field relatedto the object of a category.
Alias: thename that refers to the display nameof the field and it is used into expression language.
LDAP statement: the univocal identificationrelated to the display nameof the field.
CUSTOM
To configure this database, contact the support at support@geniusbytes.com.
MFP_DEVICE
Max results: the maximum number of results to display (e.g. 10). If the number of results is major than the number set, the "Too many results have been found, provide a more restrictive filter." error message is shown.
Group filter: the group of devices existing in the Device Groups section (by default is myDefaultDeviceGroups).
Organization unit filter: the group of devices existing in the Organization Unit section (by default it is Genius).
DMS_NODE
The DMS_NODE variable is used to research documents or folders. It can be used only with "DMS get node" and "DMS search node".
When you select DMS_NODE in the type field, the following screen displays:
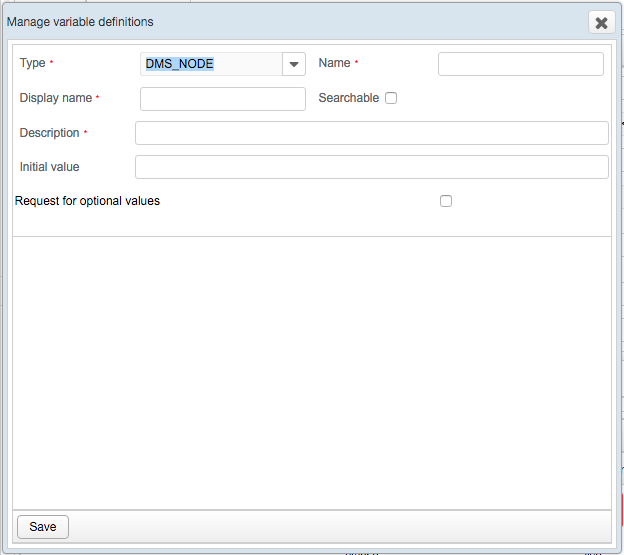
Name: name of the variable (required).
Display name: name to be displayed (required).
Searchable: if checked, a variable can be used as a filter when you search instances. For further details, refer to the filters (variable definition) section.
Description: description of the variable.
Initial value: the default value associated to the variable (e.g. the ID of a node).
Request for optional value: an optional value of the variable.
Following an example of expression languages that can be wrote to use this variable into a BPM process:
${dmsNodeVariable.name}
${dmsNodeVariable.fileName}
${dmsNodeVariable.attachments}
For further details about expression languages, refer to Placeholder and Expression Language.
Once everything is filled in don't forget to press Save.
ADVANCED_TREE
When you select ADVANCED_TREE in the type field, the following screen displays:
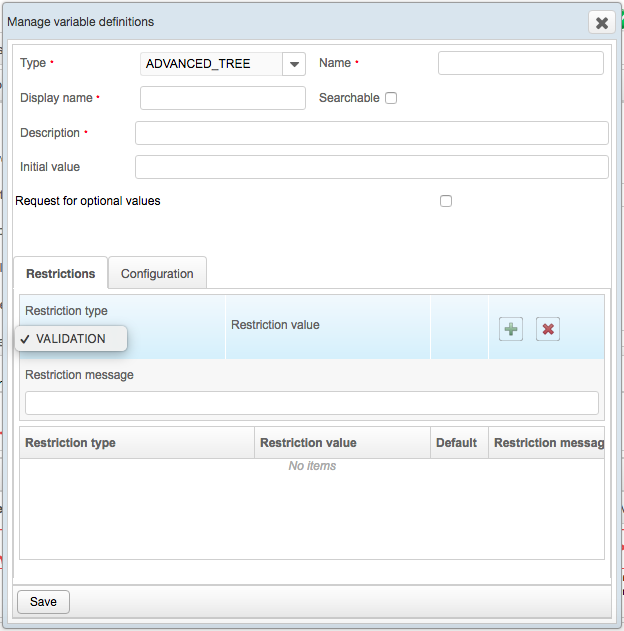
Name: name of the variable (required).
Display name: name to be displayed on the MFP or on GWeb.(required).
Searchable: if checked, a variable can be used as a filter when you search instances. For further details, refer to the filters (variable definition) section.
Description: description of the variable.
Initial value: initial value associated to the variable.
Prompt for optional value: an optional value of the variable.
Restrictions Tab
Restriction type:
VALIDATION: evaluates a conditional expression, if TRUE is returend the validation is passed. E.g., Variable a = test. Validation expression: ${a[0].value == 'test'} returns 'TRUE', the validation is passed.
Warning
The validation restriction doesn't work in instances started from a MFP device.
Restriction value: enter an expression language related to the chosen restriction type.
Restriction message: the message displayed when the value entered doesn't respect the restriction. If no message is entered, a default message is displayed.
Once entered the value, press the "plus" sign to add it to the list.
To remove a restriction from the list, select it and press the "cross" sign.
Configuration Tab
Here settings can be configured that are related to Sharepoint Online or similar features. Note that the settings that are shown depends on your choices in drop down menus.
Lookup type: choose the location where the user can perform the folder browsing. Multiple options are available:
DMS: internal or sharepoint DMS.
FILE_SYSTEM: local provider, SMB or SMB 2/3.
GOOGLE_DRIVE: Google Drive provider.
MICROSOFT: Microsoft provider.
NSCALE/KWM: NScale/KWM provider.
The fields shown below the lookup type differ depending on which lookup type you chose.
DMS
DMS provider: choose the DMS provider to use for the folder browsing:
INTERNAL_DMS.
SHAREPOINT.
Internal DMS:
Root path: the path of the Root folder (the user can see only the content of the Root folder and its subfolders).
Start path: the path of the folder where the user start to browse.
Filter enabled: if checked, a search filter is enabled.
Filter help text: The help message that explain which kind of filter the user has to enter.
SHAREPOINT:
Sharepoint configuration: choose from the list the desired configuration previously made on the Configuration Tool (for further details about the configuration, refer to [Advanced] Sharepoint Connector (Conf)).
Override URL (optional): the URL to use at the place of the one configured on the Configuration Tool.
Username: the username of the Sharepoint User.
Password is an expression: if checked, the password to enter should be an expression.
Password: the password of the Sharepoint User.
Root path: the path of the Root folder (the user can see only the content of the Root folder and its subfolders).
Start path: the path of the folder where the user starts browsing.
Filter enabled: if checked, a search filter is enabled.
Filter help text: The help message that explain which kind of filter the user has to enter.
File System
FS provider: choose the File System provider to use for the folder browsing:
LOCAL: local provider.
SAMBA: SMB shared remote location.
SAMBA23: SMB 2/3 shared remote location.
LOCAL:
Root path: the path of the Root folder (the user can see only the content of the Root folder and its subfolders).
Start path: the path of the folder where the user starts to browse.
Filter enabled: if checked, a search filter is enabled.
Filter help text: The help message that explain which kind of filter the user has to enter.
SAMBA:
Username: the username of the Samba User.
Password is an expression: if checked, the password to enter should be an expression.
Password: the password of the Samba User.
Root path: the path of the Root folder (the user can see only the content of the Root folder and its subfolders).
Start path: the path of the folder where the user starts browsing.
Filter enabled: if checked, a search filter is enabled.
Filter help text: The help message that explain which kind of filter the user has to enter.
SAMBA 2/3:
Username: the username of the Samba 2/3 User.
Password is an expression: if checked, the password to enter should be an expression.
Password: the password of the Samba 2/3 User.
Root path: the path of the Root folder (the user can see only the content of the Root folder and its subfolders).
Start path: the path of the folder where the user starts browsing.
Filter enabled: if checked, a search filter is enabled.
Filter help text: The help message that explain which kind of filter the user has to enter.
Once everything is filled in don't forget to press Save.
Warning
In each variable, the name and the description have a maximum limit of 255 characters.
Note
Writing the trick ${my:length(oggetto[0].value)>* ? my:substringExt(oggetto[0].value, 0,*) : oggetto[0].value} in the display name and description fields, the variable value is cut at the value entered at the place of the sign * (maximum value: 255).
Google Drive
Google drive configuration: choose from the list the desired configuration previously made on the Configuration Tool (for further details about the configuration, refer to [Advanced] Google Connector (Conf)).
Root folder ID or 'root': the Root folder (the user can see only the content of the Root folder and its subfolders):
ID: enter the folder ID to indicate a specific folder.
Root: enter the word root to indicate the main root of Google Drive.
Start Folder ID: the ID of the folder where the user starts browsing.
Filter enabled: if checked, a search filter is enabled.
Filter help text: The help message that explain which kind of filter the user has to enter.
Microsoft
Microsoft configuration: a drop down menu. Select the previously configured configuration.
Microsoft service: choose here which service is used:
ONE_DRIVE or
SHAREPOINT_ONLINE
Site name: only for Sharepoint Online. Enter the site name as the complete web URL in plain text where documents or folders are to be created.
Username: the Azure username - the authentication is processed via the Microsoft account not via LDAP or AD. Note, however, that the domain user name is used if the provider option default domain has been set to active (/conf/ -> Microsoft Providers).
Password is an expression: if checked, the password is an expression.
Password: the password for the Microsoft user, if it is an expression a value like this is possible: ${MicrosoftPW[0].value}
Root path: the id of the root folder of the user. Please contact your service's administator on how to access this ID.
Start path: the id of the start folder of the user. Please contact your service's administator on how to access this ID.
Nscale/KWM
Nscale/KWM configuration: a dropdown menu. Select a previously configured provider. The Provider can be configured on the Genius Server /conf web page -> Module -> Nscale/KWM Connector. If the option does not show, switch to the advanced view.
Username: the Nscale/KWM user. A variable input is possible, e.g., ${nscaleUser[0].value}.
Password is an expression: if checked, the Nscale/KWM password is an expression.
Password: the password for the Nscale/KWM user, if it is an expression a value like this is possible: ${nscalePW[0].value}.
Root path: the id of the root folder of the user. Please contact your service's administator on how to access this ID.
Start path: the id of the start folder of the user. Please contact your service's administator on how to access this ID.
Filter enabled: if checked, filters are enabled.
Filter help text: the help text that is shown when enabling and using filters.
FORMULA
The FORMULA variable is a dynamic variable that is used to create a column, working similarly to an Excel formular. As an example, this variable can be used when creating a BPM for an annual budget which is based on a monthly spending forecast.
For this a numeric variable to insert the monthly spending forecast is needed, which then is multiplied by 12 to represent the forecast for a year.
formula variable: yearly_forecast = ${montly_forecast[0].value*12}
The FORMULA variable has two uses:
as a dynamic input, where it is valued directly on the client, when the variables associated with the FORMULA variable change.
can be shown in output, in a subsequent task. At this point its value remains the one previously calculated.
When you select FORMULA in the type field, the following screen displays:
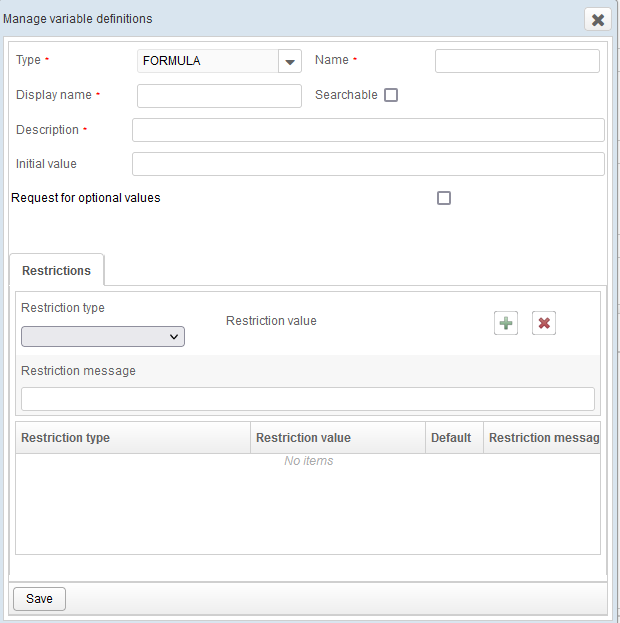
Restrictions Tab
Initial value: the default value associated to the variable.
Restriction type:
NUMBER_OF_DECIMAL: the sum in decimal number.
VALIDATION: evaluates a conditional expression, if TRUE is returend the validation is passed. E.g., Variable a = test. Validation expression: ${a[0].value == 'test'} returns 'TRUE', the validation is passed.
Restriction value: enter a number or an expression language related to the decimal number or the validation parameter.
Restriction message: the message displayed when the value entered does not respect the restriction. If no message is entered, a default message is displayed.
Once entered the value, press the "plus" sign to add it to the list.
To remove a restriction from the list, select it and press the "cross" sign.
To use this variable into a BPM process, write the following expression language: ${variable_name[0].value}.
Example of usage: ${formula[0].value}.
For further details about expression languages, refer to Placeholder and Expression Language.
Once everything is filled in don't forget to press Save.
Warning
The formula variable does not work in instances started from an MFP device.
Actors
When a BPM process is designed, the business analyst designates an actor for any step.
An actor defines the theoretical user to whom the step to perform is assigned.
In the second phase, the actor is associated to a real user or a group of users of the company/organization.
Using an actor, the real users cannot see all of the BPM process definitions.
The import and export of a BPM process definition provides an easier way to create it and users do not have a direct interaction with the Editor.
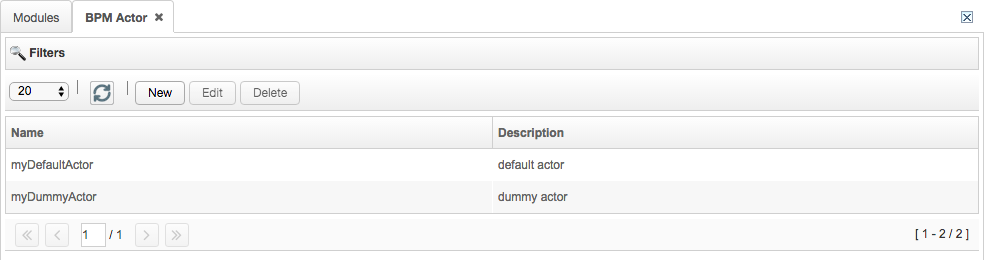
To manage an Actor in the BPM Definition, click on Tools -> Actors.
A BPM actor definition list popup opens.
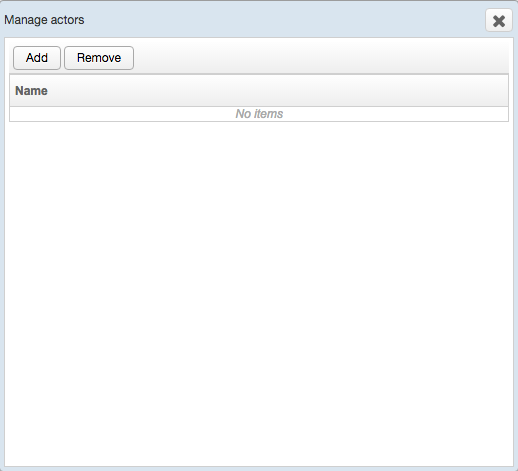
To add an actor, press the Add button and select an actor from the dropdown list.
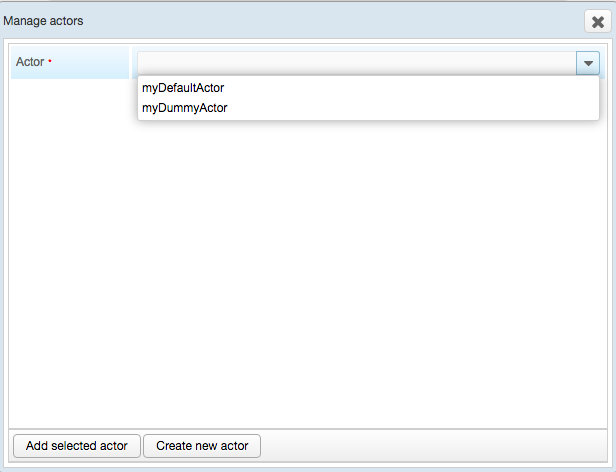
By default, users can select between:
MyDefaultActor.
MyDummyActor.
Note
By default, if Abbyy license has not been bought, myDummyActor is used as a fake actor to hidden all processes with Abbyy nodes.
The two tab pages below show which User or Provider Group is assigned to the actor. To change the association, refer to the Actors section.
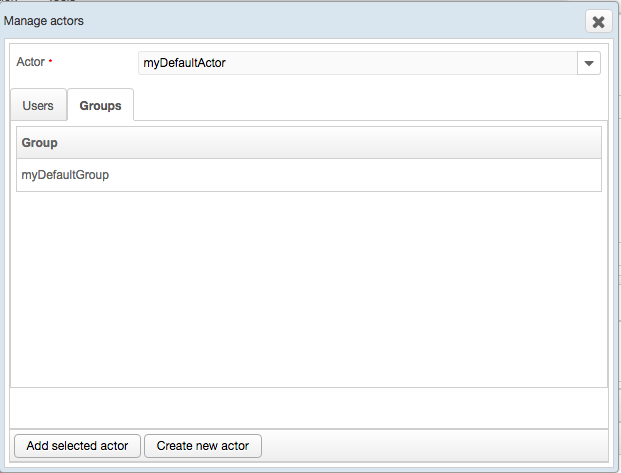
To save, press the Add selected actor button.
To add a new actor, press Create a new actor.
Placeholder and Expression Language
To use a BPM variable inside the BPM editor, specify the name of the variable enclosed in braces preceded by a dollar symbol (e.g. ${variable_name}).
To access a variable value, use the following syntax: ${variable_name[0].value} where variable_name is the name of the variable, [0] corresponds to the index of the value and value is a fixed parameter.
If the variable type is Advanced select, it contains a map of fields. To access these fields, use the following syntax: ${advanced_select_variable_name[0].fieldsMap.id} where advanced_select_variable_name is the name of the variable, [0] corresponds to the index of the value and fieldsMap.id corresponds to the alias name in advanced select.
Using the braces and dollar symbol, you are accessing expression language.
Placeholders are some key words, which are replaced by the BPM variable value to which they are associated. Specify the name of the variable in the braces preceded by a dollar symbol (e.g. ${placeholder}).
A list of placeholder follows.
StartUser
It contains the details of a user who started a BPM instance. For further details, refer to Authentication management. Usage: ${startUser. field}
startUser.username: username (e.g. ${startUser.username}).
startUser.email: user's email address (e.g. ${startUser.email}).
startUser.id: user ID (e.g. ${startUser.id}).
startUser.homeFolder: user's home folder (e.g. ${startUser.homeFolder}).
startUser.providerName: provider type (e.g. ${startUser.providerName}).
startUser.creationDate: user's creation date (e.g. ${startUser.creationDate}).
startUser.displayName: displayed name (e.g. ${startUser.displayName}).
startUser.customField0: custom field (e.g. ${startUser.customField0}).
startUser.customField1: custom field (e.g. ${startUser.customField1}).
...
startUser.customField9: custom field (e.g. ${startUser.customField9}).
StartMFPDevice
It contains the details of a MFP device where a BPM instance has been started. For further details, refer to Device Management section. Usage: ${startMfpDevice. field}.
startMfpDevice.id: MFP device ID.
startMfpDevice.serialNumber: MFP device serial number.
startMfpDevice.vendor: MFP device vendor.
startMfpDevice.vendorName: MFP device vendor name.
startMfpDevice.vendorNumber: MFP device vendor number.
startMfpDevice.address: MFP device IP address.
startMfpDevice.macAddress: MFP device MAC address.
startMfpDevice.communityNameId: MFP device community ID.
startMfpDevice.communityNameName: MFP device community name.
startMfpDevice.snmpVersionSupport: MFP device SNMP version supported.
startMfpDevice.deviceBusyOid: MFP device busy OID.
startMfpDevice.activeJobPatterns: MFP device active job pattern.
startMfpDevice.typeId: MFP device type ID.
startMfpDevice.typeName: MFP device type name.
startMfpDevice.active: MFP device is active.
startMfpDevice.printProtocolStrategy: MFP device print protocol strategy.
startMfpDevice.ippUrlSuffix: MFP device IPP URL suffix.
startMfpDevice.ippsUrlSuffix: MFP device IPPS URL suffix.
startMfpDevice.sendPrintJobRetry: number of attempts to send the print jobs.
startMfpDevice.sendPrintJobRetryInterval: sending print job interval between retries.
startMfpDevice.jobArrivalTimeout: timeout before the job arrival.
startMfpDevice.deviceBusyDelay: delay time in busy state.
startMfpDevice.countersUpdateDelay: delay before updating counters.
CurrentUser
It contains the details of a user who is currently working on a BPM task. Usage: ${currentUser.*field*}
currentUser.username: username (e.g. ${currentUser.username}).
currentUser.email: user's email address (e.g. ${currentUser.email}).
currentUser.id: user ID (e.g. ${currentUser.id}).
currentUser.homeFolder: user's home folder (e.g. ${currentUser.homeFolder}).
currentUser.providerName: provider type (e.g. ${currentUser.providerName}).
currentUser.creationDate: user's creation date (e.g. ${currentUser.creationDate}).
currentUser.displayName: displayed name (e.g. ${currentUser.displayName}).
currentUser.customField0: custom field (e.g. ${currentUser.customField0}).
currentUser.customField1: custom field (e.g. ${currentUser.customField1}).
currentUser.customField2: custom field (e.g. ${currentUser.customField2}).
other custom fields up until custom field 9 can be configured in the same manner.
Tenant
To acquire information about the current tenant. Usage: ${tenant.*field*}
tenant.id: returns the tenant ID (e.g., ${tenant.id}).
tenant.code: returns the tenant code (e.g., ${tenant.code}).
tenant.name: returns the tenant name (e.g., ${tenant.name}).
tenant.description: returns the tenant description (e.g., ${tenant.description}).
tenant.status: returns the tenant status (e.g., ${tenant.status}).
tenant.creationDate: returns the tenant creation date (e.g., ${tenant.creationDate}).
tenant.activationDate: returns the tenant activation date (e.g., ${tenant.activationDate}).
tenant.deactivationDate: returns the tenant deactivation date (e.g., ${tenant.deactivationDate}).
CurrentMfpDevice
It contains the details of a MFP device where a BPM instance has been worked. For further details, refer to Device Management section. Usage: ${currentMfpDevice. field}.
currentMfpDevice.id: MFP device ID.
currentMfpDevice.serialNumber: MFP device serial number.
currentMfpDevice.vendor: MFP device vendor.
currentMfpDevice.vendorName: MFP device vendor name.
currentMfpDevice.vendorNumber: MFP device vendor number.
currentMfpDevice.address: MFP device IP address.
currentMfpDevice.macAddress: MFP device MAC address.
currentMfpDevice.communityNameId: MFP device community ID.
currentMfpDevice.communityNameName: MFP device community name.
currentMfpDevice.snmpVersionSupport: MFP device SNMP version supported.
currentMfpDevice.deviceBusyOid: MFP device busy OID.
currentMfpDevice.activeJobPatterns: MFP device active job pattern.
currentMfpDevice.typeId: MFP device type ID.
currentMfpDevice.typeName: MFP device type name.
currentMfpDevice.active: MFP device is active.
currentMfpDevice.printProtocolStrategy: MFP device print protocol strategy.
currentMfpDevice.ippUrlSuffix: MFP device IPP URL suffix.
currentMfpDevice.ippsUrlSuffix: MFP device IPPS URL suffix.
currentMfpDevice.sendPrintJobRetry: number of attempts to send the print jobs.
currentMfpDevice.sendPrintJobRetryInterval: sending print job interval between retries.
currentMfpDevice.jobArrivalTimeout: timeout before the job arrival.
currentMfpDevice.deviceBusyDelay: delay time in busy state.
currentMfpDevice.countersUpdateDelay: delay before updating counters.
CurrentTask
It contains the details of the BPM task that has been worked with. For further details, refer to Device Management section. Usage: ${currentTask. field}.
currentTask.taskNode: the task node.
currentTask.displayName: the display name of the task.
currentTask.description: the description of the task.
currentTask.instanceDisplayName: the display name of the complete instance.
currentTask.instanceDescription: the description of the complete instance.
currentTask.status: the status of the task (e.g. executing).
currentTask.startDate: the date when the task started.
currentTask.endDate: the date when the task ended.
currentTask.dueDate: the expiration date of the task.
currentTask.draftEnabled: if draft is enabled on the task.
currentTask.priority: the priority of the task.
currentTask.lowPrivacyEnabled: if the low privacy is enabled on the task.
currentTask.targetGroupNames: the name of the group to which the task has been assigned.
currentTask.targetUserNames: the name of the user to which the task has been assigned.
currentTask.userIsManager: if the user who is working on the task is a manager.
currentTask.isReassignable: if the task can be reassigned.
currentTask.issingleAssigneeUser: if the task is assigned to one specific user instead to a group.
Thematically fitting, but not following the above mentioned pattern are TasknameUser.username and TasknameUser.email:
tasknameUser.username: returns the username of the user who executed the task. Usage: e.g., taskname = 123456789TASK12, the expression ${123456789TASK12User.username} is valid. Note, that between taskname and User no dot is inserted. Another example: taskname = confirmBooking -> ${confirmBookingUser.username} is valid.
tasknameUser.email: returns the e-mail of the user who executed the task.
Note
Note that instead of the generated task name, the alternative-name can be used, too.
BPMInstance
In EL expressions the "bpmInstance" object can be used. Usage: ${bpmInstance.*field*}
bpmInstance.displayName: the display name.
bpmInstance.description: description of the bpm instance.
bpmInstance.currentNodeDisplayName: display name of the current node.
bpmInstance.startDate: start date.
bpmInstance.id: the BPM instance id.
The bpmInstance object CANNOT be used:
in BPM variable definition "initial value" because the BPM instance object does not exists in that moment and
in "Instance display name" and "Instance description" (it would be a recursive use of the object).
DMS Node Variables
It contains the metainformation available inside the DMS node variable. Usage: ${dmsNode. field}.
It contains the meta information available inside the DMS node variable. Usage: ${dmsNode. field}.
<dmsNodeVariable>.id: unique identifier of the DMS node inside the RDB (e.g. ${dmsNode[0].id}).
<dmsNodeVariable>.name: name of the DMS node (e.g. ${dmsNode[0].name}).
<dmsNodeVariable>.type: type of the DMS node. It can be CONTENT or FOLDER (e.g. ${dmsNode[0].type).
<dmsNodeVariable>.category: category of the DMS node (e.g. ${dmsNode[0].category).
<dmsNodeVariable>.path: DMS path of the DMS node (e.g. ${dmsNode[0].path).
<dmsNodeVariable>.fileName: name of the file of the DMS node (e.g. ${dmsNode[0].fileName).
<dmsNodeVariable>.state: status of the DMS node. It can be PUBLISHED or DRAFT (e.g. ${dmsNode[0].state).
<dmsNodeVariable>.versionNumber: version number of the DMS node (e.g. ${dmsNode[0].versionNumber).
<dmsNodeVariable>.links: path of the link of the DMS nodes. Links can be more than one, and to read the first link the EL is ${dmsNode[0].links[0]}.
<dmsNodeVariable>.attachments: file names of DMS node attachments. Attachments can be more than one, and to read the first link the EL is ${dmsNode[0].attachments[0]}.
<dmsNodeVariable>.attributes: attributes of the DMS node. Attributes can be more then one. and to read the value of an attribute, use the attribute name in EL for example ${dmsNodeVariable[0].attributes.attributeName}.
Date Format
${now}: current date:
${now.time} current date in milliseconds (allows users to give unique names to objects, files, etc.).
${my:now(DATE_FORMAT)} current date in different formats (some DATE_FORMAT examples are 'dd-MM-yyyy', 'dd-MM-yyyy_HH-mm-ss-SSS'):
${my:now('dd-MM-yyyy')}(e.g. 24-09-2013).${my:now('dd-MM-yyyy_HH-mm-ss-SSS')}(24h format, e.g. 24-09-2013_16-45-28-748).${my:now('dd-MM-yyyy_hh-mm-ss-SSS')}(12h format) e.g. 24-09-2013_04-45-28-748).
Note
${my:now('dd-MM-yyyy_HH-mm-ss-SSS')} and ${my:now('dd-MM-yyyy_hh-mm-ss-SSS')} are only used for string type variables.
Document Variable
Document parameter expressions can now be used with the document variable. Please note that "document" in the examples below is a placeholder for the name you give the document variable in your environment.
Parameter expressions are case sensitive!
Usable expressions are:
name: the name of the document.
pages: the number of pages in the document. May be null.
createdDate: the date and time when this document was created.
fileSize: the size of the document, in bytes.
To access these parameters use the format ${document[0].xxx}, where "xxx" stands for one of the four mentioned attributes and "document" for the name you gave your document variable.
Also, data from the database table BPM_BINARY_DATA_ATTRIBUTE can be accessed. This can be done by using the format
${document[0].attributes.xxx}
or
${document[0].attributes["xxx"]}.
Use the second method if the key contains characters other than a-z, A-Z, 0-9 and _ or -. The prefix "embedded.client" that shows up in the database table can be omitted. So for example, accessing the file type attribute can look like this:
${document[0].attributes.FILE_TYPE}
Again, as above, document is a placeholder for the name you gave youre document variable. Also, the names are case sensitive.
Please note, that the attributes that can be accessed via BPM_BINARY_DATA_ATTRIBUTE differ depending on the client type.
String Util Functions
The following functions can be used with generic string variables.
Functional interfaces provide target types for lambda expressions and method references:
${my:size( variable )} functions to get the number of elements in a variable.
If doc is a variable, ${my:size(doc)} returns:
x, if doc contains x elements.
0, if doc is null.
Note
This function can be useful for loops.
${my: function ( variable )}: string util functions (for further details, refer to Java String documentation)
${my: function ( variable[0].value )}: it applies the function to the first element of the array
my:size(vector of string): the string gets the number of string in a given variable.
my:trim(string): the string removes spaces at the begin and at the end of a given string.
my:substring(string, startIndex): the string gets substring of a given string starting from startIndex (included).
my:substringExt(string, startIndex, stopIndex): the string gets substring of a given string starting from startIndex (included) to stopIndex (excluded).
my:indexOf(string, stringToMatch): the int gets index of the first occurrence of stringToMatch in a given string.
my:indexOfExt(string, stringToMatch, startIndex): the int gets index of the first occurrence of stringToMatch after given startIndex in a given string.
my:lastIndexOf(string, stringToMatch): the int gets index of the last occurrence of stringToMatch in a given string.
my:lastIndexOfExt(string, stringToMatch, startIndex): the int gets index of the last occurrence of stringToMatch after given startIndex in a given string.
my:length(string): the int gets the length of a given string.
my:toLowerCase(string): the string returns to the lower case of a given string.
my:toUpperCase(string): the string return to the upper case of a given string.
my:matches(string, pattern): the boolean checks if a given string matches with a given regex pattern.
my:contains(string, stringToMatch): the boolean returns true if a given string contains a given stringToMatch (case sensitive).
my:replaceFirst(string, stringToMatch, replaceWith): the string replaces the first occurrence of a stringToMatch in a given string with replaceWith.
my:replaceAll(string, stringToMatch, replaceWith): the string replaces all the occurrences of a stringToMatch in a given string with replaceWith.
my:startsWith(string, stringToMatch): the boolean returns true if a given string starts with a stringToMatch (case sensitive).
my:startsWithExt(string, stringToMatch, startIndex): the boolean returns true if a given string starts with a stringToMatch (case sensitive) from a given startIndex.
my:endsWith(string, stringToMatch): the boolean returns true if a given string ends with a stringToMatch (case sensitive).
my:endsWithExt(string, stringToMatch, startIndex): the boolean returns true if a given string ends with a stringToMatch (case sensitive) from given startIndex.
my:charAt(string, index): the string returns char at a given index in a given string.
my:fillLeft(string, length, fillWith): the string fills the left side of a given string of a fillWith to reach a given string length.
my:fillRight(string, length, fillWith): the string fills the right side of a given string of a fillWith to reach a given string length.
my:concat(string, string): the string concatenates two strings.
my:concatNL(string, string): the string concatenates two strings and add EOL.
my:binarySize(document[0].value): takes the doucment token and returns the document binary size.
Example usage of the functions above:
${my:trim(variablefrombpm[0].value)}→ to trim(" A test string"): A test string.${my:substring(variablefrombpm[0].value, 5)}→ substring ("A test string", 5): t string.${my:substringExt(variablefrombpm[0].value, 5, 10)}→ substringExt("A test string", 5, 10): t str.${my:indexOf(variablefrombpm[0].value, 'test')}→ indexOf ("A test string", 'test'): 2.${my:indexOfExt(variablefrombpm[0].value, 'test', 2)}→ true.${my:lastIndexOf(variablefrombpm[0].value, 'i')}→ ${my:lastIndexOf("A test string", 'i')}: 10.${my:lastIndexOfExt(variablefrombpm[0].value, 't', 4)}→ ${my:lastIndexOfExt("A test string", 't', 4)}: true.${my:length(variablefrombpm[0].value)}→ length ("A test string"): 13.${my:toLowerCase(variablefrombpm[0].value)}→ toLowerCase ("A test string"): a test string.${my:toUpperCase(variablefrombpm[0].value)}→ toUpperCase ("A test string"): A TEST STRING.${my:matches(variablefrombpm[0].value, 'hello %s!')}→ matches ("hello world!", 'hello %s!'): true.${my:contains(variablefrombpm[0].value, 'test')}→ contains ("A test string", 'test'): true.${my:replaceFirst(variablefrombpm[0].value, 'test', 'toast')}→ replaceFirst("A test string", 'test', 'toast'): A toast string.${my:replaceAll(variablefrombpm[0].value, 'i', 'I')}→ replaceAll ("A test string", 'i', 'I'): A test strIng.${my:startsWith(variablefrombpm[0].value, 'gb\_')}→ startsWith ("gb_tab", 'gb_'): true.${my:startsWithExt(variablefrombpm[0].value, 'gb_tab', 2)}→ startsWith("gb_tab", '_tab'): true.${my:endsWith(variablefrombpm[0].value, '.com')}→ startsWith ("www.geniusbytes.com", '.com'): true.${my:charAt(variablefrombpm[0].value, 12)}→ charAt ("A test string", 12): g.Note
Functions that take var as input can process a string array (var) or a single variable value (e.g. var[0].value). Functions that receive var[0].value as input can apply the function to one value only.
${my:if (condition, obj1, obj2)}: the If-Then-Else construct for BPM variables:
${my:if(variable[0].value == 'IS01', 'APPROVED', 'REJECTED')}
Note
Condition is a boolean value, obj1 and obj2 can be a variable (var), a value (var[0].value), a string ('text') or a function (e.g. ${my:charAt(variablefrombpm[0].value, 12)}).
${my:dateFormat( variablefrombpm[0].value, 'date_pattern' )} where variablefrombpm is a GENERIC_DATE variable and date_pattern is a valid format for a date (e.g. "dd/MM/yyyy", "MM-dd-yyyy" and so on).
Replaces the input date (GENERIC_DATE) with the specified date_pattern value:
${my:dateFormat(dateTest[0].value, 'MM/dd/yyyy')}→ dateFormat(12/05/2014, 'MM/dd/yyyy'): 05/12/2014${my:dateFormat(dateTest[0].value, 'ddMMyyyy')}→ dateFormat(12/05/2014, 'ddMMyyyy'): 12052014
${my:stringDateFormat('input_date_pattern', variablefrombpm[0].value, 'output_date_pattern')} where variablefrombpm is a GENERIC_TEXT variable, input_date_pattern and output_date_pattern are valid date formats. In this expression, the input date is a string and the starting date format is specified in the input_date_pattern field. The final format is specified in the output_date_pattern.
Replaces the input date (GENERIC_TEXT with date format specified in input_date_pattern) with a date (GENERIC_TEXT) in the output_date_pattern
${my:stringDateFormat('yyyy-MM-dd', dateText[0].value, 'ddMMyyyy')}→ stringDateFormat('yyyy-MM-dd', 2014-05-12, 'ddMMyyyy'): 12052014${article[0].fieldsMap.id} : the user can access an advanced select variable fields where article corresponds to the variable name, [number] corresponds to the index of the value and fieldsMap.id corresponds to the alias name in advanced select.
${my:gr: it returns true if the first numeric parameter is greater than the second numeric parameter.
→
${my:gr(bpm_variable1[0].value, bpm_variable2[0].value)}${my:gte: It returns true if the first numeric parameter is greater than or equal to the second numeric parameter.
→
${my:gte(bpm_variable1[0].value, bpm_variable2[0].value)}${my:lo: it returns true if the first numeric parameter is lower than the second numeric parameter.
→
${my:lo(bpm_variable1[0].value, bpm_variable2[0].value)}${my:lte: it returns true if the first numeric parameter is lower than or equal to the second numeric parameter.
→
${my:lte(bpm_variable1[0].value, bpm_variable2[0].value)}${py:eval: It returns the evaluation’s result of the expression in python syntax included in the first parameter of the variable. Additional parameters which semantics depends on python expression are allowed.
→
${py:eval(bpm_variable[0].value, bpm_variable[0].value)}
Document EL Util Function
The following function can be used with DOCUMENT_OBJECT variables.
The binaryPath util function takes the document token and returns the document binary path.
Example of usage:
in Metafile node:
${my:binaryPath(document[0].value)}
in Script node:
from com.phoenix2.core.server.bpm.core.execution.el.function import BpmELDocumentUtilFunction
...
bpmvar__document_file_path[0].value = BpmELDocumentUtilFunction.binaryPath(str(bpmvar__document[0].value))
Another possibility to use the BpmELDocumentUtilFunction is to use it to assign one variable the content of another. This will also work with encrypted data:
from com.phoenix2.core.server.bpm.core.execution.el.function import BpmELDocumentUtilFunction
...
bpmvar_extracted_text[0].value = BpmELDocumentUtilFunction.binaryContent(bpmvar_original_file[0].value)
Date EL Util Functions
The following functions can be used with GENERIC_DATE variables.
my:datesBetween(date, date): list of dates between given dates.
my:dateDiffInDays(date, date): difference in days between given dates.
my:dateDiffInHours(date, date): difference in hours between given dates.
my:dateDiffInMins(date, date): difference in minutes between given dates.
my:dateDiffInSecs(date, date): difference in seconds between given dates.
my:dateDiffInMillis(date, date): difference in milliseconds between given dates.
my:daysAfter(date, int): date a number of days after the given date.
my:daysBefore(date, int): date a number of days before the given date.
my:afterTodayInDays(date): number of days after today of given date.
my:afterTodayInHours(date): number of hours after today of given date.
my:beforeTodayInDays(date): number of days before today of given date.
my:beforeTodayInHours(date): number of hours before today of given date.
my:date(date, format): returns the date variable in the specified date format.
Example of usage:
${my:datesBetween(start_date_bpm_variable[0].value,end_date_bpm_variable[0].value}
→ datesBetween(”01/01/2016”, ”03/01/2016”): "02/01/2016".
${my:dateDiffInDays(start_bpm_variable[0].value,end_date_bpm_variable[0].value)}
→ dateDiffInDays(”01/01/2016”, ”03/01/2016”): "2".
${my:dateDiffInHours(start_bpm_variable[0].value,end_date_bpm_variable[0].value)}
→ dateDiffInHours(”01/01/2016”, ”03/01/2016”): "48".
${my:dateDiffInMins(start_bpm_variable[0].value,end_date_bpm_variable[0].value)}
→ dateDiffInMins(”01/01/2016”, ”03/01/2016”): "2880".
${my:dateDiffInSecs(start_bpm_variable[0].value,end_date_bpm_variable[0].value)}
→ dateDiffInSecs(”01/01/2016”, ”03/01/2016”): "172800".
${my:dateDiffInMillis(start_bpm_variable[0].value,end_date_bpm_variable[0].value)}
→ dateDiffInMillis(”01/01/2016”, ”03/01/2016”): "172800000".
${my:daysAfter(start_date_bpm_variable[0].value,5)}
→ daysAfter(”01/01/2016”, 5): "Wed Jan 06 00:00:00 CET 2016".
${my:daysBefore(start_date_bpm_variable[0].value,2)}
→ daysBefore(”03/01/2016”, 5): "Fri Jan 01 00:00:00 CET 2016".
${my:afterTodayInDays(start_date_bpm_variable[0].value)}
→ afterTodayInDays(”03/01/2016”): "13".
${my:afterTodayInHours(start_date_bpm_variable[0].value)}
→ afterTodayInHours(”03/01/2016”): "312".
${my:beforeTodayInDays(start_date_bpm_variable[0].value)}
→ beforeTodayInDays(”03/01/2016”): "13".
${my:beforeTodayInHours(start_date_bpm_variable[0].value)}
→ beforeTodayInHours(”03/01/2016”): "312".
${my:date(genericDateVariable[0].value, "dd/MM/yyyy")}
→ date (”12/02/2022”): "02/12/2022".
DMS EL Util Functions
The following functions can be used with DMS_NODE variables.
my:dmsDocumentLink(documentPath): the link redirects the user directly in the GWEB document page.
my:dmsFolderLink(folderPath): the link redirects the user directly in the GWEB folder.
Example of usage:
${my:dmsDocumentLink(document_path_bpm_variable[0].value)}
→ dmsDocumentLink(”Root folder/MyDocument”): "http://localhost:8080/gweb?enc=7icddTIAXC6MdPVtTPqbUeXGvDT1TGCARBca3iSODJfMQlj6cyPBkg0Zudr3vnEw".
${my:dmsFolderLink(folder_path_bpm_variable[0].value)}
→ dmsFolderLink(”Root folder/MyFolder”): "http://localhost:8080/gweb?enc=7icddTIAXC70yhEwhhN4q4LdgfuRu10ByAaGhlubcysMD7xKZwthLdCLDJSmPugP".
User EL Util Functions
The following functions can be used with generic string variables.
my:isUserInGroup(string, string): it returns true if the user is in the group, otherwise it returns false.
This function could be used with an Add if: if true, a field is shown to the user that is in the group and has specific grants.
Example of usage:
${my:isUserInGroup(username_bpm_variable[0].value, groupname_bpm_variable[0].value)}
→ isUserInGroup(”myAdmin”, ”myAdminGroup”): true;
${my:isUserInGroup(username_bpm_variable[0].value, groupname_bpm_variable[0].value)}
→ isUserInGroup(”myAdmin”, ”myDefaultGroup”): false;
Execution of a BPM Process
When a BPM process starts, a process instance which represents the execution of the BPM process, is created. For example, when you execute a process that specifies how to process a sales order, a process instance is created for each sales request. The BPM process instance represents the current execution state in that specific context, and contains all the information related to the process instance itself.
The runtime state of an executing process is stored in the database. This allows to restore the state of execution of all the running processes if an unexpected failure occurs.
Clicking on the BPM instance, you can access to detailed information about the specific BPM instance and read timestamp execution information, error information (if any), BPM variable values.
In the BPM definition, you can enable the BPM history: the user receives the snapshot of the BPM variables of a running execution at each transition from a node to another.
The history in the BPM execution uses up valuable space of the database. To save the space, enable the BPM instance purge and configure the corresponding interval of time. Once the time is elapsed, BPM instance variable data and all the history data are deleted.
If a node runs in error, the process instance itself is marked as error. Accessing BPM instance details, users can read the reason of the failure.
To monitor the BPM process execution, in BPM Menu click on Instance.
Controlling Execution of the BPM Process
While BPM instances are running, a number of operations can be executed:
Abort: if the BPM instance is running, you can stop the execution clicking on Abort.
Resume: if a BPM instance is in error, you can resume it clicking on Resume.
Purge instance: when a BPM finishes its execution, you can remove all the related data, BPM variables and the history clicking on Purge instance.
Specific BPM instances can be found by filtering BPM definitions or by using advanced filters. To perform a filter search, use the filter.
Filters
Filters are used to perform searches on instances.
A filter works as the AND logical operator, the search result is produced if all conditions are met.
Fill in the list of filter fields with their description:
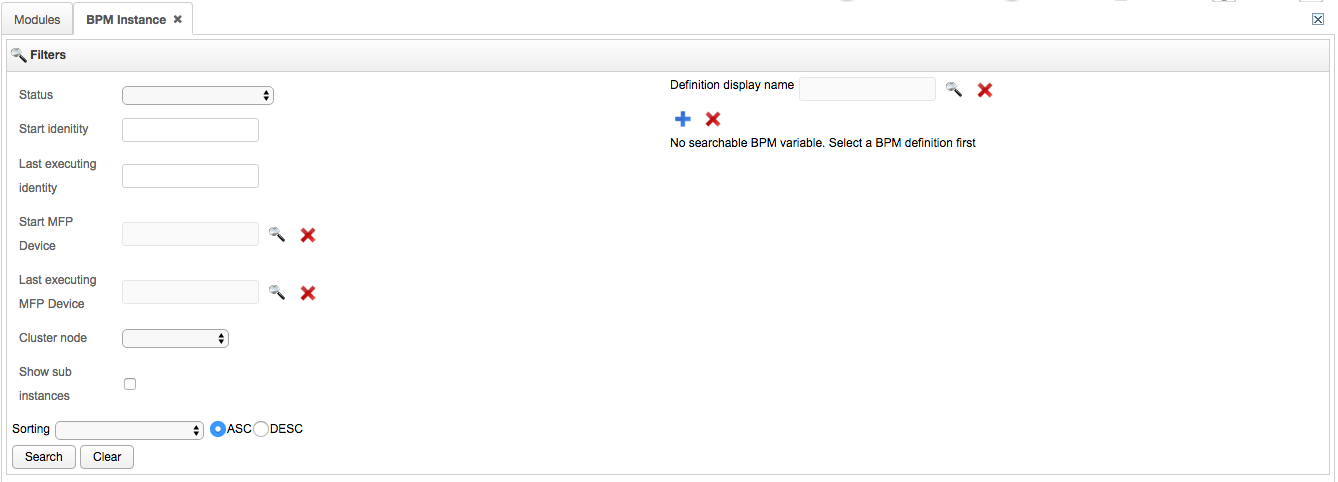
Status: status of the instance. It can be:
READY_TO_EXECUTE: the instance is ready to be executed by the BPM engine.
EXECUTING: the instance is running.
WAITING: the instance is waiting.
SYSTEM_WAITING: the instance is waiting for a system task.
ENDED: the instance ended.
ERROR: the instance is in error.
ABORTED: the instance has been aborted.
Start identity: the user who started the instance (username).
Start Mfp Device: the IP address of the MFP device where the instance has been started.
Last executing identity: the identity (username) that has performed the last execution.
Last executing Mfp Device: the IP address of the last MFP device where the instance has been executed.
Cluster node: from the dropdown list, select the name of the cluster.
Show sub instances: if checked, it allows to visualize the sub instances.
Sorting: the alphabetical order can be sorted by Status or Definition display name - ASC (Ascending order), DESC (Descending order).
Definition display name: definition to be displayed.
Variable definition: selection list of searchable variables related to the definition selected. Multiple selection are allowed (also for the same variables). The search result is displayed if all the conditions on variables (AND logical operator) are met.
Resuming instances
The user can resume instances in ERROR status. An error occurs when a definition is not properly defined or the values assigned to BPM definition variables are missing.
This feature allows users to restart instances when the related definition are fixed or when the BPM variables are valued (e.g. the addition of the missing user email address).
To resume an instance in error, select the instance and press the Resume Instance button.
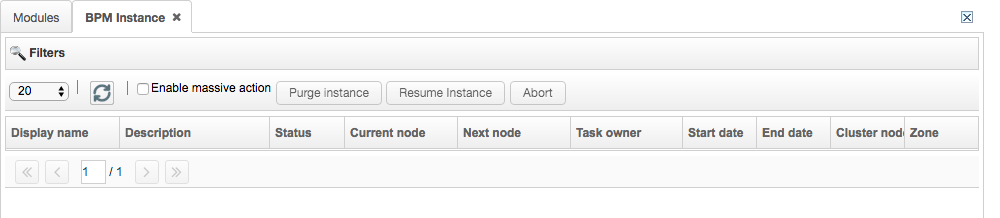
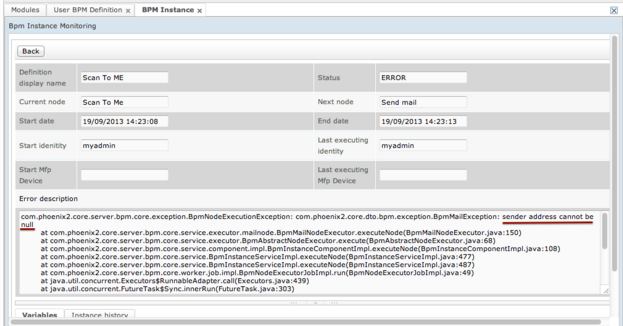
This example shows how to restart a default Scan to me instance when it goes in error.
A Scan to me instance, already defined in the BPM definition list, generates an error if the recipient email variable cannot be valued (e.g. if in the Genius Server there is not any user's email address). This kind of error follows:
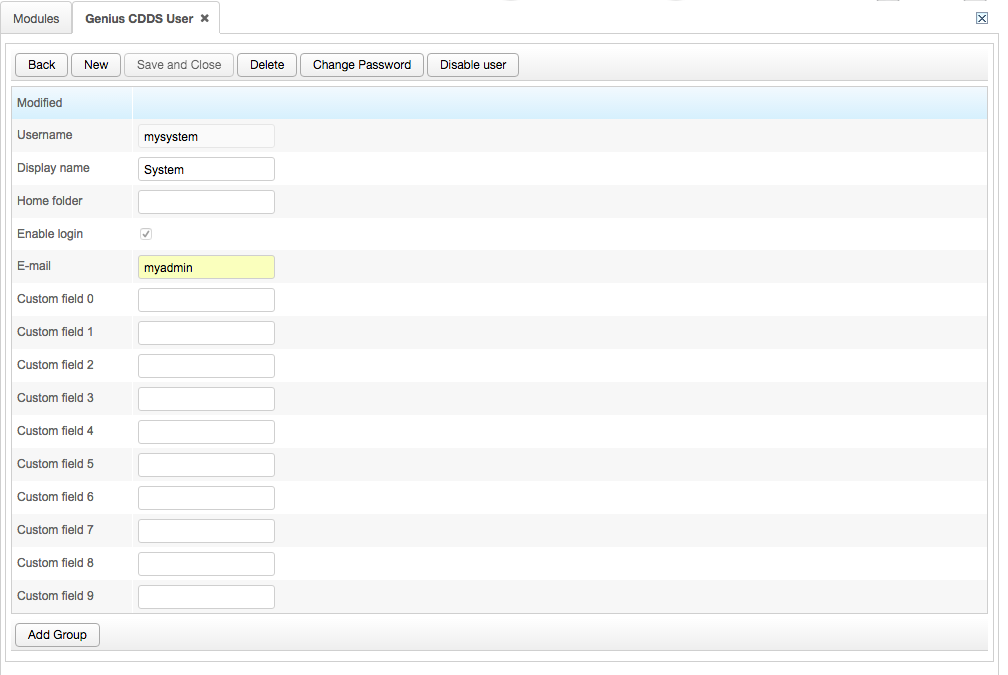
Before you restart the instance, enter a valid email in user's related field (for further details, refer to Authentication management section). In the example, the user is myadmin.
Restart the instance and wait for the process to end.
Command Line
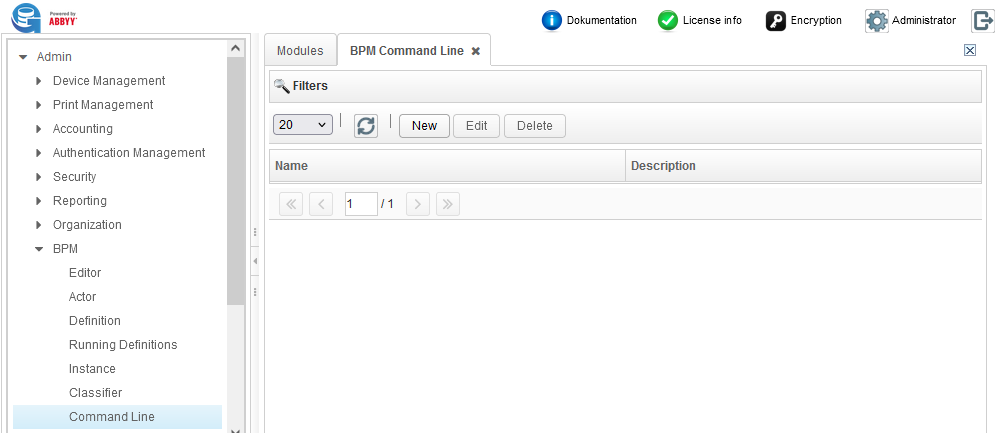
The command line feature allows to add a command and integrate it into BPM processes. The command-line needs to be defined seperately and can be used by multiple BPM process definitions. BPM process variables will be mapped to command-line variables using the BPM command-line node.
To create a new command line, go to BPM, select Command Line and press the New button. The following page opens:
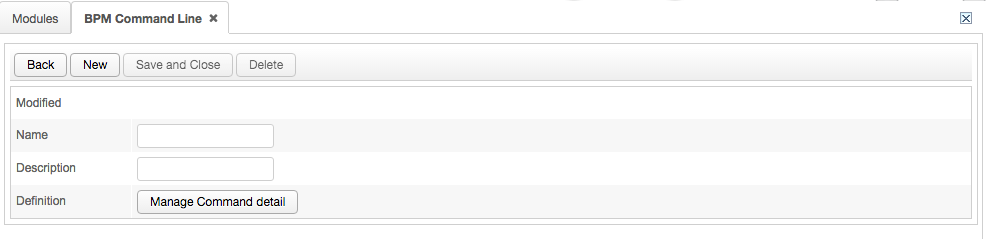
Name: the identification name of the command to add (required).
Description: description of the command.
Definition: select the Manage Command detail button to define the command path.
Selecting Manage Command detail, the following page opens:
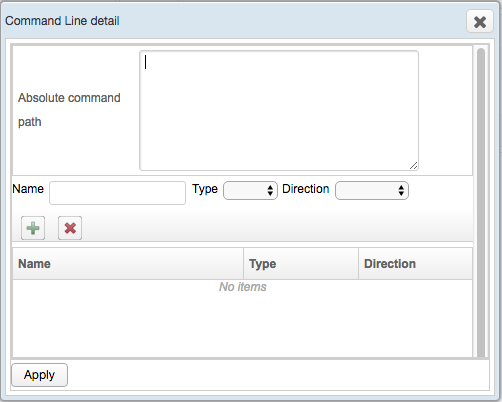
Absolute command path: the path of the command to execute
C:\ASPOSE\jdk1.8.0_65\bin\java -jar C:\ASPOSE\pdfpasswd.jar [document] [SecurePDF] [pdfpass]Name: name of the item (e.g. myDocument.pdf).
Type: type of the item. it can be TEXT, FILE or FOLDER.
Direction: the type of channel of the item. It can be INPUT or OUTPUT.
To add the item, press the +. To delete the item, select it and press the x.
Once all items have been added, press Apply and then Save and Close to save the new command.
To edit a command line, select it from the list and press the Edit button or click twice on the command line.
To delete a command line, select it from the list and press the Delete button, then Delete again to confirm.
Once the new command-line definition has been created, it will be available in the BPM Editor.
To include it, open a BPM process definition, drag and drop the Command line node in the editor view and set its parameters. If the desired command-line tool execution requires an input or can deliver an output, select a type and direction and add it. In the Absolute command path the variables added need to be in square brackets [cmdInput] [cmdOutput].
Hint
If for example multiple documents are passed from a document variable to a command line FILE variable. The executable will be executed multiple times for each of the available documents.
If multiple documents should be passed to a single execution the FOLDER variable can be used. It will contain a temporary path including all elements of the mapped DOCUMENT_OBJECT variable.
In the BPM process one or multiple BPM variables will be mapped to the command-line input variable. (for further details, refer to Command Line Node).
Hint
The following example is meant to show basic variable usage in command-line definitions. Any executable can be used, so creating a password to a PDF using ASPOSE is just an example. Command Line configuration:
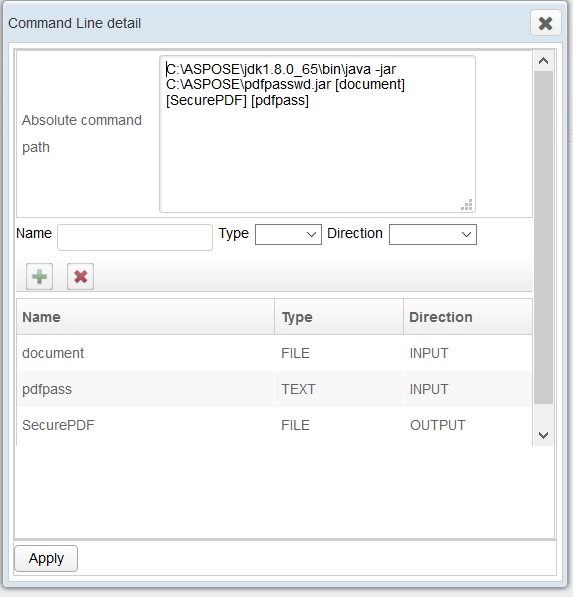
COMMAND:
C:\ASPOSE\jdk1.8.0_65\bin\java -jar C:\ASPOSE\pdfpasswd.jar [document] [SecurePDF] [pdfpass]
In this case document and pdfpass are input command-line input while variablesSecurePDF is a command-line output variable.
Hint
It is recommended to first run/test the command without Genius Server locally. Always use the full path, because the execution path of the command line will be in a temporary directory. For Windows it might be required to use "[document]" if paths with spaces will be injected in the command.
Bpm Starter
BPM instances usually start with the user interaction on a client. For example, the scanning from an MFP can trigger a BPM process execution.
In the business scenario, a BPM process starts, when an event is triggered from an internal or external server. For this purpose, the BPM Starter can trigger a BPM instance from events.
To manage the BPM Starter Definition, go to BPM -> BPM Starter Definition -> New.
This feature can start BPM definitions when a particular event occurs. These events are:
Supply item level
The supply item level is the level of supply consumption necessary to start a BPM definition (e.g. the ink cartridge is finishing). Type the name of the definition, then go on Manage strategy and fill in the following fields:
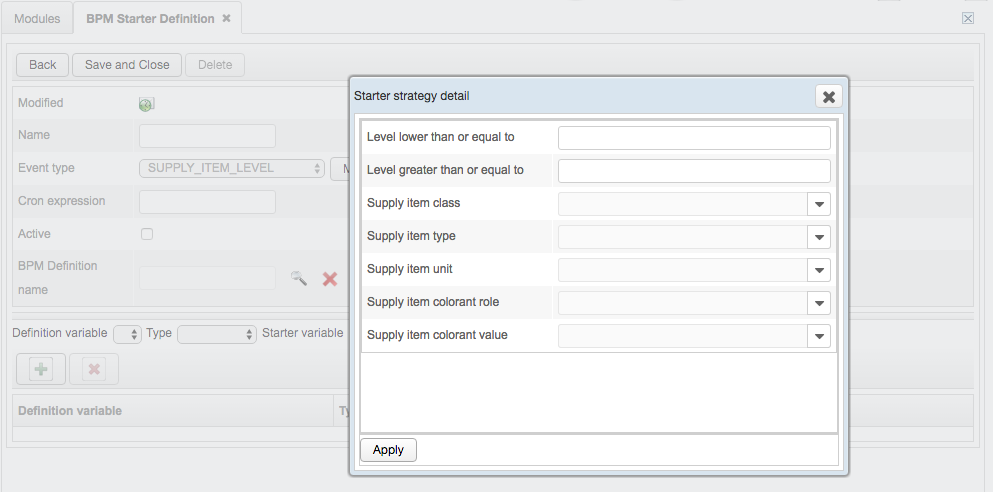
Level lower or equal than: the supply must be lower than or equal to a value selected by the user.
Level greater or equal than: the supply must be greater than or equal to a value selected by the user.
Supply item class: the class of the item can be of three kinds: Other, Consumable, Receptacle.
Supply item type: item type.
Supply item unit: the unit of measurement of the item.
Supply item colorant role: the colorant role can be of three kinds: Other, Process, Spot.
Supply item colorant value: available colors.
Cron expression: a scheduling time expression.
Active: to activate (check) or deactivate (uncheck) the definition.
Bpm definition name: the user can select the definition type.
Definition variable: variables linked to the BPM definition name.
Type: it can be Dynamic or Static.
Starter variable: the dynamic type is linked to some given starter variables. The static type is linked to a starter variable the user decides to add and does not change for the different definitions.
File on folder
A file arrives in a document management folder (e.g. Root folder).
Type the name of the definition, then go on Manage strategy and fill in the following fields:
Folder url: the path of a document management folder (required).
File extension: available formats are pdf, docx, xlsx, pptx.
File name filter: a files are filtered by name. A filter that only processes .pdf, .xlsx and .docx files, would look like this:
^(.*pdf)$|^(.*xlsx)$|^(.*docx)$.Number of retry after completion: the number of retry of the system to check whether the file has been changed.
Control file existing: it disables Number of retry after completion.
Control file extension: it controls the extension of the file.
Delete after processing: it allows the deletion of the document after the execution.
Archive folder url: the path of the archive folder, the folder in which the file is stored.
File name match pattern a regular expression. A regular expression can match a string multiple times, creating so called "matched values". Here an example:
The pattern [A-Za-z]+ will match the filename aaa_bbb_ccc three times: aaa, bbb and ccc. These values will be stored in the "filename_matched-value_1", "filename_matched-value_2" etc. files and can be assigned to BPM variables of the started BPM definition.
Cron expression: a scheduling time expression.
Active: to activate (check) or deactivate (uncheck) the definition.
Bpm definition name: users can select the definition type.
Definition variable: variables linked to the BPM definition name.
Type: it can be Dynamic or Static.
Starter variable: the dynamic type is linked to some given starter variables. The static type is linked to a starter variable the user decides to add and does not change for the different definitions.
Mailer poller
Mailer poller is a system that polls a specified mailbox, which is awaiting the arrivals of emails.
Type the name of the definition, then go on Manage strategy and fill in the following fields:
Mail store protocol: protocols such as IMAP, IMAPS, POP3, POP3S (required).
Mail server host: host URL (required).
Mail server port: host port.
Mail username: username (required).
Mail password: user's credentials (required).
Timeout (ms): timeout connection to mail server.
Max fetch size (KB): how many KB users can download.
Cron expression: a scheduling time expression.
Active: to activate (check) or deactivate (uncheck) the definition.
Bpm definition name: users can select the definition type.
Definition variable: variables linked to the BPM definition name.
Type: it can be Dynamic or Static.
Starter variable: the dynamic type is not linked to any starter variable. the static type is linked to a starter variable the user decides to add and does not change for the different definitions.
Job on printing queue
A print job is sent to a pull printing queue.
Type the name of the definition, then go on Manage strategy. It is available only for pull-printing:
Active: to activate (check) or deactivate (uncheck) the definition.
Bpm definition name: users can select the definition type.
Definition variable: variables linked to the BPM definition name.
Type: it can be Dynamic or Static.
Starter variable: the dynamic type is linked to some given starter variables. the static type is linked to a starter variable the user decides to add and does not change for the different definitions.
Scheduled
The BPM Scheduled starter can start a BMP Definition based on a cron expression. This starter is useful when an activity needs to be done in a certain period of time. Type the name of the definition (Manage strategy does not contain any filter), and fill in the other fields:
Cron expression: a scheduling time expression.
Active: to activate (check) or deactivate (uncheck) the definition.
Bpm definition name: users can select the definition type.
Definition variable: variables linked to the BPM definition name.
Type: it can be Dynamic or Static.
Starter variable: the dynamic type is not linked to any given starter variable. the static type is linked to a starter variable the user decides to add and does not change for the different definitions.
Print Rule Action
BPM Print rule action can start a BMP definition based on a print rule check. This starter can be used to trigger a BPM definition whether a print job satisfies some specific conditions previously defined in the Print rule engine.
Default metadata information for a BPM Starter is:
Active: to activate (check) or deactivate (uncheck) the definition.
Bpm definition name: users can select the definition type.
Definition variable: variables linked to the BPM definition name.
Type: it can be Dynamic or Static.
Starter variable: the dynamic type is linked to some given starter variables. the static type is linked to a starter variable the user decides to add and does not change for the different definitions.
Instance
To monitor BPM starter instances and their status, click on Bpm -> Bpm Starter Instance. It shows the status of the instance, when a process has started or ended, the number of prefilters (similar events), the number of the started instances, cluster nodes and the zone (where the instance is triggered).
BPM Nodes
In the Genius BPM, the process definition consists of a different types of nodes connected to each other through a sequence flow. When creating a flow, it is not necessary to add the arrows, only the node insertion is required.
Nodes are available in the Genius BPM editor based on the license you purchased. On the demo license, the full list of nodes is available.
Attention
If you model a BPM process using a demo license, be sure to buy the corresponding license in order to have the nodes available in the productive installation.
Once a new project definition is opened, the default nodes are Start (refer to Start Node) and End (refer to End Node).
Tip
To add a node, drag the item and drop it between the start and the end node.
To delete a node, drag the item and drop it into the recycle bin.
Default Nodes Family
The default nodes are visible when a new definition is created.
Start Node
"The start" node represents the beginning of the workflow. It is the first task to be executed.

Name: name of the node (not editable).
Display name: the node name, which is displayed also on Web Administrator console, MFP devices and office client (required).
Description: the node description, which is also displayed on Web Administrator console, MFP devices and office client (required).
Assignee actor: the assignee to start the instances is an actor. To add an actor, click on on Tools -> Actors -> Add and select the actor(s) from the dropdown list (for further details, refer to Actors section) (required).
Complete action label: the label text needed to complete the start node execution. The label is visible on MFP devices and Web Administrator console.
Task validation: can contain a conditional expression for example: ${select[0].value == 'true'}. If the condtional expression is not true, the Start Node cannot be executed and the task validation message will be displayed.
Task validation message: this message will be displayed if the task validation expression fails (is not "true").
Complete generic select action variable: the name of the GENERIC_SELECT variable that should be displayed as buttons instead of a drop-down menu.
Note
The variable should be added in the Input/Output form tab to work.
Auto complete: if checked, auto completion is enabled: As soon, as all variables in the variable overview are filled to the minimum (with a cardinality of 0:n; they do not have to be filled) the process is automatically completed.
Quick auto complete: if checked, quick scan is enabled. This setting is not dependant on Auto complete and can be used separately or combined.
Hint
What is quickscan? If all variables, except for the document variable are filled in, the button for quick scan appears. With this button a scan is issued directly from the variable overview. Scan settings cannot be changed. If all variables are filled at the start of a quickscan, the process is automatically completed after the quickscan is finished. Independently of this, it is still possible to open the scan view of the document variable and to scan with changed scan settings. With a cardiality of 1:n, several documents can also be added in this way. If documents have been added via this path, a quickscan (from the variable overview) is no longer possible. Instead, the button then has the function 'Complete', with which the process can/must be completed manually.
Wizard enabled: if checked, the wizard is enabled to assist with filling in variables. The variable overview will not be shown after starting the BPM. Instead, the variables are queried one after the other. As soon as the last variable has been queried, the overview is shown.
Join subsequent task: if checked, it enables BPM engine to search for another task assigned to the same user in a certain pre-configured period of time during which the other nodes continue to be performed. If they all have been accomplished, next user's task opens and is ready to be completed. If BMP engine hasn't reached the node yet, an error message is displayed and the user is asked to look for the node himself.
Add user to instance viewers: if checked, the user who starts the instance can continue to see the instance until the end (by default it is enabled).
Add user to instance managers: if checked, the user who starts the instance can continue to see the instance until the end, and he can act on the instance itself.
Required 2nd Factor Auth: a dropdown menu. When nothing is selected this option is deactivated. If "CARD_AND_PIN" is selected this BPM requires the user to perform a 2-factor authentication with card and card-pin to use this specific BPM.
Input form tab: for further details, refer to Input/Output form in Task Node section.
Note
The node must have at least one input or output variable.
Enabled client types: for further details, refer to Enabled client types in Task Node section.
Device group: for further details, refer to Device group in Task Node section.
End Node
This node does not perform a task, it represents the end of the workflow.
When a BPM execution reaches this node, it means that the execution is successfully completed.

Display name: node name (required).
Description: description name (required).
Generic Nodes Family
The nodes that are part of the Generic family are:
Task Node
A user's "Task" node represents a unit of work that requires an actor who completes it in a certain period of time. Once the BPM execution reaches a task node, the execution is interrupted until a specific actor completes the task filling in a form. Only one user at a time can complete the task and will lock it when they deside to complete the task. If the user who has locked the task in advance cannot proceed to its completion, she can unlock it enabling other users to accomplish the task.

Hint
A BPM can have several task nodes, e.g., confirmOrder, approveOrder, etc.. To access the task owner details of those nodes, the following variable schema can be used:
(TaskNodeName)User.username or (TaskNodeName)User.email
For example: ${fce00b03e2224f0299684d71707c9f2aUser.Username}
If "fce00b03e2224f0299684d71707c9f2a" has been renamed, to "approveOrder", the command ${approveOrderUser.Username} will work, too.
Name: the name of the task node. A name is automatically generated when dragging and dropping the node into the editor. Renaming is possible. In the .xml file the orignal name can be found as name and the rename will be sown as alternative-name. E.g., name ="fce00b03e2224f0299684d71707c9f2a", alternative-name="approveOrder".
Display name: the task name, also displayed on the Web Administrator Console, MFP devices and office client (required).
Description the task description, also displayed on the Web Administrator Console, MFP devices and office client (required).
Note
In Display name and Description fields, users can enter a Placeholder. In case of internationalization, the language is inherited from the one, which has been set by the user who starts the task. When the task is created, display name and description are internationalized, evaluated (Placeholder are replaced by the current value) and persisted.
Assignee actor: an actor to whom the task is assigned. Add an actor to the dropdown list from the Tools menu (for further details, refer to Actors section) (required).
Draft enabled: if checked, draft are saved.
Complete action label: the text shown on MFP devices once the task is completed.
Task validation: can contain a conditional expression for example: ${select[0].value == 'true'}. If the condtional expression is not true, the Start Node cannot be executed and the task validation message will be displayed.
Task validation message: this message will be displayed if the task validation expression fails (is not "true").
Complete generic select action variable: the name of the GENERIC_SELECT variable that should be displayed as buttons instead of a drop-down menu.
Note
Anyway, the variable should be added in the Input/Output form tab to work.
Auto complete: if checked, the completion of the task without user's interaction: the user is not asked to press the Complete button.
Quick auto complete: if checked, it is allowed only if the last variable is Document. On an MFP device, users can scan a number of documents between the minimum and maximum value given.
Wizard enabled: if checked, it helps entering the variable, users can directly fill in the empty field.
Join subsequent task: if checked, it enables BPM engine to search for another task assigned to the same user in a certain preconfigured period of time during which, the other nodes continue to be performed. If they all have been accomplished, next user's task opens and is ready to be completed. If BMP engine hasn't reached the node yet, an error message displays and the user is asked to look for the node himself.
Blocking task: if checked, a mandatory task to complete is enabled. To use device or client features, the user has to complete the task.
Due date strategy is divided into:
From creation: the expiration date is calculated starting from the creation date.
From lock: the expiration date is calculated from the moment a user undertakes the task.
Due date interval: after this time has exceeded the task will expire (and be deleted if the cancel option is checked).
Due date unit: the unit (MINUTES, HOURS, DAYS for the due date interval)
Absolute due date: an absolute date on which the task should expire (and be deleted if the cancel option is checked). Variable usage is possible, for example: ${my:endOfDayDate(fixDueDate[0].value)}
Cancel task on due date: if this is checked expired tasks are deleted.
Due date timeout output variable: a variable which contains the timeout status. Possible values are TURE or FALSE.
Priority: the priority order of the different tasks (required). (On GWEB, tasks with an higher priority are the first to be shown). Priority can be:
HIGH
MEDIUM
LOW
Enable low privacy: if checked, users that do not have the task assigned, can see it on GWEB but they cannot modify it.
Add user to instance viewers: if checked, the user who completes the task can continue to see the instance until the end (by default it is enabled).
Add user to instance managers: if checked, the user who completes the task can continue to see the instance until the end, and he can act on the instance itself.
Task can be reassigned: if checked, the task can be reassigned by the user who has the role to do that.
If values are not entered, the task does not expire.
Input/Output form tab:
the task has one or more variables, which are used to customize the task. These variables are visible on clients as a data form.
Type:
Input: a variable where users should enter a value.
Output: a variable that cannot be modified, users can only visualize it.
Variable: name of the variable. The name is displayed by clients, select the variable desired from the dropdown list. For further details, refer to Defining BPM Variables section.
Section: the name of the section where to place the variable.
Min: minimum number of variables.
Max: maximum number of the variables.
Add if: the condition which allows to show fields on forms.
Note
The node must have at least one input or output variable.
Warning
The blocking task mustn't be enabled if a DOCUMENT_OBJECT variable is present in input.
Assignee users tab:
User expression: type an expression matching with a user.
Assignee groups:
User expression: type an expression matching with a group of users.
Enable client types tab:
Users can restrict the node execution by one or more client types selectable in the dropdown list.
Client type:
EMBEDDED_MFP: MFP devices.
EMBEDDED_ANDROID: client on mobiles.
EMBEDDED_M_BOX: mighty boxes, an hardware device for MFP authentication.
PC: Microsoft Office client.
WEB: Web console.
EXTERNAL_1 to EXTERNAL_5: for third part client integration.
Note
If the client type is not specified, the node is visible by all clients.
Device group tab:
"Task" node and "Start" node can be used only from some groups of devices. If the Client type is not specified, the node is visible by all client types except the EMBEDDED_MFPs because they are NOT in the device group.
To enable only the MFPs related to the device group to see the node, select EMBEDDED_MFP as Client type and their groups of device in the Device group.
Note
A modification of a device group name does NOT automatically modify the device group assigned to a BPM node. A modification on the device group has no effects on the same device group previously assigned to a node.
Assignee MFP devices tab:
"Task" node and "Start" node can be used only from the MFP devices added in this tab. To add a device, enter the MFP device expression and then press on the plus (for more info about the MFP device expression refer to Placeholder).
Hint
Usage example:
Participating Character(s): Jo Delegate and Mel O'Drama.
Node in usage: Task node, to sign the contract.
Mr Jo Delegate starts the BPM process and Ms Mel O'Drama receives via email the employment contract to sign. After two days the task is still pending because it can’t be closed until she approves the contract. Once approved, Jo Delegate receives the signed contract back via email and the BPM process ends.
Custom Node
"Custom" node is intended to call custom execute method in Custom Java class. Genius Bytes uses this node to provide custom implementation to solve specific problems.
If you need a special BPM interaction e.g. Web services or call to legacy system, refer to the Genius Bytes support to find out the best way to solve it.
If you receive a jar file from Genius Bytes which contains an implementation of a custom node, users can copy it in the folder ext-lib, which is located in C:Program FilesGenius Server ext-lib. On the first time, this folder does not exist and users have to create it himself. Once you have stored the extension jar file, restart the Genius Server service.

Drag and drop the icon in the palette and fill in the configuration fields:
Display name: displayed name of the node (required).
Description: description of the node (required).
Custom class: the name of an external class deployed on a server (required).
Instance in error on fail: If checked, when an exception occurs, the process is closed in ERROR.
Response status variable: a variable which indicates the response status of the node. A response status can be:
SUCCESS.
GENERIC_ERROR.
Error message variable: the variable which indicates where to store the error message and the stack trace.
Number of retries: the number of attempts after which a node is stored in ERROR.
Retry counter variable name: a variable which indicates where to store the data related to the retries.
Retry wait interval: the amount of time after which a new attempt to run a node is performed.
Input attributes mapping tab: the selection list of input attributes and their value.
Output attributes mapping tab: the selection list of output attributes and their value.
Mail Node
"Mail" node is intended to send mails to a recipient through a mail transmission service. Through this node, users can manage the advance mail settings: cc and bcc can be configured as well as a list of attachments.
In the Admin menu Service/Mail Transmission, the status of the mail transmission originated by the BPM can be checked.
If the retrial of the mail transmission reaches the maximum and the mail cannot be sent, an error occurs.
"Mail" node can manage the error in two ways: putting the whole BPM execution in error or storing the error result in a variable.
In this latter case, design a BPM, which can manage error variables.

Drag and drop the icon in the palette and fill in the configuration fields:
Display name: displayed name of the node (required).
Description: description of the node (required).
SMTP Provider name: SMTP provider, which sends the emails (required).
Sender address: email address of the sender. You can use an expression, e.g. ${startUser.email}. Refer to Placeholder and Expression Language section.
Recipients: email addresses of the recipients (required).
Cc recipients: email address of recipients in carbon copy (Cc).
Bcc recipients: email address of recipients in blind carbon copy (Bcc).
Subject: subject of the email.
Body: body of the email.
Attachments: the document to be attached. Specify the name of the document object variable (e.g. ${document}). Refer to Placeholder and Expression Language section.
File base name: name assigned to the attached file. Disable the keep original file extension and type a name.
File page suffix: extension of the file assigned to the attached file.
Keep original file extension: keep the extension of the original file.
Keep original file name: keep the file name of the original file.
Enable S/Mime encryption: Secure/Multipurpose Internet Mail Extensions: if DISABLED, MIME encryption is not enabled. If ENCRYPTION, it is used to send secure and encrypted messages.
Enable send body in plain text: if checked, the node sends mail with body in plain text only, otherwise it sends mail with body in plain text and HTML part enclosed.
Confidentiality: set the confidentiality level for emails. Possible values are:
NONE
PERSONAL
PRIVATE
COMPANY_CONFIDENTIAL
Instance in error on fail: if checked, when an exception occurs, the process is closed in ERROR.
Response status variable: a variable which indicates the response status of the node. A response status can be:
SUCCESS.
GENERIC_ERROR.
Error message variable: the variable which indicates where to store the error message and the stack trace.
Hint
Usage example:
Participating Character(s): Anton Fresh.
Node in use: Mail node
Yesterday Anton Fresh was absent from work due to personal health reasons, so now he has to send the medical certificate to Human Resources. He scans the medical certificate, add the human resources’ email address and automatically the document is sent to them via email.
Folder Node (SMB)
Folder node is intended to store a document in a SMB shared remote location. Using this node, you can create a folder structure.
To use this node, an enabled user is needed.

Drag and drop the icon in the palette and fill in the configuration fields:
Display name: displayed name of the node (required).
Description: description of the node (required).
Folder URL: path of the folder which contains the file. The name of the root is "Root folder" (required).
Enable anonymous access: if checked, the folder is accessible to everyone.
Folder domain: domain of the folder.
Folder username: the username of the folder (required).
Password is an expression: if checked, the password is an expression to be entered.
Folder password: the password needed to write a grant (required).
Expression folder password: the expression password to be enter if the Password is an expression is checked.
File base name: name of the file to be saved. This value replaces the original name of the file (required).
File page suffix: suffix of the file to be saved. This value replaces the original file extension.
Files: files to be added to a folder, refer to Placeholder and Expression Language section (required).
Overwrite existing file: if checked, a more recent file with the same name overwrites the previous one.
Create folders: if checked, folder is created, if it does not exists.
Keep original file extension: if checked, the original file extension is kept.
Keep original file name: if checked, the original file name is kept.
Instance in error on fail: If checked, when an exception occurs, the process is closed in ERROR.
Response status variable: a variable which indicates the response status of the node. A response status can be:
SUCCESS.
GENERIC_ERROR.
Error message variable: the variable which indicates where to store the error message and the stack trace.
Number of retries: the number of attempts after which a node is stored in ERROR.
Retry counter variable name: a variable which indicates where to store the data related to the retries.
Retry wait interval: the amount of time after which a new attempt to run a node is performed.
Press the Apply button to save.
Hint
To create a request of password to access a protected folder, perform the following steps:
Create a GENERIC_PASSWORD variable.
Add the GENERIC_PASSWORD variable to the Start Node with Cardinality 1:1.
Configure the fields of the Folder node as follow:
Folder username: ${startUser.username}.
Password is an expression: checked.
Expression folder password: ${generic_password_variable_name[0].value}.
Local Folder Node
Folder node is intended to store a document in a folder on the local file system of the Genius Server. Using this node, you can create a folder structure.
To use this node, an enabled user is needed.
Drag and drop the icon in the palette and fill in the configuration fields:
Display name: displayed name of the node (required).
Description: description of the node (required).
Folder URL: path of the folder which contains the file. The name of the root is "Root folder" (required).
File base name: name of the file to be saved. This value replaces the original name of the file (required).
File page suffix: suffix of the file to be saved. This value replaces the original file extension.
Files: files to be added to a folder, refer to Placeholder and Expression Language section (required).
Overwrite existing file: if checked, a more recent file with the same name overwrites the previous one.
Create folders: if checked, folder is created, if it does not exists.
Keep original file extension: if checked, the original file extension is kept.
Keep original file name: if checked, the original file name is kept.
Instance in error on fail: If checked, when an exception occurs, the process is closed in ERROR.
Response status variable: a variable which indicates the response status of the node. A response status can be:
SUCCESS.
GENERIC_ERROR.
Error message variable: the variable which indicates where to store the error message and the stack trace.
Number of retries: the number of attempts after which a node is stored in ERROR.
Retry counter variable name: a variable which indicates where to store the data related to the retries.
Retry wait interval: the amount of time after which a new attempt to run a node is performed.
Press the Apply button to save.
Note
In case of SMB protocol issues or network issues, it'is recommended to use this node.
Get Files Node

The Get files node is intended to obtain a document from a user folder.
Drag and drop the icon in the palette and fill in the configuration fields:
Display name: displayed name of the node (required).
Description: description of the node (required).
Folder URL: path of the folder which contains the file. The name of the root is "Root folder" (required).
Domain: the domain of the user that has the grant to read the folder.
Username: the username of the user (required).
Password: the password of the user (required).
File name pattern: a filter to narrow down the file choice (e.g. ".pdf" to search only among pdf files).
Max file size: the maximum size of the file (e.g. 10).
Max file size unit: the unit of the file size. it can be:
Bytes.
KB.
MB.
Delete files after get: if checked, once the file has been fetched, it is deleted from the user folder.
Output variable: a DOCUMENT_OBJECT variable to define the destination of the file.
To save, press the Apply button.
Delete Files Node

This node can be used to automatically delete files from folders.
Drag and drop the icon in the palette and fill in the configuration fields:
Display name: displayed name of the node (required).
Description: description of the node (required).
Folder URL: path of the folder which contains the file. The name of the root is "Root folder" (required). It can be a single folder or file (e.g., /somefolder, /somefolder/somfile.pdf, ${filepath[0].value}) or a list of folders or files, e.g., (${filepath}).
Domain: the domain of the user that has the grant to read the folder.
Username: the username of the user (required).
Password is an expression: check, if the password is an expression.
Password: the password of the user (required).
Password expression: enter the password expression here. Only necessary if the password is an expression and the corresponding setting is checked.
File name pattern: a filter to narrow down the file choice (e.g. ".pdf" to search only among pdf files).
Max file size: the maximum size of the file (e.g. 10).
Max file size unit: the unit of the file size. it can be:
Bytes.
KB.
MB.
Recursive file search: if checked, folders are searched revursively for matching files.
Output variable: a DOCUMENT_OBJECT variable to define the destination of the file.
Instance in error on fail: If checked, when an exception occurs, the process is closed in ERROR.
Response status variable: a variable which indicates the response status of the node. A response status can be:
SUCCESS.
GENERIC_ERROR.
Error message variable: the variable which indicates where to store the error message and the stack trace.
Number of retries: the number of attempts after which a node is stored in ERROR.
Retry counter variable name: a variable which indicates where to store the data related to the retries.
Retry wait interval: the amount of time after which a new attempt to run a node is performed.
To save, press the Apply button.
Wait Node
"Wait" node is intended to stop the BPM execution for a certain period of time.
This node is useful in combination with the loop node to gain additional time before the next execution of other nodes.

Drag and drop the icon in the palette and fill in the configuration fields:
Display name: the name of the node to be displayed (required).
Description: description of the node (required).
Wait interval (seconds): waiting time in seconds (required).
Command Line Node
"Command Line" node is intended to call a previously created command-line definition and execute it.
With this node, a lot of interactions can be used, e.g., .bat, .sh, powershell, Python, Java, .NET or any other executable, which can be invoked from the command line. The execution context will be the user running the Genius Server service.
"Command Line" node can pass parameters to the command-line definition and can read back results into BPM variables. (for further details, refer to Command Line).

USAGE: to add a new command line executable, map it in the corresponding Command line list. This list is available in the BPM admin menu. For further details, refer to Command Line section.
Drag and drop the icon in the palette and fill in the configuration fields:
Display name: displayed name of the node (required).
Description: description of the node (required).
Command line: users can select a command among the ones already created.
Instance in error on fail: If checked, when an exception occurs, the process is closed in ERROR.
Response status variable: a variable which indicates the response status of the node. A response status can be:
SUCCESS.
GENERIC_ERROR.
Error message variable: the variable which indicates where to store the error message and the stack trace.
Number of retries: the number of attempts after which a node is stored in ERROR.
Retry counter variable name: a variable which indicates where to store the data related to the retries.
Retry wait interval: the amount of time after which a new attempt to run a node is performed.
Input attributes mapping tab: selection list of input attributes and their values:
Name: list of command line inputs.
Value: variable value, it is a regular expression.
Press the + (cross) button to add the input attribute.
Output attributes mapping tab: selection list of output attributes and their values:
Name: list of command line outputs.
Value: variable value, it can be the name of the output.
Press the + (cross) button to add the input attribute.
To save, press the Apply button.
If the command line definition requires an input, select it from the Input attributes mapping tab (e.g. document -> ${bpmVarDocument}).
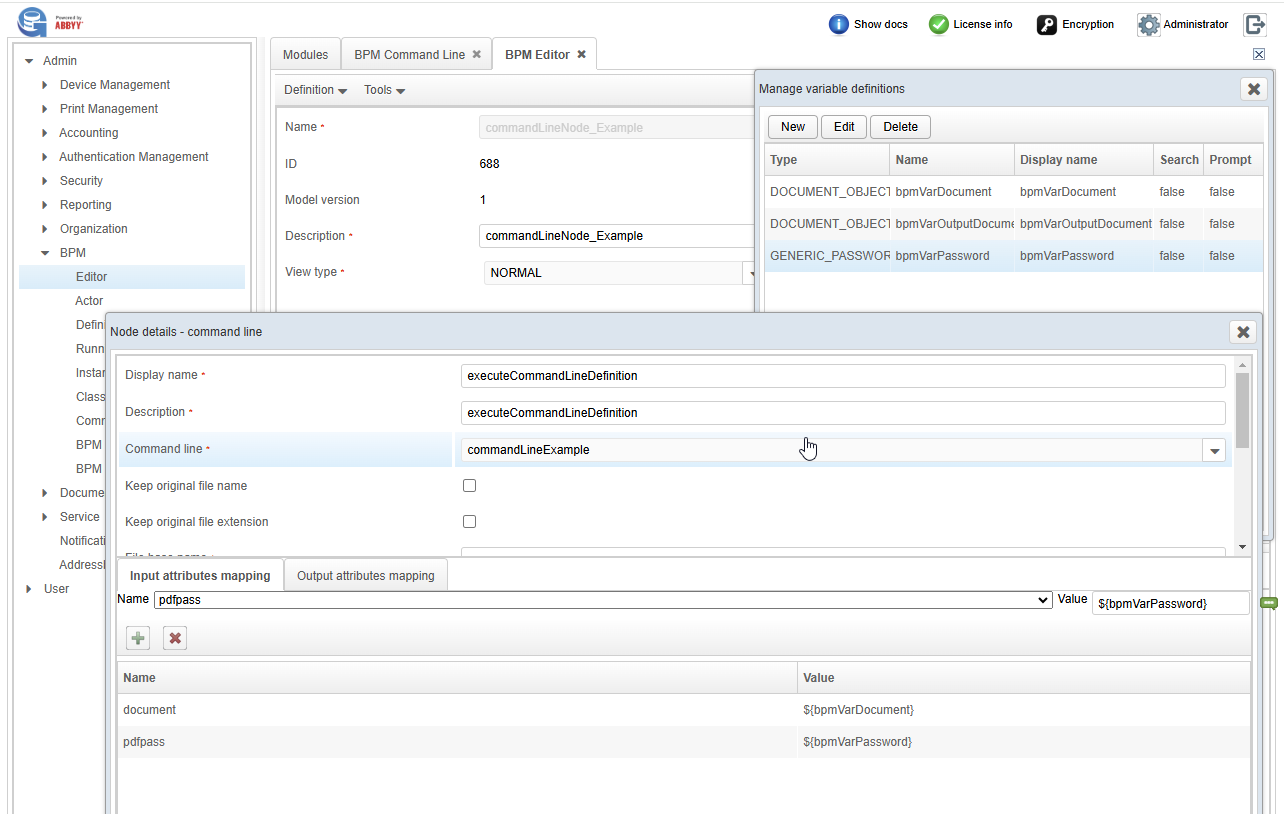
If the command-line node delivers an output, access Output attributes mapping, select the command-line output variable and map a BPM variable (e.g. cmdOutput -> bpmVarOutputDocument). In this step, use the output writing for BPM variables without ${}, just add the variable name.
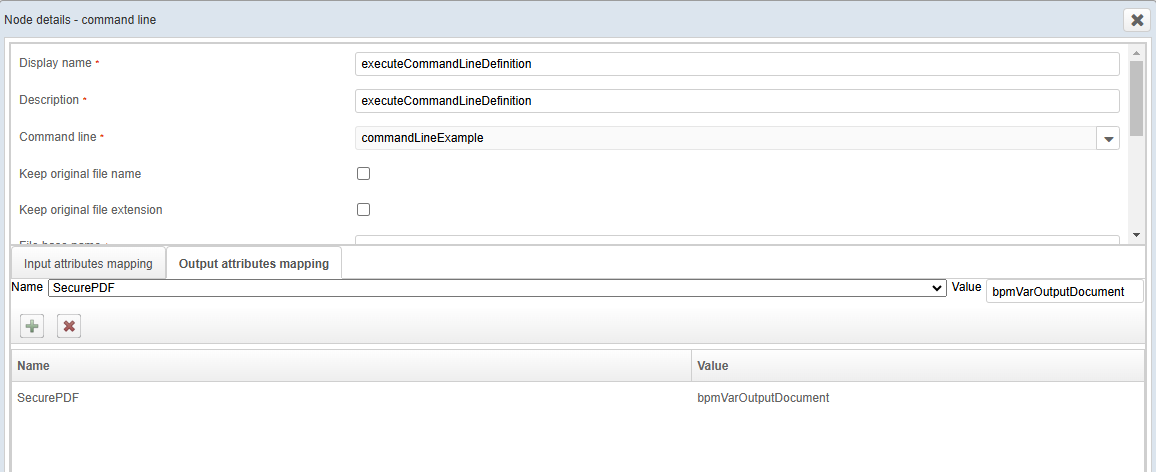
(for further details, refer to Command Line).
Modify Preferences Node
"Modify Preferences" node is intended to modify any user authentication identity preferences on any type of client.

Drag and drop the icon in the palette and fill in the configuration fields:
Display name: the node name, which is displayed also on Web Administrator console, MFP devices and office client (required).
Description: the node description, which is also displayed on Web Administrator console, MFP devices and office client (required).
Global: if enabled, the preference is applied to all users.
Username: the name of the user to whom apply the preference (e.g. ${startUser.username}). If Global is enabled, this settings cannot be filled in.
Client type: the Client to which apply the preference (e.g. embedded_MFP, Gweb, etc.).
Namespace: the device type to which apply the preference. If it is left empty, the preference is applied to all devices.
Strategy: the action to perform. There are 4 applicable strategies:
CREATE_UPDATE: it modifies an existing preference or creates a new one if it doesn't exist.
CREATE_UPDATE_DELETE: it modifies an existing preference or creates a new one if it doesn't exist, and delete the others that correspond with the defined values (if a value is different from the defined ones, the preference is not deleted).
DELETE_ALL: it deletes all preferences.
DELETE: it deletes only the defined preference.
Delete regular expression: an expression that defines what automatically delete (e.g. embedded.client.copy..*).
Instance in error on fail: If checked, when an exception occurs, the process is closed in ERROR.
Response status variable: a variable which indicates the response status of the node. A response status can be:
SUCCESS.
GENERIC_ERROR.
Error message variable: the variable which indicates where to store the error message and the stack trace.
Attribute mapping tab:
Name: the key name of the preference to modify (e.g. embedded.client.user.card.strong.authentication.disabled).
Value: the new value to apply (e.g. true).
To add the attribute press the + sign.
To delete an attribute, select it an press the x sign.
For further details about the keys and the related values refer to User Authentication Identity Preferences Keys.
Press the Apply button to save the changes.
Reload DB Advanced Select Node
The reload DB advanced select node is intended to reload data from the DB in order to have updated information.

Display name: the node name, which is displayed also on Web Administrator console, MFP devices and office client (required).
Description: the node description, which is also displayed on Web Administrator console, MFP devices and office client (required).
Instance in error on fail: if checked, when an exception occurs, the process is closed in ERROR.
Response status variable: a variable which indicates the response status of the node. A response status can be:
SUCCESS
GENERIC_ERROR
Error message variable: the variable which indicates where to store the error message and the stack trace.
Number of retries: the number of retry attempts to execute the node before a failure message appears.
Retry counter variable name: the variable which indicates where to store the number of retries.
Retry wait interval: the time after which a new attempt is performed.
Reload Variable tab: select an ADVANCED_SELECT variable from the drop down list and press th + sign to add it.
Warning
The Reload DB advanced select node works only with DB ADVANCED_SELECT variables.
To delete a variable, select it and press the x sign.
Press the Apply button to save the changes.
Unarchive Node

"Unarchive" node is intended to extract files from an archive.
Display name: displayed name of the node (required).
Description: description of the node (required).
Input archive: a DOCUMENT_OBJECT variable that contains the input archive (e.g. ${archive_file[0].value}) (required). There can only be one input archive.
File name pattern: a GENERIC_TEXT variable or a fixed value that applies a filter to identify the files to extract (e.g. *.pdf, ${file_name_pattern[0].value}).
Output variable: a DOCUMENT_OBJECT variable that contains the output files (e.g. unarchived_files) (required).
Press Apply to save.
Flow Nodes Family
The nodes that are part of the Flow family are:
Group Node
"Group" node is intended to organize a part of the BPM design. This node does not perform specific actions.

Drag and drop the icon in the palette and fill in the configuration fields:
Display name: the name of the node to be displayed (required).
Description: the description of the node (required).
Number of sub-nodes: the number of the sub-nodes of the group.
Number of not valid sub-nodes: the number of the not valid sub-nodes of the group.
Loop Node
"Loop" node is intended to repeat an action many times. To stop the execution, use a control expression.

Drag and drop the icon in the palette and fill in the configuration fields:
Display name: the name of the node to be displayed (required).
Description: the description of the node (required).
Condition: the boolean value -which can be true or false- that is the result of an expression language (e.g. evaluation of a BPM variable content, ${approved[0].value=="OK"}), which allows the repetition of an action. For further details, refer to Java Expression Language documentation (required).
Iteration counter variable: this is an optional field for a variable to add iterations to the loop node. It is important to set the initial value of the integer variable to 0. The field supports working as an index, like: ${documentVariable[counterVariable[0].value].value}. An Example: the condition field contains: ${my:size(samples) > loop_counter[0].value}. Then for iteration counter variable you must enter: loop_counter.
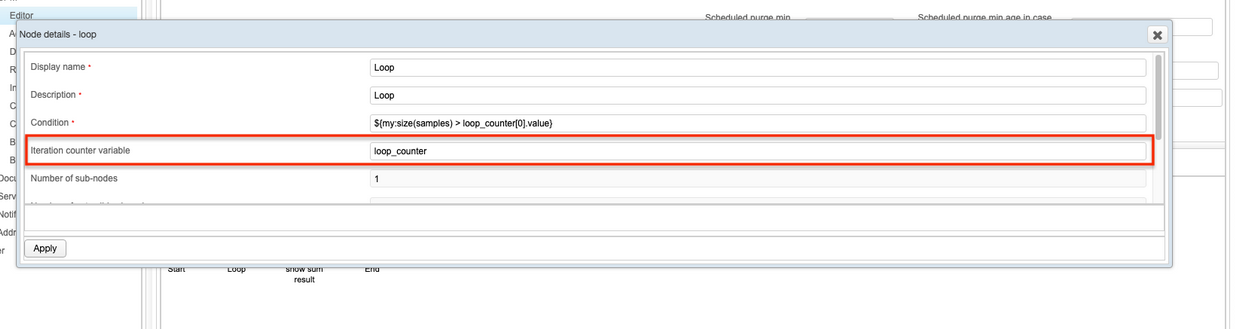
Number of sub-nodes: the number of sub-nodes of the branch.
Number of not valid sub-nodes: the number of not valid sub-nodes into the branch.
Instance in error on fail: If checked, when an exception occurs, the process is closed in ERROR.
Response status variable: a variable which indicates the response status of the node. A response status can be:
SUCCESS.
GENERIC_ERROR.
Error message variable: the variable which indicates where to store the error message and the stack trace.
Switch Node
"Switch" node is intended to allow the value of a BPM variable or expression to change the BPM execution control flow via a multiple branch.

Drag and drop the icon in the palette and fill in the configuration fields:
Display name: the name of the node to be displayed (required).
Description: the description of the node (required).
Number of not valid branches: the number of not valid branches into the switch node.
Instance in error on fail: If checked, when an exception occurs, the process is closed in ERROR.
Response status variable: a variable which indicates the response status of the node. A response status can be:
SUCCESS.
GENERIC_ERROR.
Error message variable: the variable which indicates where to store the error message and the stack trace.
Goto Node
"Goto" node is intended to create an unconditional step to another node. This node can be used if you need to jump to another node bypassing the designed flow.
This node can create never ending loops.

Drag and drop the icon in the palette and fill in the configuration fields:
Display name: the name of the node to be displayed (required).
Description: the description of the node (required).
Target node: destination node, if the Goto condition is verified (the task processing can be forwarded or backwarded, according to the target node position from the Goto node) (required).
Condition: the boolean value -which can be true or false- that is the result of an expression language (e.g. evaluation of a BPM variable content, ${approved[0].value=="OK"}), which allows the repetition of an action. For further details, refer to Java Expression Language documentation (required).
Trigger Instance Node
"Trigger instance" node is intended to start another BPM instance and to keep running the main execution without waiting for a feedback.

Drag and drop the icon in the palette and fill in the configuration fields:
Display name: the name of the node to be displayed (required).
Description: the description of the node (required).
Definition name: name of sub BPM instance to start (required).
Start user: the user who starts the sub instance.
Instance in error on fail: If checked, when an exception occurs, the process is closed in ERROR.
Response status variable: a variable which indicates the response status of the node. A response status can be:
SUCCESS.
GENERIC_ERROR.
Error message variable: the variable which indicates where to store the error message and the stack trace.
Attribute mapping tab:
Mapping type: the types to be mapped. They are of two kinds: ALL_VALUES and EXPRESSION.
Variable: if ALL_VALUES is selected, the variable corresponds to an already defined variable, which enters the Triggered definition variable and is related to the definition name. If EXPRESSION is selected, the variable corresponds to the result of a regular expression which enters the Triggered definition variable and is related to the definition name.
Triggered definition variable: definition of the variable.
Trigger Instance Callback Node
"Trigger instance callback" node is intended to start another BPM definition and to stop the main execution waiting for a feedback from the sub process running.

Drag and drop the icon in the palette and fill in the configuration fields:
Display name: the name of the node to be displayed (required).
Description: the description of the node (required).
Definition name: name of sub BPM instance to start (required).
Start user: the user who starts the sub-instance.
Instance in error on fail: If checked, when an exception occurs, the process is closed in ERROR.
Response status variable: a variable which indicates the response status of the node. A response status can be:
SUCCESS.
GENERIC_ERROR.
Error message variable: the variable which indicates where to store the error message and the stack trace.
Attribute mapping tab:
Mapping type: type to be mapped. They are of two kinds: ALL_VALUES and EXPRESSION.
Variable: if ALL_VALUES is selected, the variable corresponds to an already defined variable which enters the Triggered definition variable and is related to the definition name. If EXPRESSION is selected, the variable corresponds to the result of a regular expression which enters the Triggered definition variable and is related to the definition name.
Triggered definition variable: definition of the variable.
Return variable mappings tab:
Triggered definition variable: triggered variable definition.
Variable: an already defined variable which enters the Triggered definition variable and is related to the definition name.
Trigger Instances Node
"Trigger instances" node is intended to start more than one BPM definition and to keep running the main execution without waiting for a feedback.

Drag and drop the icon in the palette and fill in the configuration fields:
Display name: the name of the node to be displayed (required).
Description: the description of the node (required).
Definition name: the name of sub-BPM instance to start (required).
Number of sub-instances: number of sub-instances to start (required).
Start user: the user who starts the sub-instance.
Instance in error on fail: If checked, when an exception occurs, the process is closed in ERROR.
Response status variable: a variable which indicates the response status of the node. A response status can be:
SUCCESS.
GENERIC_ERROR.
Error message variable: the variable which indicates where to store the error message and the stack trace.
Variable mapping tab:
Mapping type: type to be mapped. They are of three kinds: ALL_VALUES, N_TH_VALUE and EXPRESSION.
Variable: if ALL_VALUES is selected, variables correspond to the already defined variables which enters the Triggered definition variable and are related to the definition name. If EXPRESSION is selected, the variable corresponds to the result of a regular expression which enters the Triggered definition variable and is related to the definition name. If N_TH_VALUE is selected, the variable corresponds to an already defined and selcted variable which enters the Triggered definition variable and is related to the definition name.
Triggered definition variable: definition of the variable.
Trigger Instances Callback Node
"Trigger instances callback" node is intended to start more than one BPM definition and to stop the main execution waiting for a feedback from the sub-process running. In this node, users can configure the condition, which allows to keep going on the main execution:

Drag and drop the icon in the palette and fill in the configuration fields:
Display name: the name of the node to be displayed (required).
Description: the description of the node (required).
Definition name: name of sub BPM instance to start (required).
Number of sub-instances: number of sub-instances to start (required).
Restart strategy: the strategy to adopt in order to restart the main execution. It is of two kinds: All_ENDED, which allows to go back to the main execution after the completion of the sub-instances. ONE_ENDED, which allows to go back to the main execution after the completion of at least one sub-instance (required).
Start user: the user who starts the sub-instance.
Instance in error on fail: If checked, when an exception occurs, the process is closed in ERROR.
Response status variable: a variable which indicates the response status of the node. A response status can be:
SUCCESS.
GENERIC_ERROR.
Error message variable: the variable which indicates where to store the error message and the stack trace.
Attribute mapping tab:
Mapping type: type to be mapped. They are of two kinds: ALL_VALUES and EXPRESSION.
Variable: if ALL_VALUES is selected, variables correspond to the already defined variables which enters the Triggered definition variable and are related to the definition name. If EXPRESSION is selected, the variable corresponds to the result of a regular expression which enters the Triggered definition variable and is related to the definition name.
Triggered definition variable: definition of the variable.
Return variable mappings tab:
Triggered definition variable: triggered variable definition.
Variable: an already defined variable which enters the Triggered definition variable and is related to the definition name.
MFP Nodes Family
The node that is part of the MFP family is:
Update Supply Item Level Node
"Update supply item level node" is intended to update BMP variables after the supply items have been checked.

Drag and drop the icon in the palette and fill in the configuration fields:
Display name: the name of the node to be displayed (required).
Description: the description of the node (required).
Supply item ID variable: the name of the variable related to the supply item, which has triggered the process (required).
Supply item level variable: the level of the variable related to the supply item, which has triggered the process (required).
Instance in error on fail: if checked, when an exception occurs, the process is closed in ERROR.
Response status variable: a variable which indicates the response status of the node. A response status can be:
SUCCESS.
GENERIC_ERROR.
Error message variable: the variable which indicates where to store the error message and the stack trace.
Number of retries: the number of attempts after which a node is stored in ERROR.
Retry counter variable name: a variable which indicates where to store the data related to the retries.
Retry wait interval: the amount of time after which a new attempt to run a node is performed.
Instance Management Nodes Family
The nodes that are part of the instance management family are:
Add Instance Viewer Node
"Add instance viewer node" is intended to add another user or group of users to the instance viewers.
An instance viewer is a user or a group of users who can see the instance and its status until the end.

Drag and drop the icon in the palette and fill in the following fields:
Display name: the name of the node to be displayed (required).
Description: the description of the node (required).
Username: the username of the user to add to instance viewers (it is possible to use also an expression language, for further details refer to Placeholder and Expression Language).
Group name: the name of the group to add to instance viewers.
Instance in error on fail: if checked, when an exception occurs, the process is closed in ERROR.
Response status variable: a variable which indicates the response status of the node. A response status can be:
SUCCESS.
GENERIC_ERROR.
Error message variable: the variable which indicates where to store the error message and the stack trace.
Once the fields have been filled in, press Apply.
Add Instance Manager Node
"Add instance manager node" is intended to add another user or group of users to the instance managers.
An instance manager is user o group of users who can see the instance and its status until the end, and they can act on the instance itself (i.e. reassign a User Task).

Drag and drop the icon in the palette and fill in the following fields:
Display name: the name of the node to be displayed (required).
Description: the description of the node (required).
Username: the username of the user to add to instance managers (it is possible to use also an expression language, for further details refer to Placeholder and Expression Language).
Group name: the name of the group to add to instance managers.
Instance in error on fail: If checked, when an exception occurs, the process is closed in ERROR.
Response status variable: a variable which indicates the response status of the node. A response status can be:
SUCCESS.
GENERIC_ERROR.
Error message variable: the variable which indicates where to store the error message and the stack trace.
Once the fields have been filled in, press Apply.
File Conversion Family
The nodes that are part of the file conversion family are:
Convert Pdf to Jpeg Node
"Convert pdf to jpeg" node is intended to covert .pdf documents into .jpeg ones.

Display name: the name of the node to be displayed (required).
Description: the description of the node (required).
Input PDF: a DOCUMENT_OBJECT variable that contains the input file to convert ( e.g. ${inputfile[0].value}) (required).
Resolution in DPI (dot per inch): the resolution of the document (e.g. 300).
Image type: choose the image type from a drop down menu. Possible values are BINARY, GRAY or RGB.
Output variable: a DOCUMENT_OBJECT variable that contains the output file ( e.g. ${outputfile[0].value}) (required).
Press Apply to save.
Convert Pdf to Tiff
"Convert pdf to tiff" node is intended to convert .pdf documents into .tiff ones.

Display name: the name of the node to be displayed (required).
Description: the description of the node (required).
Input PDF: a DOCUMENT_OBJECT variable that contains the input file to convert (e.g. ${inputfile[0].value}) (required).
Resolution in DPI (dot per inch): the resolution of the document (e.g. 300).
Image type: choose the image type from a drop down menu. Possible values are BINARY, GRAY or RGB.
Output variable: a DOCUMENT_OBJECT variable that contains the output file (e.g. ${outputfile[0].value}) (required).
Press Apply to save.
Convert Pdf to Png
"Convert pdf to png" node is intended to convert .pdf documents into .png ones.

Display name: the name of the node to be displayed (required).
Description: the description of the node (required).
Input PDF: a DOCUMENT_OBJECT variable that contains the input file to convert (e.g. ${inputfile[0].value}) (required).
Resolution in DPI (dot per inch): the resolution of the document (e.g. 300).
Image type: choose the image type from a drop down menu. Possible values are BINARY, GRAY or RGB.
Output variable: a DOCUMENT_OBJECT variable that contains the output file (e.g. ${outputfile[0].value}) (required).
Press Apply to save.
Convert Pdf to Gif
"Convert pdf to png" node is intended to convert .pdf documents into .gif ones.

Display name: the name of the node to be displayed (required).
Description: the description of the node (required).
Input PDF: a DOCUMENT_OBJECT variable that contains the input file to convert (e.g. ${inputfile[0].value}) (required).
Resolution in DPI (dot per inch): the resolution of the document (e.g. 300).
Image type: choose the image type from a drop down menu. Possible values are BINARY, GRAY or RGB.
Output variable: a DOCUMENT_OBJECT variable that contains the output file (e.g. ${outputfile[0].value}) (required).
Press Apply to save.
Tiff Files Aggregator
"Tiff files aggregator" node is intended to convert single page TIFF in multi page TIFF documents.

Display name: the name of the node to be displayed (required).
Description: the description of the node (required).
Tiff files: a DOCUMENT_OBJECT variable that contains the input file to convert (e.g. ${inputfile[0].value}) (required).
Compression mode: the type of compression to apply to the output document. It can be one of the following:
COMPRESSION_NONE: no compression is applied to the output document.
COMPRESSION_PACKBITS: this lossless compression type is used for run-length encoding (RLE). Baseline TIFF readers must support this compression. Use this compression for higher compatibility with various applications.
COMPRESSION_GROUP4: Used particularly for encoding bitonal (or bi-level) images. It is particularly known for its use with fax transmission of images. Using this compression type will help keep smaller file sizes.
COMPRESSION_JPEG_TTN2: Very popular compression, used for color and grayscale images and can produce high compression ratios. JPEG allows a good amount of control over how the image in question should be compressed. Use this compression for general color or grayscale images.
COMPRESSION_DEFLATE: A lossless compression using Huffman and LZ77 techniques and also supports different bit depths.
Output variable: a DOCUMENT_OBJECT variable that contains the output file (e.g. ${outputfile[0].value}) (required).
Output file name: the name of the output file.
Press Apply to save.
PDF Util Family
The nodes that are part of the pdf util family are:
Count PDF Pages
This node allows to count pages of a PDF file.
Display name: the display name.
Description: the description of this process node.
Input PDF: this field contains the variable that links to the pdf whose pages are to be counted, e.g.,
${inputPdf}.Output variable: the output variable name, e.g., outputPDF.
Concatenate PDF
This node allows to concatenate two PDF files.
Display name: the display name.
Description: the description of this process node.
First pdf: the variable for the first pdf to be concatenated, e.g.,
${firstPDF}.Second pdf: the variable for the second pdf to be concatenated, e.g.,
${secondPDF}.File name: the file name for the concatenated pdf including the file type, e.g., merged.pdf. Do not forget to add the file type (must be .pdf).
Output variable: the output variable name, e.g., outputDocument.
Concatenate Multiple PDF
This node allows to concatenate multiple PDF files.
Display name: the display name.
Description: the description of this process node.
Pdf list: the variable for the list of PDF files to be concatenated, e.g.,
${fileList}.File name: the file name for the concatenated pdf including the file type, e.g., multiple-merged.pdf. Do not forget to add the file type (must be .pdf).
Output variable: the output variable name, e.g., outputDocument.
Split PDF
This node allows to split a PDF in such a way that only specific pages are "printed" to the new PDF file.
Display name: the display name.
Description: the description of this process node.
Input PDF: the variable for the input, e.g.,
${inputPDF}.Split range: the range of pages that are to be sent to the new document. For example: if you have a 100 page document, but you only need one chapter, the range might be 10-25. The output file will only contain pages 10-25.
File name: the file name of the split PDF, including the file type, e.g., split-pages10-25.pdf. Do not forget to add the file type (must be .pdf).
Output variable: the output variable name, e.g., outputDocument.
Barcode Stamp on PDF
This node allows to stamp a barcode on PDF files.
Display name: the display name.
Description: the description of this process node.
Document: the input document variable, e.g.,
${input_document}.Data: the content of the barcode, needs to be defined in a variable; e.g.,
${barcode_content[0].value}.Type: the type of the barcode stamp. Possible values are:
UPC_A
UPC_E
EAN_8
EAN_13
CODE_39
CODE_93
CODE_128
CODABAR
QR_CODE
DATA_MATRIX
AZTEC_CODE
X position: the horizontal position of the stamp on the pages, in pixels.
Y position: the vertical position of the stamp on the pages, in pixels.
Width: the width of the stamp, in pixels.
Height: the height of the stamp, in pixels.
Page from: the starting page where the barcode stamp first appears (e.g., 1 meaning that the barcode appears first on page one).
Page to: the last page where the barcode stamp will appear (e.g., 5 meaning that the barcode appears up until page five).
Keep original document name: if checked, the original document name will be kept. If not checked, the name defined in output document name is used.
Output document name: the output document name, including the file type, e.g., barcode-applied.pdf. Do not forget to add the file type (must be .pdf).
Output variable: the output variable name, e.g., outputDocument.
Image Stamp on PDF
This node allows to stamp an image on PDF files.
Display name: the display name.
Description: the description of this process node.
Document: the input document variable, e.g.,
${input_document}.Image: the image to be stamped, needs to be defined in a variable; e.g.,
${input_image}.X position: the horizontal position of the stamp on the pages, in pixels, also accepts variables; e.g.,
${input_xpos[0].value}.Y position: the vertical position of the stamp on the pages, in pixels, also accepts variables; e.g.,
${input_ypos[0].value}.Width: the width of the stamp, in pixels, also accepts variables; e.g.,
${input_width[0].value}.Page from: the starting page where the barcode stamp first appears (e.g., 1 meaning that the image appears first on page one), also accepts variables; e.g.,
${input_from_page[0].value}.Page to: the last page where the image stamp will appear (e.g., 5 meaning that the image appears up until page five), also accepts variables; e.g.,
${input_to_page[0].value}.Output document name: the output document name, including the file type, e.g., image-stamped.pdf. Do not forget to add the file type (must be .pdf).
Output variable: the output variable name, e.g., outputDocument.
Digital Signature
This node allows the user to add a digital signature to a document.
Display name: the display name.
Description: the description of this process node.
Document: the input document variable, e.g.,
${input_document}.Dynamic signature: the image of the signature, needs to be defined in a variable; e.g.,
${input_image}.X position: the horizontal position of the signature on the pages, in pixels, also accepts variables; e.g.,
${input_xpos[0].value}.Y position: the vertical position of the signature on the pages, in pixels, also accepts variables; e.g.,
${input_ypos[0].value}.Width: the width of the signature, in pixels, also accepts variables; e.g.,
${input_width[0].value}.Page from: the starting page where the signature first appears (e.g., 1 meaning that the signature appears first on page one), also accepts variables; e.g.,
${input_from_page[0].value}.Page to: the last page where the signature will appear (e.g., 5 meaning that the signature appears up until page five), also accepts variables; e.g.,
${input_to_page[0].value}.Output document name: the output document name, including the file type, e.g., image-stamped.pdf. Do not forget to add the file type (must be .pdf).
Output variable: the output variable name, e.g., outputDocument.
PDF Util Print
Display name: the display name.
Description: the description of this process node.
Hostname: hostname or IP-address of the printer or print server (Genius Server) where the job is to be printed to.
Port: the port of the printer or print server (Genius Server) where the job is to be printed to.
Owner: the owner of the job that is to be printed.
Queue: the print queue that is to be used.
Job name: the name of the print job.
Document: the input document variable, e.g.,
${input_document}.Copies: the number of copies.
Duplex auto: if checked, the duplex setting set in the PDF metadata is used automatically.
Duplex: if checked, duplex print is enforced, regardless of PDF metadata.
Extract PDF Attachment
Display name: the display name.
Description: the description of this process node.
Input pdf: the variable for the input, e.g.,
${inputPDF}.Attachments variable output: the DOCUMENT_OBJECT variable for the extracted attachments, e.g., output_attachment.
Keep original attachments names: if checked, the original file name is used.
Attachments base name: if Keep original attachments names is unchecked, the name of the attachment is set here. In case of multiple attachments the base name gets enumerated.
Save pdf without attachments: if checked, the PDF is saved without its attachments.
Pdf without attachments variable output: the output variable name, e.g., outputDocument.
Pdf without attachments file name: the output document name, including the file type, e.g., attachment-extracted.pdf. Do not forget to add the file type (must be .pdf).
Add Attachment to PDF
Display name: the display name.
Description: the description of this process node.
Input pdf: the variable for the input pdf, e.g.,
${inputPDF}.Input attachments: the variable for the input attachments, e.g.,
${inputattachments}.Attachments base name: the name of the attachment is set here. In case of multiple attachments the base name gets enumerated.
Overwrite attachments with the same name: if checked, attachments with the same name will be overwritten.
Pdf with attachments file name: the file name for the pdf, including file type, e.g., added-attachments.pdf. Do not forget to add the file type (must be .pdf).
Pdf with attachments variable output: the output variable name, e.g., outputDocument.
TXT to PDF Conversion
This node allows to turn a TXT document into a PDF file.
Display name: the display name.
Description: the description of this process node.
Input text document: the input text document variable, e.g.,
${input_text_file[0].value}.Pdf variable output: the output pdf document variable, e.g.,
${output_pdf_file_name[0].value}.Pdf file name: the output pdf file name, e.g., output_pdf_file.
Text Stamp on PDF
This node allows to print a text stamp on a PDF.
Display name: the display name.
Description: the description of this process node.
Document: the document variable, e.g.,
${input_pdf[0].value}.Text: the text variable, e.g.,
${text_stamp[0].value}.X position: the horizontal position of the stamp in pixels.
Y position: the vertical position of the stamp in pixels.
Size: the size of the text in pixels.
Page from: the starting page where the text stamp first appears (e.g., 1 meaning that the text stamp appears first on page one).
Page to: the last page where the text stamp will appear (e.g., 5 meaning that the text stamp appears up until page five).
Output document name: the output document name, including the file type, e.g., image-stamped.pdf. Do not forget to add the file type (must be .pdf).
Output variable: the output variable name, e.g., outputDocument.
Add PDF Metadata
Display name: the display name.
Description: the description of this process node.
Input PDF: the input PDF file, e.g.,
${input_pdf[0].value}.Meta-data list: the metadata supports input like
key1=value;key2=value:Author=${startUser.username};Title=WorkingWithGeniusMFPSupported PDF Metadata Parameters are: Author, Title, Subject, Producer, Creator, Keywords.Output document name: the output document name, including the document type, e.g., file-with-metadata.pdf. Do not forget to add the file type (must be .pdf).
Output variable: the output variable, e.g., output_pdf.
PDF Print Conversion
This node will convert all formats from PCL into a PDF.
Display name: the display name.
Display name: the displayps name.
Description: the description of this process node.
Input document: the input document variable, e.g.,
${input_printjob[0].value}.Document type: enter the document type to be converted. For example, if a postscript file needs conversion, enter "PS". (Also accepted is Ps or ps.)
Document type result: the document type. Leave empty to generate PDFs.
Document pdf size result: the maximum size of the PDF can be defined here. Size in KB.
Document result: the output variable, e.g., output_pdf.
FTP Nodes Family
The node that is part of the FTP family is:
FTP Node
"FTP" node is intended to create a file in a FTP/SFTP location. This node can also create folders if they do not exist in the destination path.

Drag and drop the icon in the palette and fill in the configuration fields:
Display name: the name of the node to be displayed (required).
Description: the description of the node (required).
FTP provider: from the dropdown list, select the Sharepoint provider already configured in Configuration tool (required).
Folder url: path of a document management folder (required).
Folder username: username of the folder.
Password is expression: if checked, the password is an expression, so fill in the field below.
Folder password: the password of the folder.
Expression folder password: password expression of the folder.
File base name: name assigned to the attached file. Disable keep original file extension and type a name (required).
File page suffix: the extension of the file assigned to the attached file.
Files: files to be added to the folder (required).
Overwrite existing file: to overwrite a file with the same name, if exists.
Create folders: to create the folder, if it does not exist.
Keep original file extension: the extension of the original file is not changed.
Keep original file name: the file name of the original file is not changed.
Instance in error on fail: If checked, when an exception occurs, the process is closed in ERROR.
Response status variable: a variable which indicates the response status of the node. A response status can be:
SUCCESS,
GENERIC_ERROR,
CONNECTION_ERROR,
AUTHENTICATION_ERROR,
CHANGE_FOLDER_ERROR and
UPLOAD_FILE_ERROR.
Error message variable: the variable which indicates where to store the error message and the stack trace.
Number of retries: the number of attempts after which a node is stored in ERROR.
Retry counter variable name: a variable which indicates where to store the data related to the retries.
Retry wait interval: the amount of time after which a new attempt to run a node is performed.
Pdf Nodes Family
The node that is part of the PDF family is:
Pdf Builder Node
"Pdf builder" node is intended to aggregate a list of images into one single PDF file.

Drag and drop the icon in the palette and fill in the configuration fields:
Display name: the name of the node to be displayed (required).
Description: the description of the node (required).
Input images: DOCUMENT_OBJECT variable, which stores images of input (e.g. ${inputdoc[0].value} or ${inputdoc}). For further details, refer to Placeholder and Expression Language section (required).
Supported file type are: png, jpg, jpeg, jpe, jif, jfif, jfi, gif, bmp, dib.
Pdf file name: output document filename (required).
Pdf author: output document author.
Pdf title: output document title.
Pdf subject: output document subject.
Is pdf A: it specifies if the output document is a PDF-A file. Available values are TRUE or FALSE (required).
Pdf page size: the size of the output pdf. Allowed values are A0, A1, A2, A3, A4, A5, A6 or US_LETTER (required).
Pdf page orientation: the orientation of the page of the output pdf. Allowed values are PORTRAIT, LANDSCAPE or AUTO (required).
Fit to orientation: it shows if the the input image fits the page orientation (landscape or portrait) or not. Available values are TRUE or FALSE.
Invert fit rotation: it works if Fit to orientation field is enabled. An input image rotates 90° anticlockwise if the output orientation is different from the input. Available values are TRUE or FALSE.
Opposite fit rotation: it works if Fit to orientation field is enabled. An input image in landscape orientation rotates 90° clockwise if the output orientation is Portrait. If the input image is in portrait orientation and the output orientation is landscape, the image rotates 90° anticlockwise. Available values are TRUE or FALSE.
Output document: the output document variable (DOCUMENT_OBJECT variable, e.g. outputdoc) which stores the output pdf.
Instance in error on fail: If checked, when an exception occurs, the process is closed in ERROR.
Response status variable: a variable which indicates the response status of the node. A response status can be:
SUCCESS
GENERIC_ERROR
Error message variable: the variable which indicates where to store the error message and the stack trace.
Number of retries: the number of attempts after which a node is stored in ERROR.
Retry counter variable name: a variable which indicates where to store the data related to the retries.
Retry wait interval: the amount of time after which a new attempt to run a node is performed.
The table below shows the output results for boolean values assigned to Fit to orientation, Invert fit rotation and Opposite fit rotation fields. The input and output columns take as values: P (Portrait) or L (Landscape).
Fit to orientation |
Invert fit rotation |
Opposite fit rotation |
Input |
Output |
Result |
|---|---|---|---|---|---|
true |
false |
false |
L |
P |
The input image is rotated 90° clockwise |
true |
false |
false |
P |
P |
No rotation |
true |
false |
false |
P |
L |
The input image is rotated 90° clockwise |
true |
false |
false |
L |
L |
No rotation |
true |
true |
false |
L |
P |
The input image is rotated 90° anticlockwise |
true |
true |
false |
P |
P |
No rotation |
true |
true |
false |
P |
L |
The input image is rotated 90° anticlockwise |
true |
true |
false |
L |
L |
No rotation |
true |
false |
true |
L |
P |
The input image is rotated 90° clockwise |
true |
false |
true |
P |
P |
No rotation |
true |
false |
true |
P |
L |
The input image is rotated 90° anticlockwise |
true |
false |
true |
L |
L |
No rotation |
true |
true |
true |
L |
P |
The input image is rotated 90° anticlockwise |
true |
true |
true |
P |
P |
No rotation |
true |
true |
true |
P |
L |
The input image is rotated 90° clockwise |
true |
true |
true |
L |
L |
No rotation |
false |
any |
any |
L |
P |
No rotation |
false |
any |
any |
P |
P |
No rotation |
false |
any |
any |
P |
L |
No rotation |
false |
any |
any |
L |
L |
No rotation |
Abbyy Nodes Family
Abbyy nodes are Abbyy Engine connectors. Abbyy is used for OCR operations.
Since Abbyy is an external engine, it needs to be installed on the same server of the Genius Server seperately.
The connection between Abbyy FRE and Genius Server can be configured in the Genius Server configuration tool.
For more details refer to the corresponding sections in this manual (e.g., Configuration Tool or the Abbyy Fine Reader Engine 12 chapter in the Optional Extras section.)
Nodes that are part of the Abbyy family are:
Abbyy OCR Node
This node provides the character recognition from images using the Abbyy Fine Reader.

Drag and drop the icon in the palette and fill in the configuration fields. Note, that there is a hierarchy for setting parameters, when using ABBYY.
API set parameters, i.e., the node configuration. This means, activating the settings which have the checkbox "override [...]".
Parameters set in user profiles, also known as My Profile in Genius Server. They can be accessed using the Change my profile button.
Parameters set in predfined profiles, like DocumentArchiving_Accuracy. For more details, please refer to the official ABBYY documentation ([external link] https://help.abbyy.com/en-us/finereaderengine/12/user_guide/guidedtour_profiles/).
The hierarchy for overwriting settings is: Node configuration > user profile/my profile > predefined profiles.
Display name: the name of the node to be displayed (required).
Description: the description of the node (required).
Input documents: input documents such as DOCUMENT_OBJECT variable, e.g. ${inputdoc[0].value} (required).
Some file format for input documents are bmp, png, tif, tiff, jpg, jpeg, pdf, gif.
Profiles: selectable profiles are:
DocumentConversion_Accuracy: it converts documents into an editable format (e.g. RTF, DOCX). Settings have been optimized for accuracy:
best quality enables the font style detection and full synthesis of the logical structure of a document.
orientation is not detected.
DocumentConversion_Speed: it converts documents into an editable format (e.g. RTF, DOCX). Settings have been optimized for processing speed:
best quality enables the font style detection and the full synthesis of the logical structure of a document.
processes of a document analysis and the recognition are sped up.
orientation is not detected.
DocumentArchiving_Accuracy: it creates an electronic archive (converting to PDF, PDF/A, PDF and PDF/A with MRC). Settings have been optimized for accuracy:
the profile is not intended to convert a document into RTF, DOCX, only PDF texts are allowed.
it enables the detection of the text in an image, including text embedded into the image.
the skew correction is not performed.
fonts and styles are not detected.
the full synthesis of the logical structure of a document is not performed.
DocumentArchiving_Speed: it creates an electronic archive (converting to PDF, PDF/A, PDF and PDF/A with MRC). Settings have been optimized for processing speed:
the profile is not intended to convert a document into RTF, DOCX, only PDF texts are allowed.
it enables the detection of a text in an image, including text embedded into the image.
the skew correction is not performed.
fonts and styles are not detected.
the full synthesis of the logical structure of a document is not performed.
processes of document analysis and recognition are sped up.
BookArchiving_Accuracy: it creates an electronic library (converting to PDF, PDF/A, PDF and PDF/A with MRC). Settings have been optimized for accuracy:
Best quality enables the font style detection and the full synthesis of the logical structure of a document
BookArchiving_Speed: it creates an electronic library (converting to PDF, PDF/A, PDF and PDF/A with MRC). Settings have been optimized for processing speed:
best quality enables the font style detection and the full synthesis of the logical structure of a document.
processes of the document analysis and recognition are sped up.
TextExtraction_Accuracy: it extracts the text from a document. The settings have been optimized for accuracy:
the profile is not intended to convert a document into RTF, DOCX, only PDF texts are allowed.
it enables the detection of all the text in an image, including small text areas of low quality (pictures and tables are not detected).
fonts and styles are not detected.
full synthesis of the logical structure of a document is not performed.
TextExtraction_Speed: it extracts the text from a document. The settings have been optimized for processing speed:
the profile is not intended to convert a document into RTF, DOCX, PDF text only.
it enables the detection of all the text in an image, including small text areas of low quality (pictures and tables are not detected).
fonts and styles are not detected.
full synthesis of the logical structure of a document is not performed.
processes of the document analysis and recognition are sped up.
FieldLevelRecognition: it recognizes short text fragments. Currently this profile has default settings.
BarcodeRecognition: it is suitable only for barcode extraction (texts, pictures, or tables are not detected).
Version9Compatibility: it is provided for compatibility, it sets the processing parameters to the default values of ABBYY FineReader Engine 9.0. Currently, this profile has default settings.
Default: it sets all the processing parameters to default values.
My profile: a custom profile consists of a code block with sections and entries in each section. Supported sections are the following:
PrepareImageMode.
PageAnalysisParams.
RecognizerParams.
OrientationDetectionParams.
SynthesisParamsForDocument.
For further details, refer to ABBYY documentation. In the two examples below a custom profile is shown:
[PrepareImageMode]
DiscardColorImage = false
[RecognizerParams]
BalancedMode = false
TextLanguage = English,German
[TextExportParams]
EncodingType = TET_UTF8
[PrepareImageMode]
DiscardColorImage = true
[PDFExportParams]
TextExportMode = PEM_ImageOnText
[RecognizerParams]
TextLanguage = English,Russian
To specify the custom profile, write the code on My profile text area. My profile overwrites the default or other profile parameters specified in the custom profile.
Output format: output file format. Possible formats are: PDF, PDF_A, RTF, TXT, DOCX, XLS, XLSX, PPTX, XML, ODT, TXT_IN_VARIABLE, EPUB, ALTO, FB2, XPS and HTML. To select those formats they can either be set via conversion ( one node -> one file format) or by using the options in the "more formats" tab. A more detailed description of these formats can be found further below in the more formats section.
Output documents: output document variable (generally this is a DOCUMENT_OBJECT variable, e.g., outputdoc. But note, that if you chose TXT_IN_VARIABLE as the output format the output document variable needs to be GENERIC_TEXT).
Note
Using TXT_IN_VARIABLE can be used to save the results of an OCR scan into a text variable, e.g., to use it for document names, recipients etc. This is also useful for zone OCR. Please keep in mind, that in this case the output document variable needs to be GENERIC_TEXT, as mentioned above.
Keep original file name (one input file): if checked, the output file name is equal to the original.
Debug log variable: the variable for saving the debug log. Requires a DOCUMENT_OBJECT variable.
Pages per output file (0=all, -1=dynamic): with this setting the pages per output file are determined. The value 0 means all scanned documents from one scan process will be merged into one document. -1 means that the ABBYY Engine dynamically splits documents. E.g., a users scans two single page documents. With the setting set to 0, the user will receive one document with two pages. With the setting set to -1, the user will receive two single page documents. It is also possible to use a variable for this setting, ${pagesPerOutput[0].value}.
Instance in error on fail: If checked, when an exception occurs, the process is closed in ERROR.
Response status variable: a variable which indicates the response status of the node. A response status can be:
SUCCESS.
ABBY_OCR_ERROR.
Error message variable: the variable which indicates where to store the error message and the stack trace.
Number of retries: the number of attempts after which a node is stored in ERROR.
Retry counter variable name: a variable which indicates where to store the data related to the retries.
Retry wait interval: the amount of time after which a new attempt to run a node is performed.
Timeout active: if this setting is checked, timeout settings are activated and can be changed. Per default this setting is turned off.
Time for timeout: if this value is set to a positive number this number signifies the amount of time after which OCR jobs that are in status SYSTEM_WAITING are set to ERROR. This setting is useful for processes that seem to run "forever" due to e.g., external processing errors. Choose a reasonable value. Requires Timeout active to be set to "on".
Time unit for timeout: if Time for timeout is set, this field needs to be set, too. Choose between seconds, minutes and hours. Requires Timeout active to be set to "on".
Image processing tab: the image is preprocessed before the analysis and recognition.
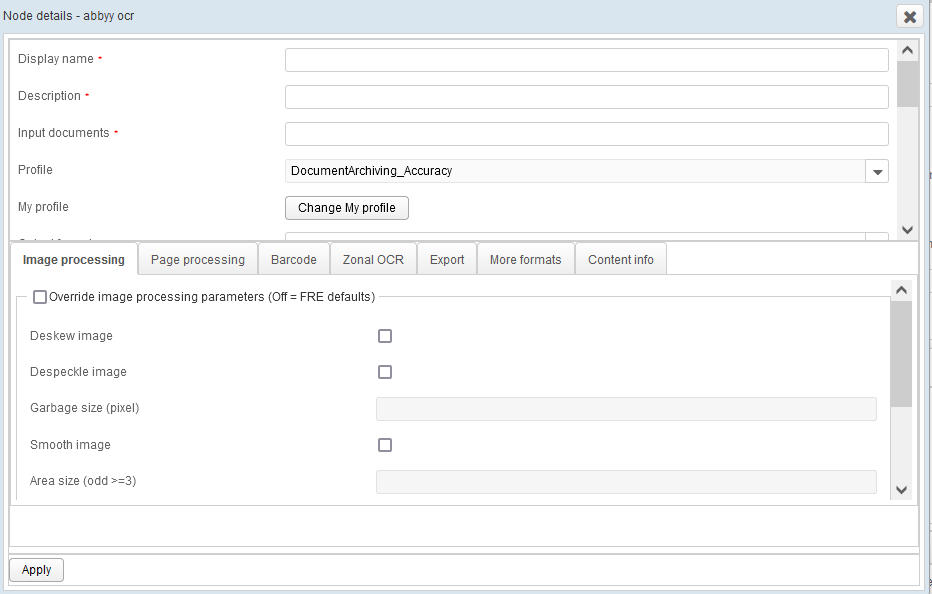
Enable image processing parameters: this switch enables toggling all image processing parameters described below. If this switch is set to OFF, the default FRE Engine parameters are used.
Deskew image: if checked, it is applied to scanned documents which require the compensation for the image skew:

Despeckle image: if checked, when scanning low to medium quality documents, the obtained image can present dots or speckles close to letters or numbers, which affect the quality of OCR. The size of the speckles to be removed are specified in the Garbage size (pixel) field.
Garbage size (pixel): it specifies the maximum area of black dots to be considered as garbage (in pixels). The value of -1 for this input parameter tells ABBYY Engine to automatically calculate the size of the garbage.

Smooth image: if checked, it allows to smooth the image. It can be useful, for example, if the image contains some noises, i.e. random black dots or speckles. This property should not be used if the lines of letters on the image are thin. This feature can be used for gray and color images only.
Area size (odd >=3): this variable specifies the dimension of the side of the rectangle. Enter an odd number greater than or equal to 3.
Remove color objects: if checked, it removes color objects from the image. This feature can be used for color images only.
Remove objects color: it removes only Red, Green, Blue, or Yellow objects.
Remove object type: Full, Background and Stamp are the object types that can be removed:
Full: all the color objects in the image.
Background: color objects in the background.
Stamp: color stamps and signatures.
Page Processing tab: it tunes different parameters of layout analysis and recognition.
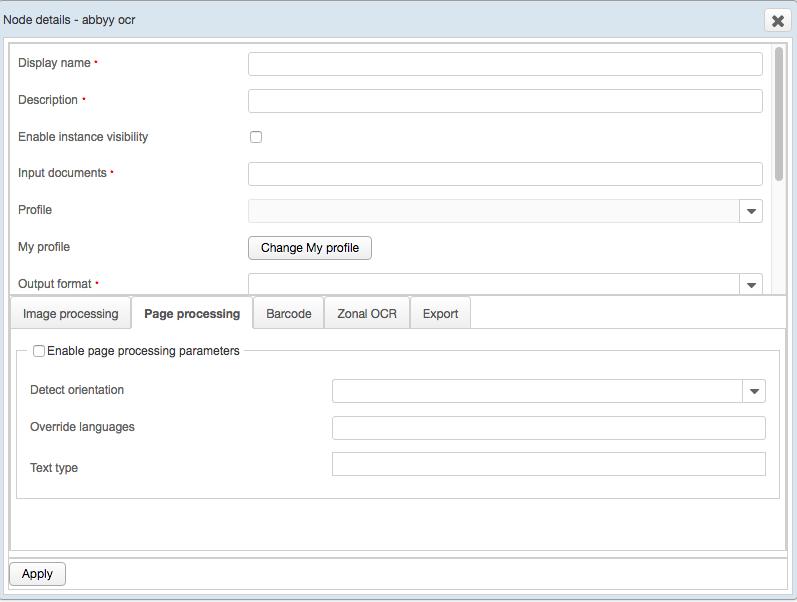
Enable page processing parameters: this switch enables toggling all page processing parameters described below. If this switch is set to OFF, the default FRE Engine parameters are used.
Detect orientation: if enabled (TRUE), it tries to detects text orientation on the image.

Override languages: it specifies one or more languages separated by a comma (e.g. German,French,Spanish).
Text type: recognized text types:
Normal: it corresponds to a common text type.
Typewriter: it corresponds to the typewriter text type.
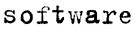
Matrix: it corresponds to a dot-matrix printer text type.

Index: it corresponds to a special set of characters, which only includes digits written in ZIP-code style.

Handprinted: it corresponds to handprinted text type. Note that automatic analysis is not available for handprinted text, unless it is manually set.

OCR_A: it corresponds to a monospaced font, designed for Optical Character Recognition. It is largely used by banks, credit card companies and similar businesses.

OCR_B: it corresponds to a font designed for Optical Character Recognition.

MICR_E13B: MICR (Magnetic Ink Character Recognition) corresponds to a special set of characters, which only includes digits and A, B, C, D characters printed in magnetic ink.

MICR_CMC7: it corresponds to a special set of characters, which includes only digits and A, B, C, D, E characters, written in MICR barcode font (CMC-7).

Gothic: it corresponds to the text Gothic text type.

Barcode tab: ABBYY Engine is used to read barcodes. It is useful, for example for the automatic document separation, processing documents by a Document Management System, or indexing and classifying documents, ect.
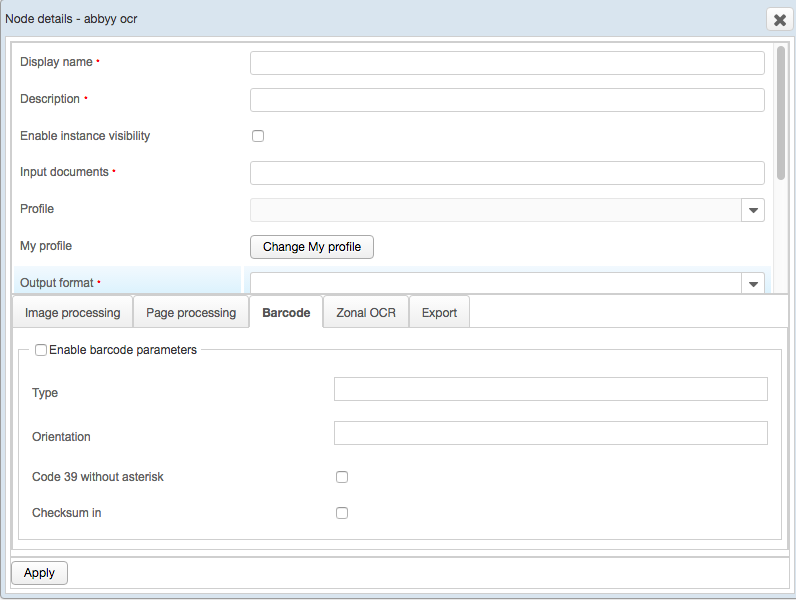
Enable barcode parameters: this switch enables toggling all barcode parameters described below. If this switch is set to OFF, the default FRE Engine parameters are used.
Type: the barcode types recognized by ABBYY Engine (one or more selections are possible) are the following:
Unknown: unknown type of barcode types.
Code39: the Code 3 of 9 is an alphanumeric, self-checking, variable length barcode that uses five black bars and four spaces to define a character. Three elements are wide and six are narrow.
Interleaved25: Interleaved 2 of 5 is a high-density, self-checking, variable length (must be a multiple of two) numeric barcode that uses five black bars and five white bars to define a character. In every character, two digits are encoded: one in the black bars and one in the white bars. Two black bars and two white bars are wide. The other bars are narrow.
EAN13: European Article Numbering (EAN) system is used for products that require a country of origin. It consists of a fixed-length barcode used to encode either eight or thirteen characters. The first two characters identify the country of origin, the next characters are data characters, and the last character is the checksum. These barcodes may include an additional barcode to the right of the main barcode. This second barcode, which is usually not as tall as the primary barcode, is used to encode additional information for newspapers, books, and other periodicals. The supplemental barcode may either encode 2 or 5 digits of information.
Code128: this is a very high-density, alphanumeric, compact, variable length barcode scheme that can encode the full 128 ASCII character set. Each bar or space is 1, 2, 3 or 4 units wide, the sum of the widths of bars must be even, the sum width of spaces must be odd, and total 11 units per character.
EAN8: the European Article Numbering (EAN) system is used for products that require a country of origin. This is a fixed-length barcode used to encode either eight or thirteen characters. The first two characters identify the country of origin, the next characters are data characters, and the last character is the checksum. These barcodes may include an additional barcode to the right of the main barcode. This second barcode, which is usually not as tall as the primary barcode, is used to encode additional information for newspapers, books, and other periodicals. The supplemental barcode may either encode 2 or 5 digits of information.
PDF417: this is a variable length, a two-dimensional (2D), stacked symbology that can store up to 2710 digits, 1850 printable ASCII characters or 1108 binary characters per symbol. PDF417 is designed with selectable levels of error correction. Its high data capacity can be helpful in applications where a large amount of data must travel with a labeled document or item.
Codabar: Codabar is a self-checking, variable length barcode that can encode 16 data characters. It is primarily used for numeric data, and encodes also six special characters. Codabar is useful to encode dollars and other mathematical figures as decimal point, plus and minus.
UPCE: the UPC-E barcode is a shortened version of the UPC-A barcode. It compresses data characters and the checksum into six characters. This barcode is ideal for small packages because it is the smallest barcode.
Industrial25: Industrial 2 of 5 is a numeric barcode that has been in use for a long time. Unlike Interleaved 2 of 5, all of the information are encoded in the bars. spaces are of fixed width and are only used to separate bars. The code is self-checking and does not include a checksum.
IATA25: IATA 2 of 5 is a standard barcode designed by IATA (International Air Transport Association). This standard is used for all boarding passes.
Matrix25: Matrix 2 of 5 is a self-checking numeric barcode. Unlike Interleaved 2 of 5, all of the information are encoded in the bars. spaces are of fixed width and are used only to separate the bars. Matrix 2 of 5 is used primarily for warehouse sorting, photo finishing, and airline ticket marking.
Code93: Code 93 is a variable length barcode that encodes 47 characters. It is called Code 93 because every character is constructed from nine elements arranged into three bars with their adjacent spaces. Code 93 is a compressed version of Code 39 and was designed to complement Code 39.
PostNet: Postnet (Postal Numeric Encoding Technique) is a fixed length symbology (5, 6, 9, or 11 characters) which uses constant bar and space width. Information are encoded varying the bar height between the two values. Postnet barcodes are placed on the lower right of envelopes or postcards, and are used to expedite the mailing process with automatic equipment and provide reduced postage rates.
UCC128: this type of barcode is a 19 digit barcode with a 20th check digit. For a total of 20 digits. It is typically used for the carton identification. It is useful both for the internal carton numbering and to use the UCC-128 barcode on cartons being shipped.
Patch: horizontal black bars separated by spaces. Typically, a patch code is placed near the top center of a paper document to be scanned and used as a document separator.
Aztec: this is a high density two-dimensional matrix style barcode symbology that can encode up to 3832 digits, 3067 alphanumeric characters, or 1914 bytes of data. The symbol is built on a square grid with a bull-eyed pattern in the center.
DataMatrix: Data Matrix is a two-dimensional matrix barcode consisting of black and white modules arranged in either a square or rectangular pattern. Every Data Matrix is composed of two solid adjacent borders in an "L" shape and two other borders consisting of alternating dark and light modules. Within these borders there are rows and columns of cells encoding information. A Data Matrix barcode can store up to 2335 alphanumeric characters.
QRCode: QR Code is a two-dimensional matrix barcode. The barcode has 3 large squares (registration marks) in the corners which define the top of the barcode. The black and white squares in the area between the registration marks are encoded data and error correction keys. QR Codes can encode over 4000 ASCII characters.
UPCA: the UPC-A (Universal Product Code) barcode is 12 digit long, including its checksum. Each digit is represented by a seven-bit sequence, encoded by a series of alternating bars and spaces. UPC-A is used to mark products which are sold at retail in the USA.
Autodetect: this type forces ABBYY Engine to automatically detect the barcode type during the recognition.
Orientation: barcode orientation. By default, this property is set to Autodetect, so ABBYY Engine detects the barcode orientation automatically. Available orientations are:
Unknown: unknown barcode orientation type.
Left_To_Right: the barcode is oriented from left to right.
Down_To_Top: the barcode is oriented from the bottom to the top.
Right_To_Left: the barcode is oriented from right to left.
Top_To_Down: the barcode is oriented from the top to the bottom.
Autodetect: it automatically detects the barcode orientation.
Is code 39 without asterisk: if checked, the Code 39 barcode being recognized has no start and stop symbol: the asterisk, "*". By default, this property is set to FALSE.
Has checksum: if checked, it specifies whether the barcode being recognized must be interpreted as the barcode of the same type with a check sum. This property is available only for Code 39, Interleaved 2 of 5, Codabar, and Matrix 2 of 5 barcode types.
Note
While Codabar has no check digits, ABBYY Engine uses an algorithm to compute check digits according to Modulo 16. The check digit is computed as follows. Each Codabar character has a value assigned to it. The sum of all character values is taken, including the Start and the Stop characters. Data character whose value (when added to this sum) equals to a multiple of 16 is the check digit. By default, this property is set to FALSE.
Zonal OCR TAB: it is used to define the area of the document from where the text has to be extracted (e.g. where the barcode is).
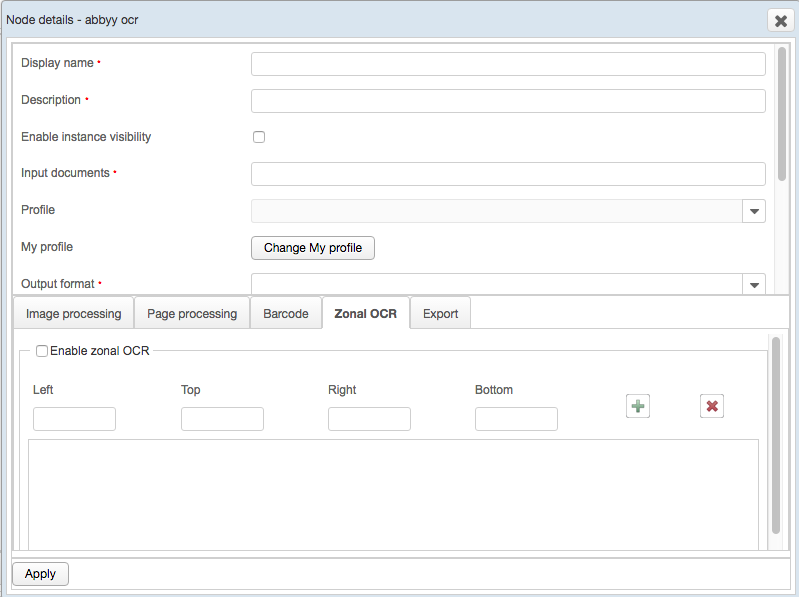
Check Enable zonal OCR and fill in the fields Left, Top, Right and Bottom to define the area.
The coordinates of the area are measured in pixels and the origin is the left top corner of the paper. The values entered mark the edges of the zonal OCR area.
Warning
Note that the Top value always needs to be smaller than Bottom and Left needs to be smaller than Right.
Once all fields have been filled in, press the + sign to add the area.
To remove an area, select it and press the x sign.
Hint
Example:
An A4 document with 300 DPI has a barcode on the right top corner of the paper and I want to define its area.
In that case, write as follow:
Left: 1771. Top: 118. Right: 2362. Bottom: 413.
Export tab: ABBYY Engine allows to tune export to PDF and PDF/A formats:
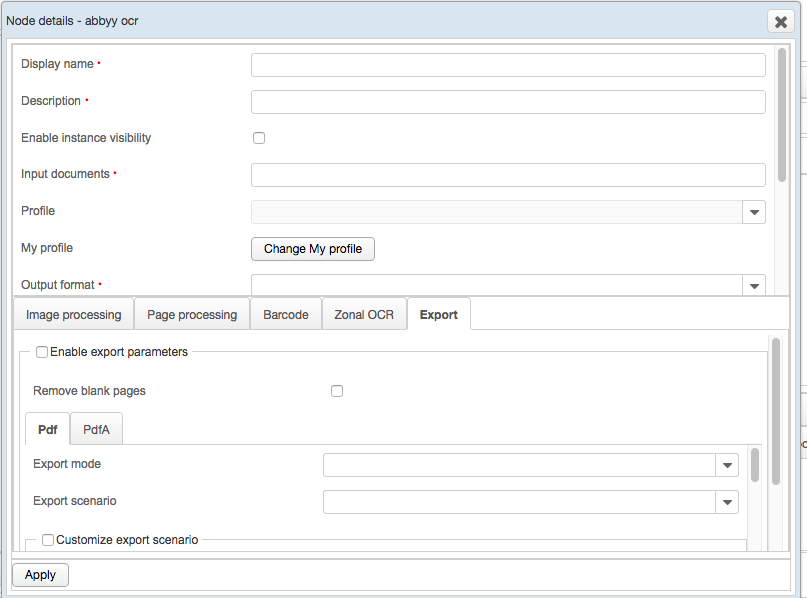
Enable export parameters: this switch enables toggling the export parameters desribed below. If this switch is set to OFF, the default FRE Engine parameters are used.
Remove blank pages: if checked, it removes all the blank pages.
Pdf tab (part of Export):
Export mode: specifies the export mode to recognize a text into PDF (PDF/A) formats. By default, this property is ImageOnText.
TextWithPictures: the recognized text is saved as text, and pictures are saved as pictures.
TextOnImage: the entire image is saved as a picture. Text areas are saved as text over the image.
ImageOnText: the entire image is saved as a picture. The recognized text is put under it. This option is useful when exporting a text to document archives: the full page layout is retained and the full-text search is available.
ImageOnly: the entire image is saved as a picture. The recognized text and layout information are not used, so the recognition stage is skipped.
TextOnly: the recognized text is saved as text. Pictures are not saved.
Export scenario: specifies the export scenario to a PDF (PDF/A) format, which optimizes export for some parameters. By default, the value for this property is Balanced:
MaxQuality: it optimizes the PDF (PDF/A) export in order to have the best quality of the resulting file.
Balanced: the PDF (PDF/A) export is balanced among the quality of the resulting file, its size and the time of processing.
MinSize: it optimizes the PDF (PDF/A) export in order to have the minimum size of the resulting file.
MaxSpeed: it optimizes the PDF (PDF/A) export in order to have the highest speed of processing.
Paper Size Mode: In some cases the paper size varies from the usual sizes. With this setting you can choose how the engine should handle those cases. Possible values are:
ImageSize: From the Abbyy FRE Engine 12 user guide: "The paper size should be equal to the original size of the preprocessed image."
SynthesisSize: From the Abbyy FRE Engine 12 user guide: "The paper size should be equal to the page size detected during synthesis."
User Defined: define the paper size by using Paper Height and Paper Width to enforce a specific paper size. The unit is measured in TWIPS. An example for an A4 paper size woudl be: PaperWidth=11909 and PaperHeight=16834.
AutoFlexible: From the Abbyy FRE Engine 12 user guide: "The paper size is selected automatically for each page in the output file. The paper size is selected from the standard paper sizes so that the contents of the page fits into the paper size. For each page its own minimum paper size is selected."
AutoFixed: From the Abbyy FRE Engine 12 user guide: "The paper size is selected automatically from the standard paper sizes so that the contents of each page in the document fits into the selected paper size. The minimum paper size, into which the contents of each page in the document fits, is selected."
PDF version: set the PDF version.
Customize export scenario: enables all the following parameters. If checked, the default profile parameters are overwritten:
Jpeg quality (%): stores the value of the JPEG quality as a percentage. By default, the value for this property is 50.
Resolution (dpi): specifies the picture resolution in DPI. The specified resolution cannot be higher then the original resolution. By default, the value for this property is 300 DPI.
Resolution type: defines how to use the picture resolution value specified in the Resolution property:
Desired: the picture resolution is defined as follows:
if the original resolution of the source image is less than or equal to the desired resolution, the original resolution is preserved.
if the original resolution of the source is more than the desired resolution, the program selects the closest value to the desired resolution.
Exact: it uses the specified resolution. The specified resolution cannot be higher then the original resolution.
Source: the original resolution is preserved.
Export MRC mode: specifies the mode of using Mixed Raster Content for output PDF (PDF/A) file. By default, the value of this property is Auto.
The MRC imaging model represents a document of three different layers: a foreground plane, a mask plane, and a background plane. Each layer is separately compressed using the best type of compression for that data type. The MRC technology for PDF (PDF/A) allows the user to achieve a better file compression without visible degradation of document representation.
Auto: if necessary, it is the Mixed Raster Content default parameters. According to the Export scenario, export parameters and parameters of the input image, ABBYY Engine automatically determined whether to use MRC or not.
Always: MRC is always used.
Disable: MRC is not used. MRC technology uses lossy compression algorithm, so some unimportant information from the source image (background texture, scanning garbage, etc.) can be lost. It is recommended to use this constant even if insignificant information from the source image cannot be lost.
Export compression level: the level of compression.
Embed fonts - Pdf: if checked, it specifies if fonts should be embedded during the export to PDF. The default value for this property is TRUE.
Write links: if checked, it specifies if the hyperlinks must be retained during the export of the recognized text to PDF (PDF/A) format. If this property is FALSE, hyperlinks are exported as text. By default, this property is TRUE.
Write tagged pdf: if checked, it specifies if the recognized text should be exported to tagged PDF. Tagged PDF is a structured PDF that allows to extract the page content. It is useful for various purposes such as the reflow of text and graphics, the conversion to file formats such as HTML and XML, and the accessibility to the visually impaired. This parameter can be set to TRUE only if the Compliance mode - PdfA field is set to None. By default, this property is FALSE.
Enable encryption requested: if checked, it enables the encryption of the following parameters:
User password: password of the user.
User password is an expression: if checked, the password is an expression, so fill in the field below.
User password expression: password expression of the user.
Owner password is expression: if checked, the owner's password is an expression, so fill in the field below.
Owner password expression: password expression of the owner.
Permission add annotations: if checked, it enables to add and modify text annotations and interactive form fields.
Permission assemble doc: if checked, it enables to assemble the document: inserting, rotating, deleting pages and creating navigation elements such as bookmarks and thumbnail images.
Permission extract text and graphics: if checked, it enables to copy and extract both text and graphics from the document.
Permission extract text and graphics ext: if checked, it enables to extract text and graphics.
Permission fill form fields: if checked, it enables to fill in forms and sign the document.
Permission modify content: if checked, it enables to modify the contents of the document.
Permission print: if checked, it enables to print the document.
Permission print ext: if checked, it enables to print and then generate an exact digital copy of the PDF content.
Use AES: if checked, it enables a high (128-bit AES) encryption level.
PdfA tab (part of Export):
Export mode: specifies the export mode to recognize a text into PDF (PDF/A) formats. By default, this property is ImageOnText.
TextWithPictures: the recognized text is saved as text, and the pictures are saved as pictures.
TextOnImage: the entire image is saved as a picture. Text areas are saved as text over the image.
ImageOnText: the entire image is saved as a picture. The recognized text is put under it. This option is useful when exporting a text to document archives: the full page layout is retained and the full-text search is available.
ImageOnly: the entire image is saved as a picture. The recognized text and layout information are not used, so the recognition stage is skipped.
TextOnly: the recognized text is saved as text. Pictures are not saved.
Compliance mode - PdfA: it is used to set the compliance with PDF/A standard for output PDF files:
Pdfa_1a: the recognized text is exported to PDF/A-1a format.
Pdfa_1b: the recognized text is exported to PDF/A-1b format.
The other options exoprt the recognized text to Pdfa_2a, 2b, 2u or 3a, 3b, 3u, depending on the selected option.
Enable pdf UA compliance: when selected the export to an output format that is PDF UA compliant. Note that it might be the case that some input formats cannot be converted to PDF UA.
Export scenario: it specifies the export scenario to a PDF (PDF/A) format, which optimizes the export for some parameters. By default, the value for this property is Balanced:
MaxQuality: it optimizes the PDF (PDF/A) export in order to have the best quality of the resulting file.
Balanced: the PDF (PDF/A) export is balanced among the quality of the resulting file, its size and the time of processing.
MinSize: it optimizes the PDF (PDF/A) export in order to have the minimum size of the resulting file.
MaxSpeed: it optimizes the PDF (PDF/A) export in order to have the highest speed of processing.
Customize export scenario: it enables all the following parameters. If checked, the default profile parameters are overwritten:
Jpeg quality (%): it stores the value of the JPEG quality as a percentage. By default, the value for this property is 50.
Resolution (dpi): it specifies the picture resolution in DPI. The specified resolution cannot be higher than the original resolution. By default, the value for this property is 300 DPI.
Resolution type: it defines how to use the picture resolution value specified in the Resolution property:
Desired: the picture resolution is defined as follows:
if the original resolution of the source image is less than or equal to the desired resolution, the original resolution is preserved.
if the original resolution of the source is more than the desired resolution, the program selects the closest value to the desired resolution.
Exact: it uses the specified resolution. The specified resolution cannot be higher then the original resolution.
Source: the original resolution is preserved.
Export MRC mode: it specifies the mode of using Mixed Raster Content for output PDF (PDF/A) file. By default, the value of this property is Auto.
The MRC imaging model represents a document of three different layers: a foreground plane, a mask plane, and a background plane. Each layer is compressed separately using the best type of compression for that data type. The MRC technology for PDF (PDF/A) allows the user to achieve a better file compression without visible degradation of document representation.
Auto: it is the Mixed Raster Content default parameters, if it is necessary. According to the Export scenario, export parameters and parameters of the input image, ABBYY Engine automatically determined whether to use MRC or not.
Always: MRC is always used.
Disable: MRC is not used. MRC technology uses lossy compression algorithm, so some unimportant information from the source image (background texture, scanning garbage, etc.) can be lost. It is recommended to use this constant even if insignificant information from the source image cannot be lost.
Export compression level: the level of compression.
Write links: if checked, it specifies if the hyperlinks must be retained during the export of the recognized text to PDF (PDF/A) format. If this property is FALSE, hyperlinks are exported as text. By default, this property is TRUE.
Write tagged pdf: if checked, it specifies if the recognized text should be exported to tagged PDF. Tagged PDF is a structured PDF that allows to extract the page content. It is useful for various purposes such as the reflow of text and graphics, the conversion to file formats such as HTML and XML, and the accessibility to the visually impaired. This parameter can be set to TRUE only if the Compliance mode - PdfA field is set to None. By default, this property is FALSE.
Empty page detection tab (part of Export):
Define in this tab, which pages should be recognized as "empty" by the empty page recognition.
Remove blank pages: when checked, pages that are considered empty are removed.
Remove blank pages (Expression): expression for blank page removal, e.g., ${blankPageDetectionEnabled[0].value}.
Number of blank pages removed: a drop down menu for genericNumber variables that have been configured previously in the variables section. Returns the number of removed blank pages.
Max alphabet letters: the number entered here defines how many letters can be present on a page to still be considered empty. The default value is 2 (meaning, 2 letters shown on the page -> page is considered empty and will be removed). Value range goes from -1 (feature is turned off) to 100.
Max black percentage: enter here the percentage of black areas that may appear on a page to still be considered empty. The default value is -1 (meaning the feature is turned off by default). Value range goes from -1 to 100.
Max text objects: enter here the maximum number of text objects that may appear on a page to still be considered empty. The default value is 20. The value range goes from -1 ( feature is turned off) to 100.
Need check barcodes: if set to true the page will be checked for barcodes, even if it was considered empty by other criteria. If a barcode is detected, the page will not be considered empty. Default value is false.
Use margins: if checked, the fields below are used to define the margins in between which the check should happen. If the setting is not checked, the page rectangle is determined automatically. Per default this value is set to false.
Left margin: the width of the left margin. Value range is 0 to 300 millimeters. Default value is 0.
Top margin: the width of the top margin. Value range is 0 to 300 millimeters. Default value is 0.
Right margin: the width of the right margin. Value range is 0 to 300 millimeters. Default value is 0.
Bottom margin: the width of the bottom margin. Value range is 0 to 300 millimeters. Default value is 0.
Check other block objects: choose here which other objects should block ABBYY from detecting a page as empty. Possible values are:
RasterPicture
Table
Barcode
Checkmark
CheckmarkGroup
VectorPicture
Separator
SeparatorGroup
AutoAnalysis
Note
More information about the values can be found in the official ABBYY documentation.
Picture compression tab (part of Export):
Enable: if checked, picture compression in PDFs is enabled.
B/W picture format: select the compression mode for B/W picture format:
AUTO
CCITT4
JBIG2
JBIG2Lossless
Color picture format: select the compression mode for color picture format:
Jpeg
Zip
LZW
J2K
Png
Auto
Enable interpolation mode: select if interpolation mode is activated. Possible values are:
AUTO
YES
NO
Enable sharpen filter: if checked, sharpen filter is activated.
Gray picture format: select the compression mode for gray picture format:
Jpeg
Zip
LZW
J2K
Png
Auto
More Formats tab:
Assign formats to previously configured variables here. Supported formats are:
PDF: Portable Document Format. Used for electronic publishing or print.
PDF_A: a format for long time preservation. Some features that are supported by PDF are not supported in PDF_A since they are not suitable for archiving. Font linking and encryption are examples for this.
RTF: a proprietary document file format. RTF stands for Rich Text Format. It can be read by most word processors.
TXT: a text file format, commonly used to store information due to its simplicity.
DOCX: the default Microsoft Word document file format.
XLS: an older Microsoft Excel format, used for Office 97-2003 documents.
XLSX: a newer Micorsoft Excel format, used since Office 2007.
PPTX: a Microsoft Power Point format.
XML: a markup language and file format. It is commonly used to store aribtrary data. Transmitting and reconstructing is possible, too.
ODT: the OpenDocument format.
TXT_IN_VARIABLE: writes the OCR result into a Generic_Text variable. A possible use could be for zonal OCR, to use a name in a following process.
EPUB: Short for electronic publication. Popular file format used for storing eBooks and other types of content.
ALTO: Analyzed Layout and Text Object. A file format that is based on XML. It was created to describe the layout and text from a book or newspaper.
FB2: Fiction Book 2.0. An eBook file that contains the structure of the eBook. It is based on the XML format and contains special tags for describing each element of the book. It was developed primarily for fictional writings and literature, but is not limited to these.
XPS: Open specification for a page description language and a fixed-document format.
HTML: Hypertext Markup Language, the foundation of a website.
Content Info tab:
Here pdf meta data can be entered. All fields support expression language support, i.e., ${startUser.username} and ${myTextVariable[0].value}.
Author: the author of the document. Can be set tot the user's name. Per default the value is an empty string.
Creator: the creator of the document. Does not take into account the creator attribute of the original PDF document. The default value is ABBYY FineReader Engine 12.
Producer: the producer of the content. Per default this is an empty string. If the original PDF has a producer attribute specified, this value is used.
Title: the title of the document. Per default this is an empty string. If the original PDF has a title attribute specified, this value is used.
Subject: the topic of the document. Per default this is an empty string. If the original PDF has a subject attribute specified, this value is used.
Keywords: keywords for this content. Per default this is an empty string. If the original PDF has keyword attributes specified, these values are used.
Abbyy Split Node
"Abbyy split" node splits a PDF file exactly where a barcode is placed. While it executes, the node searches for a barcode. Once a barcode is recognised, a new file is created.

Drag and drop the icon in the palette and fill in the configuration fields:
Display name: the name of the node to be displayed (required).
Description: the description of the node (required).
Input xml ocr document: XML document variable for the input.
Input pdf document: pdf document variable for the input.
Cropped: if checked, the crop is enabled:
Units: cropped barcode area units in MILLIMETERS or PIXELS.
X: X is the horizontal coordinate.
Y: Y is the vertical coordinate.
Width: width of the cropped area.
Height: height of the cropped area.
Barcode in output document name: if checked, the barcode for the output document name is enabled.
Barcode prefix: name prefix of document.
Barcode suffix: name suffix of document.
Barcode pattern matches: a regular expression with whom barcodes match.
Output document name: output name of document (required).
Remove cover: to remove blank pages containing a barcode. Enter a boolean value in the empty field (required).
Barcodes output variable: output variable with barcodes.
Verbose barcodes output variable: the page number and its relative barcode.
Split documents output variable: the variable of a split document.
Instance in error on fail: If checked, when an exception occurs, the process is closed in ERROR.
Response status variable: a variable which indicates the response status of the node. A response status can be:
SUCCESS.
ABBY_SPLIT_ERROR.
Error message variable: the variable which indicates where to store the error message and the stack trace.
Number of retries: the number of attempts after which a node is stored in ERROR.
Retry counter variable name: a variable which indicates where to store the data related to the retries.
Retry wait interval: the amount of time after which a new attempt to run a node is performed.
Tesseract node family
The node that is part of the tesseract family is:
Tesseract OCR Node
This node provides the character recognition from an image using the Tesseract OCR open source engine. To enable this feature, go to Configuration tool -> Tesseract -> Configuration, then check the Enabled box. For further details, refer to the installation and configuration manual.
Note
Tessaract is not part of the Genius Server, thus, install it separately. Tesseract supported version is 3.02.02.

Drag and drop the icon in the palette and fill in the configuration fields:
Display name: the name of the node to be displayed (required).
Description: the description of the node (required).
Language: the language recognized by the OCR engine. Only one language value can be set here. Specify the language code by using first two letters for English en, German de, and Italian it. Other languages use the three character configuration from the traineddata, e.g. bel. (required)
Additional commands: enter command line commands for the Tesseract OCR engine here. For example "-l eng+deu" allows to use English and German together for recognition.
Note
Note that if additonal commands are used which allow for multiple language recognition, that the corresponding language pack must also be installed.
Input documents: input(s) of a document variable (the source image for OCR recognition, e.g. ${ImageForRecognition[0].value}) (required). Supported format: BMP, PNM, PNG, JFIF, JPEG and TIFF.
Output documents: output(s) of a document variable (e.g. outputDoc, a DOCUMENT_OBJECT variable) (required).
Output file types: the type of the file. It can be:
PDF.
TXT.
Keep the original filename: if checked, the file name is not changed.
Output documents author: output document author.
Output documents title: output document title.
Output documents subject: output document subject.
Instance in error on fail: If checked, when an exception occurs, the process is closed in ERROR.
Response status variable: a variable which indicates the response status of the node. A response status can be:
SUCCESS.
GENERIC_ERROR.
Error message variable: the variable which indicates where to store the error message and the stack trace.
Number of retries: the number of attempts after which a node is stored in ERROR.
Retry counter variable name: a variable which indicates where to store the data related to the retries.
Retry wait interval: the amount of time after which a new attempt to run a node is performed.
Note
The node is not visible if the feature is not enabled from Configuration tool.
Barcode Nodes Family
This group is for the barcode recognition.
Nodes that are part of the Barcode family are:
Barcode analyzer node
"Barcode analyzer" node allows the barcode recognition and the storage of the output in a variable.

Drag and drop the icon in the palette and fill in the configuration fields:
Display name: the name of the node to be displayed (required).
Description: the description of the node (required).
Input images: input images (DOCUMENT_OBJECT variable, e.g. ${inputdoc[0].value} or ${inputdoc}) (required). Supported format: JPG, PNG and TIFF.
Cropped: if enabled, it is possible to define an area of the document.
X (Pixel): it is the horizontal coordinate of the rectangular region to be defined. The origin of the coordinate is the left top corner of the document.
Y (Pixel): it is the vertical coordinate of the rectangular region to be defined. The origin of the coordinate is the left top corner of the document.
Width (Pixel): the width of the rectangular region to be defined. The origin of the coordinate is the left top corner of the document.
Height (Pixel): the height of the rectangular region to be defined. The origin of the coordinate is the left top corner of the document.
Barcode output variable: a string variable that contains a barcode (GENERIC_TEXT variable) (required).
Instance in error on fail: If checked, when an exception occurs, the process is closed in ERROR.
Response status variable: a variable that indicates the response status of the node. A response status can be:
SUCCESS.
GENERIC_ERROR.
Error message variable: the variable that indicates where to store the error message and the stack trace.
Number of retries: the number of attempts after which a node is stored in ERROR.
Retry counter variable name: a variable which indicates where to store the data related to the retries.
Retry wait interval: the amount of time after which a new attempt to run a node is performed.
Zxing split node
"Zxing split" node splits a pdf where a barcode is placed. While it is executing, the node searches for a barcode. Once a barcode is recognised, a new file is created.

Drag and drop the icon in the palette and fill in the configuration fields:
Display name: the name of the node to be displayed (required).
Description: the description of the node (required).
Input pdf document: a DOCUMENT_OBJECT variable that contains the input file to convert (e.g. ${inputfile[0].value}) (required). Supported format: PDF, JPG, PNG, TIFF, UPC-a, UPC-E, EAN-8, Code 93, Code 128, QR Code, Data matrix and Aztec.
Cropped: if enabled, it is possible to define an area of the document.
X (Pixel): it is the horizontal coordinate of the rectangular region to be defined. The origin of the coordinate is the left top corner of the document.
Y (Pixel): it is the vertical coordinate of the rectangular region to be defined. The origin of the coordinate is the left top corner of the document.
Width (Pixel): the width of the rectangular region to be defined. The origin of the coordinate is the left top corner of the document.
Height (Pixel): the height of the rectangular region to be defined. The origin of the coordinate is the left top corner of the document.
Barcode in output document name: if checked, the barcode is entered in the name of the output document.
Barcode prefix: a prefix that is shown in the output document name.
Barcode suffix: a suffix that is shown in the output document name.
Barcode regex: input here a regex for splitting based on the value of the barcode. As an example:
GB.*could be an expression to consider only barcodes for splitting hte document starting with "GB".Output document name: the name of the output document (required).
Remove cover: entering true or a string variable the cover page is removed (required).
Split on same barcode: if this setting is set to true, a scanned PDF is split after every barcode. The output files are grouped by filenames matching the barcodes, e.g., Barcode-1-Page-1, Barcode-1-Page-2, Barcode-2-Page-1 etc. If set to false, multipage PDF files with the same barcode are created, e.g., one file containing the pages with barcode one, and one file containing all pages with barcode two. Per default, this setting is set to false.
Barcode output variable: a string variable that contains a barcode.
Verbose barcode output variable: a string variable that contains the page number and its relative barcode.
Split documents output variable: a DOCUMENT_OBJECT variable that contains the split output document in pdf format (required).
Split documents jpg output variable: a DOCUMENT_OBJECT variable that contains the split output document in jpg format (required).
Dms Nodes Family
This group of nodes allows users to manage documents and folders in the Data Management System (DMS).
Nodes that are part of the DMS family are:
Dms create document node
"Dms create document" node creates a document in the Data Management System.

Drag and drop the icon in the palette and fill in the configuration fields:
Display name: the name of the node to be displayed (required).
Description: the description of the node (required).
Placeholder: if checked, it enables the content filling (Dms fill placeholder node).
Content: the document to store, it is a document variable (DOCUMENT_OBJECT), e.g. ${document[0].value}. For further details, refer to Placeholder and Expression Language section (required). If a placeholder is enabled, the content is not required.
Attachments: documents attached to the content. A DOCUMENT_OBJECT variable, e.g. ${attachments}.
Document creation user: document creation user ID, e.g. ${startUser.id}. For further details, refer to Placeholder and Expression Language section (required).
Document name: name displayed in the document list and in the Information tab (DMS section). The name must be unique (required).
Target folder: folder path, e.g. Root Folder/DOC. It requires the previously creation of the the folder (required).
Documents to link attribute name: attribute name related to one or more documents in DMS, which are linked to the new document (bidirectional link). A GENERIC_TEXT variable, e.g. ${attribute} with only one value.
Documents to link attribute values: attribute value related to one or more documents in DMS, which are linked to the new document (bidirectional link). A GENERIC_TEXT variable, e.g. ${attributesvalue} with only one value.
Documents to link attribute types: attribute type related to one or more documents in DMS, which are linked to the new document (bidirectional link). It can be:
GENERIC_TEXT: a text or a string.
GENERIC_BOOLEAN: a boolean value.
GENERIC_DATE: a date.
GENERIC_DOUBLE: a decimal number.
GENERIC_LONG: an integer number.
ACL strategy: where to apply ACL. ACL strategy is of three kinds:
no_acl: the content is Public
inherit_acl_from_folder: the content inherits ACL from the folder where it has been added.
custom: the ACL is applied to the selected custom(s).
Document category: the document category name, e.g. Manuals.
Instance in error on fail: If checked, when an exception occurs, the process is closed in ERROR.
Response status variable: a variable which indicates the response status of the node. A response status can be:
SUCCESS.
GENERIC_ERROR.
CREATE_ERROR.
Error message variable: the variable which indicates where to store the error message and the stack trace.
Number of retries: the number of attempts after which a node is stored in ERROR.
Retry counter variable name: a variable which indicates where to store the data related to the retries.
Retry wait interval: the amount of time after which a new attempt to run a node is performed.
Attribute mapping tab: it assigns a BPM variable value (e.g. GENERIC_TEXT, GENERIC_DATE) to a document category attribute.
Identity ACL tab: enter the identity name or a regular expression to identify the custom, then select the action(s) he can perform.
Actor ACL: from the dropdown list Actors, select the actor(s) to add and check the action(s) he can performs.
Warning
if a document has a slash (/) in its name it could be misunderstood as path's sign, so in the document path set <literal:start> before the document's name and <literal:end> after the document's name (e.g. Root folder/device/<literal:start>check/document<literal:end>)
Note
if the attribute type is GENERIC_DATE, enter an expression to obtain a date as result (e.g. ${my:dateFormat(variable_name[0].value, 'dd/MM/yyyy’)}).
Dms delete document node
"Dms delete document" node removes a document in the Data Management System.

Drag and drop the icon in the palette and fill in the configuration fields:
Display name: the name of the node to be displayed (required).
Description: the description of the node (required).
User: document deletion user ID, e.g. ${startUser.id}. For further details, refer to Placeholder and Expression Language section (required).
Target folder: folder path, e.g. Root Folder/DOC. It requires the previously creation of the folder (required).
Document name: name of the document, which is about to be updated. A document variable (DOCUMENT_OBJECT), e.g. ${document[0].value} can be used (required).
Instance in error on fail: If checked, when an exception occurs, the process is closed in ERROR.
Response status variable: a variable which indicates the response status of the node. A response status can be:
SUCCESS.
GENERIC_ERROR.
DELETE_ERROR.
Error message variable: the variable which indicates where to store the error message and the stack trace.
Number of retries: the number of attempts after which a node is stored in ERROR.
Retry counter variable name: a variable which indicates where to store the data related to the retries.
Retry wait interval: the amount of time after which a new attempt to run a node is performed.
Warning
if a document has a slash (/) in its name it could be misunderstood as path's sign, so in the document path set <literal:start> before the document's name and <literal:end> after the document's name (e.g. Root folder/device/<literal:start>check/document<literal:end>)
Dms update document node
"Dms update document" node updates a document in the Data Management System.

Drag and drop the icon in the palette and fill in the configuration fields:
Display name: the name of the node to be displayed (required).
Description: the description of the node (required).
User: user ID, e.g. ${startUser.id}. For further details, refer to Placeholder and Expression Language section (required).
Target folder: folder path, e.g. Root Folder/DOC. It requires the previously creation of the folder (required).
Document name: name of the document, which is about to be updated (required).
Create document if not exists: if checked, and if the document does not exist, it is created.
Content: document to store. A document variable (DOCUMENT_OBJECT), e.g. ${document[0].value}. For further details, refer to Placeholder and Expression Language section.
Attachments strategy: actions adopted for attachments. They can be of two kinds:
add: attachments are added, if the document name is different.
add_or_update: attachments are added (if the document name is different) or updated (if the document name is the same ).
replace: preexisting attachments are replaced or removed, if attachments are not specified.
Attachments: documents attached to the content. A DOCUMENT_OBJECT variable, e.g. ${attachments}.
Links strategy: action adopted for links. They can be of two kinds:
add: attachments are added, if the document name is different.
add_or_update: links are added (different link name) or updated (the same link name).
replace: preexisting links are replaced or removed, if links are not specified.
Documents to link attribute name: attribute name related to one or more documents in DMS, which are linked to the new document (bidirectional link). A GENERIC_TEXT variable, e.g. ${attribute} with only one value.
Documents to link attribute values: attribute value related to one or more documents in DMS, which are linked to the new document (bidirectional link). A GENERIC_TEXT variable, e.g. ${attributesvalue} with only one value.
Documents to link attribute type: a type of attribute related to one or more documents in DMS, which are linked to the new document (bidirectional link). It can be of four kinds:
GENERIC_TEXT: a text or a string.
GENERIC_BOOLEAN: a boolean value.
GENERIC_DATE: a date.
GENERIC_DOUBLE: a decimal number.
GENERIC_LONG: an integer number.
Attributes strategy: the action adopted for attributes. They can be of two kinds:
add_or_update: attributes are added (different attribute names) or updated (the same attribute name).
replace: preexisting attachments are replaced or removed, if attachments are not specified.
ACL strategy: where to apply ACL. ACL strategy is of three kinds:
preserve_acl: the content preserves the preexisting ACL.
no_acl: the content is Public.
inherit_acl_from_folder: the content inherits ACL from folder where it has been added.
custom: the ACL is applied to the selected custom(s).
Document category: document category name, e.g. Manuals.
Instance in error on fail: If checked, when an exception occurs, the process is closed in ERROR.
Response status variable: a variable which indicates the response status of the node. A response status can be:
SUCCESS.
GENERIC_ERROR.
UPDATE_ERROR.
Error message variable: the variable which indicates where to store the error message and the stack trace.
Number of retries: the number of attempts after which a node is stored in ERROR.
Retry counter variable name: a variable which indicates where to store the data related to the retries.
Retry wait interval: the amount of time after which a new attempt to run a node is performed.
Attribute mapping tab: it assigns a BPM variable value (e.g. GENERIC_TEXT, GENERIC_DATE) to a document category attribute.
Identity ACL tab: enter the identity name or a regular expression to identify the custom, then select the action(s) he can perform.
Actor ACL tab: from the dropdown list actors, select the actor(s) to add and check the action(s) he can perform (create, read, update, delete, and/or manage ACL).
Warning
if a document has a slash (/) in its name it could be misunderstood as path's sign, so in the document path set <literal:start> before the document's name and <literal:end> after the document's name (e.g. Root folder/device/<literal:start>check/document<literal:end>)
Note
if the attribute type is GENERIC_DATE, enter an expression to obtain a date as result (e.g. ${my:dateFormat(variable_name[0].value, 'dd/MM/yyyy’)}).
Dms exists document node
"Dms exists document" node is a node used to verify whether a document is stored in the Document Management System or not.

Drag and drop the icon in the palette and fill in the configuration fields:
Display name: the name of the node to be displayed (required).
Description: the description of the node (required).
User: the user ID is used to read the document file, e.g. ${startUser.id}. For further details, refer to Placeholder and Expression Language section.
Document path: document path with the relative file name and extension (e.g. Root folder/Document.docx) (required).
Output exists: if the document exists the variable value is TRUE, otherwise it is FALSE (required).
Instance in error on fail: If checked, when an exception occurs, the process is closed in ERROR.
Response status variable: a variable which indicates the response status of the node. A response status can be:
SUCCESS.
GENERIC_ERROR.
Error message variable: the variable which indicates where to store the error message and the stack trace.
Number of retries: the number of attempts after which a node is stored in ERROR.
Retry counter variable name: a variable which indicates where to store the data related to the retries.
Retry wait interval: the amount of time after which a new attempt to run a node is performed.
Warning
if a document has a slash (/) in its name it could be misunderstood as path's sign, so in the document path set <literal:start> before the document's name and <literal:end> after the document's name (e.g. Root folder/device/<literal:start>check/document<literal:end>)
Dms read document node
"Dms read document" node is a node used to read a document in a folder concerning the Document Management System.

Drag and drop the icon in the palette and fill in the configuration fields:
Display name: the name of the node to be displayed (required).
Description: the description of the node (required).
User: the user ID is used to read the document file, e.g. ${startUser.id}. For further details, refer to Placeholder and Expression Language section.
Document path: the document path with the relative file name and extension (e.g. Root folder/Document.docx) (required).
Output file: a DOCUMENT_OBJECT variable that stores the document read (e.g. output_doc_var) (required).
Output file name: the name of an output file (required).
Output attachments: a DOCUMENT_OBJECT variable that stores the document read's attachment (e.g. output_doc_var).
Instance in error on fail: If checked, when an exception occurs, the process is closed in ERROR.
Response status variable: a variable which indicates the response status of the node. A response status can be:
SUCCESS.
GENERIC_ERROR.
READ_ERROR.
Error message variable: the variable which indicates where to store the error message and the stack trace.
Number of retries: the number of attempts after which a node is stored in ERROR.
Retry counter variable name: a variable which indicates where to store the data related to the retries.
Retry wait interval: the amount of time after which a new attempt to run a node is performed.
Note
To enable the reading, publish the document file in DMS.
Warning
if a document has a slash (/) in its name it could be misunderstood as path's sign, so in the document path set <literal:start> before the document's name and <literal:end> after the document's name (e.g. Root folder/device/<literal:start>check/document<literal:end>)
Attribute mapping: it assigns a Document attribute value to a BPM variable (e.g. GENERIC_TEXT, GENERIC_DATE):
Name: name to be entered.
Value: variable value.
Dms fill placeholder node
"DMS fill placeholder" node is used to fill a placeholder defined in the Dms create document node section.

Drag and drop the icon in the palette and fill in the configuration fields:
Display name: the name of the node to be displayed (required).
Description: the description of the node (required).
Content: a DOCUMENT_OBJECT variable e.g. ${document[0].value} or ${document} if the variable stores multiple values (required).
Attachments: the document to be attached. Specify the name of the document object variable (e.g. ${document}). Refer to Placeholder and Expression Language section.
Document creation user: document creation user ID, e.g. ${startUser.id}. For further details, refer to Placeholder and Expression Language section.
Document category name: document category name.
Attribute category name: it attributes a name in the document category to match.
Attribute value: the value of the Document category attribute to match.
Control fields: the variable with one or more boolean values (use a GENERIC_TEXT variable), it is used to control the Attribute value (if true, it adds the value to the placeholder, if false, it skips the filling).
Documents to link attribute name: a name related to one or more documents in DMS, which are linked to the new document (bidirectional link). A GENERIC_TEXT variable, e.g. ${attribute} with only one value.
Documents to link attribute values: a value related to one or more documents in DMS, which are linked to the new document (bidirectional link). A GENERIC_TEXT variable, e.g. ${attributesvalue} with only one value.
Documents to link attribute type: a type of attribute related to one or more documents in DMS, which are linked to the new document (bidirectional link). It can be of four kinds:
GENERIC_TEXT: a text or a string.
GENERIC_BOOLEAN: a boolean value.
GENERIC_DATE: a date.
GENERIC_DOUBLE: a decimal number.
GENERIC_LONG: an integer number.
Instance in error on fail: If checked, when an exception occurs, the process is closed in ERROR.
Response status variable: a variable which indicates the response status of the node. A response status can be:
SUCCESS.
GENERIC_ERROR.
Error message variable: the variable which indicates where to store the error message and the stack trace.
Number of retries: the number of attempts after which a node is stored in ERROR.
Retry counter variable name: a variable which indicates where to store the data related to the retries.
Retry wait interval: the amount of time after which a new attempt to run a node is performed.
Note
if the attribute type is GENERIC_DATE, enter an expression to obtain a date as result (e.g. ${my:dateFormat(variable_name[0].value, 'dd/MM/yyyy’)}).
Dms create folder node
"DMS create folder" node creates a folder in the Data Management System.

Drag and drop the icon in the palette and fill in the configuration fields:
Display name: the name of the node to be displayed (required).
Description: the description of the node (required).
Folder creation user: folder creation user ID, e.g. ${startUser.id}. For further details, refer to Placeholder and Expression Language section (required).
Folder name: name of the folder (required).
Target folder: folder path, e.g. Root Folder/DOC. It requires the previously creation of the folder (required).
Folder category: folder category name, e.g. Folder (required).
ACL strategy: where to apply ACL. ACL strategy is of three kinds:
no_acl: the content is Public.
inherit_acl_from_folder: the content inherits ACL from the folder where it has been added.
custom: the ACL is applied to the selected custom(s).
Ignore existing: it ignores the folder creation if already exists.
Instance in error on fail: If checked, when an exception occurs, the process is closed in ERROR.
Response status variable: a variable which indicates the response status of the node. A response status can be:
SUCCESS.
GENERIC_ERROR.
CREATE_ERROR.
Error message variable: the variable which indicates where to store the error message and the stack trace.
Number of retries: the number of attempts after which a node is stored in ERROR.
Retry counter variable name: a variable which indicates where to store the data related to the retries.
Retry wait interval: the amount of time after which a new attempt to run a node is performed.
Attribute mapping tab: it assigns a BPM variable value (e.g. GENERIC_TEXT, GENERIC_DATE) to a specific folder category attribute.
Identity ACL tab: enter the identity name or a regular expression to identify the custom, then select the action(s) he can perform.
Actor ACL tab: from the dropdown list actors, select the actor(s) to add and check the action(s) he can perform.
Warning
if a document has a slash (/) in its name it could be misunderstood as path's sign, so in the document path set <literal:start> before the document's name and <literal:end> after the document's name (e.g. Root folder/device/<literal:start>check/document<literal:end>)
Note
if the attribute is GENERIC_DATE, enter an expression to obtain a date as result (e.g. ${my:dateFormat(variable_name[0].value, 'dd/MM/yyyy’)}).
Dms exists folder node
"Dms exists folder" node is a node used to verify whether a folder is stored in the Document Management System or not.

Drag and drop the icon in the palette and fill in the configuration fields:
Display name: the name of the node to be displayed (required).
Description: the description of the node (required).
User: the user ID is used to use the folder file, e.g. ${startUser.id}. For further details, refer to Placeholder and Expression Language section.
Folder path: folder path with the relative name (required).
Output exists: if the folder exists the variable value is TRUE, otherwise it is FALSE (required).
Instance in error on fail: If checked, when an exception occurs, the process is closed in ERROR.
Response status variable: a variable which indicates the response status of the node. A response status can be:
SUCCESS.
GENERIC_ERROR.
NOT_FOUND_ERROR.
Error message variable: the variable which indicates where to store the error message and the stack trace.
Number of retries: the number of attempts after which a node is stored in ERROR.
Retry counter variable name: a variable which indicates where to store the data related to the retries.
Retry wait interval: the amount of time after which a new attempt to run a node is performed.
Warning
if a document has a slash (/) in its name it could be misunderstood as path's sign, so in the document path set <literal:start> before the document's name and <literal:end> after the document's name (e.g. Root folder/device/<literal:start>check/document<literal:end>)
Dms get node
"DMS get" node is a node used to retrieve one document or one folder stored in the DMS.

Drag and drop the icon in the palette and fill in the configuration fields:
Display name: the name of the node to be displayed(required).
Description: the description of the node (required).
Node read user: the user who can read links, documents, attachments, etc..
Node path: the path of the node written through a process variable (if dynamic) or through the relative name (if static) (required).
Exist output: if the folder exists the variable value is TRUE, otherwise it is FALSE (required).
Node output: the name of the DMS_NODE variable (required).
Instance in error on fail: If checked, when an exception occurs, the process is closed in ERROR.
Response status variable: a variable which indicates the response status of the node. A response status can be:
SUCCESS.
GENERIC_ERROR.
NOT_FOUND_ERROR.
Error message variable: the variable which indicates where to store the error message and the stack trace.
Number of retries: the number of attempts after which a node is stored in ERROR.
Retry counter variable name: a variable which indicates where to store the data related to the retries.
Retry wait interval: the amount of time after which a new attempt to run a node is performed.
Warning
if a document has a slash (/) in its name it could be misunderstood as path's sign, so in the document path set <literal:start> before the document's name and <literal:end> after the document's name (e.g. Root folder/device/<literal:start>check/document<literal:end>)
Dms search node
"DMS search" nodes is a node used to retrieve one or more documents and/or folders stored in the DMS.

Drag and drop the icon in the palette and fill in the configuration fields:
Display name: the name of the node to be displayed (required).
Description: the description of the node (required).
Node read user: the user who is conducting his searches.
Node name filter: the filter to be applied on the name of the node (required).
Name filter strategy: four different strategies to be applied on the filter. Select one of the strategies:
equal: it is case sensitive, and the result must be the same as the research.
equal_ignore_case: it is not case sensitive, and the result must be the same as the research.
like: it is case sensitive, and the result must contain at least what has been written in the filter.
like_ignore_case: it not is case sensitive, and the result must contain at least what has been written in the filter.
Node category filter: the filter to be applied on the category name (required).
Page size: number of results to be displayed on each page (required).
Page number: the number of the page to be open (required).
Total results output: total number of results (required).
Node output: the name of the DMS_NODE variable (required).
Instance in error on fail: If checked, when an exception occurs, the process is closed in ERROR.
Response status variable: a variable which indicates the response status of the node. A response status can be:
SUCCESS.
GENERIC_ERROR.
NOT_FOUND_ERROR.
Error message variable: the variable which indicates where to store the error message and the stack trace.
Number of retries: the number of attempts after which a node is stored in ERROR.
Retry counter variable name: a variable which indicates where to store the data related to the retries.
Retry wait interval: the amount of time after which a new attempt to run a node is performed.
Attribute mapping: filters to be applied on the attribute values:
Name: name of the attribute.
Value: value to be applied on the attribute filter.
Note
if the attribute is GENERIC_DATE, enter an expression to obtain a date as result (e.g. ${my:dateFormat(variable_name[0].value, 'dd/MM/yyyy’)}).
Hint
Usage example:
Participating Character(s): Stan Still and Sandy Fiction.
Nodes in use: DMS exists document node, DMS update document node and DMS get node.
Stan Still starts the BPM process sending his identity card, his CV and his health insurance. Automatically the BPM process checks if documents already exist, updates the existing documents to the latest version and shows them to Sandy Fiction.
Documentum Nodes Family
Note
To use Documentum nodes, install the Genius Documentum connector, a distinct piece of software not included in the Genius Server.
The nodes that are part of the Documentum family are:
Documentum create document node
"Documentum create document" node is intended to create a document in Documentum DMS system. Through this node, users can move the document and the corresponding metadata in order to be mapped in Documentum document category.

Drag and drop the icon in the palette and fill in the configuration fields:
Display name: the name of the node to be displayed (required).
Description: the description of the node (required).
Placeholder: if checked, it enables the content filling.
Content: document to store, it is a document variable (DOCUMENT_OBJECT), e.g. ${document[0].value}. For further details, refer to placeholder and expression language(required). If a placeholder is enabled, the content is not required.
Content type: folder category (required).
Document creation user: the user who has created the document (required).
Document name: name of the document (required).
Keep the original file extension: if checked, the file extension is not changed.
Keep the original filename: if checked, the file name is not changed.
Target folder: folder path, e.g. Root Folder/DOC. It requires the previously creation of the folder (required).
Document category: the name of the document category, e.g. Manuals (required).
Repository: Documentum repository name.
Document id: ID and identification number of the created document.
Instance in error on fail: if checked, it allows the exception management.
Response status variable name: a variable which indicates where to store the response status. It can be:
SUCCESS.
GENERIC_ERROR.
CREATE_ERROR.
Exception message variable name: the location where to store the error message.
Attribute mapping tab: it assigns a BPM variable value (e.g. GENERIC_TEXT, GENERIC_DATE) to a document category attribute:
Name: name to be entered.
Type: variable kind, (e.g. GENERIC_TEXT, GENERIC_DATE).
Value: variable value.
Documentum delete document node
"Documentum delete document" node is intended to delete a document in Documentum DMS system. The document can be identify by ID or by path.

Drag and drop the icon in the palette and fill in the configuration fields:
Display name: the name of the node to be displayed (required).
Description: the description of the node (required).
Document deletion user: the user who has deleted the document (required).
Delete by document id: if checked, the user can delete the document entering the document ID in the field below.
Document path: the path of the document to be deleted (required).
Document id: the ID of the document to be deleted (required).
Instance in error on fail: if checked, it allows the exception management.
Response status variable name: a variable which indicates where to store the response status. It can be:
SUCCESS.
GENERIC_ERROR.
DELETE_ERROR.
Exception message variable name: the location where to store the error message.
Documentum update document node
"Documentum update document" node is intended to update a document in Documentum DMS system. The document can be identify by ID or by the path.

Drag and drop the icon in the palette and fill in the configuration fields:
Display name: the name of the node to be displayed (required).
Description: the description of the node (required).
Update user: the user who has updated the document (required).
Update document name: if checked, it allows to enter the name of the update document in the following field.
Document name: the name of the update document.
Keep the original file extension: if checked, the file extension in not changed.
Keep the original filename: if checked, the file name in not changed.
Update by id: if checked, the user can update the document entering the document ID in the field below.
Document ID: the ID of the document to be updated (required).
Document path: the path of the document to be updated (required).
Updatable content: if checked, it allows to update the content.
Content: the document to store, it is a document variable (DOCUMENT_OBJECT), e.g. ${document[0].value}. For further details, refer to Placeholder and expression language. If a placeholder is enabled, the content is not required.
Content type: the folder category.
Repository: Documentum repository name.
Instance in error on fail: if checked, it allows the exception management.
Response status variable name: a variable which indicates where to store the response status. It can be:
SUCCESS.
GENERIC_ERROR.
UPDATE_ERROR
Exception message variable name: where to store the error message.
Attribute mapping tab: it assigns a BPM variable value (e.g. GENERIC_TEXT, GENERIC_DATE) to a document category attribute:
Name: name to be entered.
Type: variable kind, (e.g. GENERIC_TEXT, GENERIC_DATE).
Value: variable value.
Documentum create folder node
"Documentum create folder" node is intended to create a folder in Documentum DMS system.

Drag and drop the icon in the palette and fill in the configuration fields:
Display name: the name of the node to be displayed (required).
Description: the description of the node (required).
Folder creation user: the user who has created the folder (required).
Folder name: the name of the folder (required).
Target folder: if checked, the file extension is not changed (required).
Folder category: folder category name.
Ignoring existing: if checked, it allows to skip the error whether the folder already exists.
Repository: Documentum repository name.
Folder id: ID and identification number of the folder.
Instance on error fail: if checked, it allows the exception management.
Response status variable name: a variable, which indicates where to store the response status. It can be:
SUCCESS.
GENERIC_ERROR.
CREATE_ERROR.
Exception message variable name: location where to store the error message.
Attribute mapping tab: it assigns a BPM variable value (e.g. GENERIC_TEXT, GENERIC_DATE) to a document category attribute:
Name: name to be entered.
Value: variable value.
Documentum fill placeholder node
"Documentum fill placeholder" node is intended to create a document in Documentum DMS system. Through this node, users can move metadata in order to be mapped in Documentum document category. The content of the document cannot be created, only metadata can be created.

Drag and drop the icon in the palette and fill in the configuration fields:
Display name: the name of the node to be displayed (required).
Description: the description of the node (required).
Update user: the user who is updating the document (required).
Repository: Documentum repository name.
Fill by document ID: if checked, the user can fill the document entering the placeholder ID in the field below.
Document path: path of the document (required).
Document id: ID of the document (required).
Content: file to store, it is a document variable (DOCUMENT_OBJECT), e.g. ${document[0].value}. For further details, refer to expression language.
Content type: folder category (required).
Instance in error on fail: if checked, it allows the exception management.
Response status variable name: a variable which indicates where to store the response status. It can be:
SUCCESS.
GENERIC_ERROR.
UPDATE_ERROR.
Exception message variable name: location where to store the error message.
Documentum read document node
"Documentum read document" node is intended to read a document from Documentum DMS system. Through this node, users can read the document and the corresponding metadata to be mapped in BPM process.

Drag and drop the icon in the palette and fill in the configuration fields:
Display name: the name of the node to be displayed (required).
Description: the description of the node (required).
Output file variable: the output variable where the file is stored (required).
Document read user: the user who has read the document.
Document name: name of the updated document.
Read by document id: if checked, the user can read the document entering the document ID in the field below.
Document path: the path of the document to be deleted (required).
Document id: the ID of the document to be deleted (required).
Instance in error on fail: if checked, it allows the exception management.
Response status variable name: a variable, which indicates where to store the response status. It can be:
SUCCESS.
GENERIC_ERROR.
READ_ERROR.
Exception message variable name: location where to store the error message.
Attribute mapping tab: it assigns a BPM variable value (e.g. GENERIC_TEXT, GENERIC_DATE) to a document category attribute:
Name: name to be entered.
Value: variable value.
Documentum search document id node
"Documentum search document id" node is intended to search a document from Documentum DMS system. If the user decides to use DQL (Documentum Query Language), refer to Documentum documentation.

Drag and drop the icon in the palette and fill in the configuration fields:
Display name: the name of the node to be displayed (required).
Description: the description of the node (required).
Repository: Documentum repository name.
Document search user: the user who is searching the document.
Fields: fields the users are searching.
Type: document type (required).
Where: the condition to be satisfied (required).
Document id output variable: ID output variable of the document (required).
Instance in error on fail: if checked, it allows the exception management.
Response status variable name: a variable which indicates where to store the response status. It can be:
SUCCESS.
GENERIC_ERROR.
DQL_ERROR
Exception message variable name: location where to store the error message.
Sharepoint Nodes Family
Sharepoint is compatible with 2010 and 2013 version. Before using these nodes, configure them in Genius Configuration tool (for further details, refer to [Advanced] Sharepoint Connector (Conf)). For each interaction, specify a user and his password.
The nodes that are part of the Sharepoint family are:
Sharepoint Create Document Node
"Sharepoint create document" is intended to create a document in a Sharepoint system. Through this node, user can create the document and the corresponding metadata.

Drag and drop the icon in the palette and fill in the configuration fields:
Display name: the name of the node to be displayed (required).
Description: the description of the node (required).
Sharepoint connector: from the dropdown list, select the Sharepoint connector that has been already configured in the Configuration tool (required).
Document creator domain: domain of the creator of the document.
Document creator username: username of the creator of the document (required).
Password is an expression: if checked, the password is an expression, so fill in the field below.
Document creator password: password of the creator (required).
Document creator password expression: password expression of the document creator (required).
Content file: file to store, it is a document variable (DOCUMENT_OBJECT), e.g. ${document[0].value}. For further details, refer to expression language (required).
Target folder: the folder name where to store the document (required).
Document name: the name of the document (required).
Keep the original file extension: if checked, the file extension is not changed.
Keep the original filename: if checked, the file name is not changed.
Overwrite document: if checked, the document is overwritten by the new version.
Sharepoint document ID: identification number of the document.
Instance in error on fail: If checked, when an exception occurs, the process is closed in ERROR.
Response status variable: a variable which indicates the response status of the node. A response status can be:
SUCCESS.
GENERIC_ERROR.
CREATE_ERROR.
AUTH_ERROR.
Error message variable: the variable which indicates where to store the error message and the stack trace.
Number of retries: the number of attempts after which a node is stored in ERROR.
Retry counter variable name: a variable which indicates where to store the data related to the retries.
Retry wait interval: the amount of time after which a new attempt to run a node is performed.
Attribute mapping tab: it assigns a BPM variable value (e.g. GENERIC_TEXT, GENERIC_DATE) to a document category attribute.
Name: name to be entered.
Value: variable value.
Sharepoint Create Folder Node
"Sharepoint create folder" node is intended to create folder in Sharepoint system.

Drag and drop the icon in the palette and fill in the configuration fields:
Display name: the name of the node to be displayed (required).
Description: the description of the node (required).
Sharepoint provider: from the dropdown list, select the Sharepoint provider that has been already configured in the Configuration tool (required).
Override site: Sharepoint site manually defines the provider site to be overridden.
Folder creator domain: domain of the creator of the folder.
Folder creator username: the username of the creator of the folder (required).
Password is an expression: if checked, the password is an expression, so fill in the field below.
Folder creator password: the password of the creator of the folder (required).
Folder creator password expression: password expression of the folder creator.
Target folder: the folder name where to store the document (required).
Folder name: name of the folder (required).
Sharepoint folder ID: identification number of the folder.
Instance in error on fail: If checked, when an exception occurs, the process is closed in ERROR.
Response status variable: a variable which indicates the response status of the node. A response status can be:
SUCCESS.
GENERIC_ERROR.
CREATE_ERROR.
AUTH_ERROR.
Error message variable: the variable which indicates where to store the error message and the stack trace.
Number of retries: the number of attempts after which a node is stored in ERROR.
Retry counter variable name: a variable which indicates where to store the data related to the retries.
Retry wait interval: the amount of time after which a new attempt to run a node is performed.
Google Nodes Family
The nodes that are part of the Google family are:
Before using these nodes, configure them in Genius Configuration tool (for further details, refet to [Advanced] Google Connector (Conf)).
Google Drive Dreate Document Node
The node "Google drive create document" is intended to create a document in the Google Drive system. Through this node, user can create the document and the corresponding metadata.

Drag and drop the icon in the palette and fill in the configuration fields:
Display name: the name of the node to be displayed (required).
Description: the description of the node (required).
Google drive connector: from the dropdown list, select the Google drive connector that has been already configured in the Configuration tool (required).
Document creator username: username of the creator of the document.
Content file: file to store. It is a document variable (DOCUMENT_OBJECT), e.g. ${document[0].value}. For further details, refer to expression language (required).
Target folder is ID: if checked, the identification number can be entered in the Target folder field.
Target folder: the name or identification number of the folder where to store the document (required).
Document name: the name of the document (required).
Keep original file extension: if checked the file extension is not changed.
Keep original file name: if checked, the file name is not changed.
Overwrite document: if checked, the document is overwritten by the new version.
Google drive document ID: identification number of the document in the Google drive system.
Instance in error on fail: If checked, when an exception occurs, the process is closed in ERROR.
Response status variable: a variable which indicates the response status of the node. A response status can be:
SUCCESS
GENERIC_ERROR
CREATE_ERROR
AUTH_ERROR
Error message variable: the variable which indicates where to store the error message and the stack trace.
Number of retries: the number of attempts after which a node is stored in ERROR.
Retry counter variable name: a variable which indicates where to store the data related to the retries.
Retry wait interval: the amount of time after which a new attempt to run a node is performed.
Google Drive Create Folder Node
The node "Google drive create folder" is intended to create a folder in the Google Drive system.

Drag and drop the icon in the palette and fill in the configuration fields:
Display name: the name of the node to be displayed (required).
Description: the description of the node (required).
Google drive provider: from the dropdown list, select the Google drive provider that has been already configured in the configuration tool (required).
Folder creator username: username of the creator of the folder.
Target folder is ID: if checked, the identification number can be entered in the Target folder field.
Target folder: the name or identification number of the folder where to store the document (required).
Folder name: the name of the folder (required).
Google drive folder ID: identification number of the folder in the Google drive system.
Instance in error on fail: If checked, when an exception occurs, the process is closed in ERROR.
Response status variable: a variable which indicates the response status of the node. A response status can be:
SUCCESS
GENERIC_ERROR
CREATE_ERROR
AUTH_ERROR
Error message variable: the variable which indicates where to store the error message and the stack trace.
Number of retries: the number of attempts after which a node is stored in ERROR.
Retry counter variable name: a variable which indicates where to store the data related to the retries.
Retry wait interval: the amount of time after which a new attempt to run a node is performed.
Microsoft 365 Family
This family represents nodes that are used with MS Azure or Sharepoint. The nodes belonging to this family are
Keep in mind, that in order for this nodes to work, an Azure or Sharepoint configuration has to be made beforehand. Refer to [Advanced] Microsoft Providers (Conf) for details.
Microsoft Create Document
Display name: the name of the node to be displayed (required).
Description: the description of the node (required).
Microsoft connector: from the dropdown list, select the Microsoft provider that has been already configured in the configuration tool (required).
Document creator username: username of the document creator.
Content file: file to store. It is a document variable (DOCUMENT_OBJECT), e.g. ${document[0].value}. For further details, refer to expression language (required).
Target folder is ID: if checked, the identification number can be entered in the Target folder field.
Target folder: the name or identification number of the folder where to store the document (required).
Document name: the name of the document (required).
Keep original file extension: if checked the file extension is not changed.
Keep original file name: if checked, the file name is not changed.
Microsoft document ID: identification number of the document in the Microsoft system.
Instance in error on fail: if checked, when an exception occurs, the process is closed in ERROR.
Response status variable: a variable which indicates the response status of the node. A response status can be:
SUCCESS
GENERIC_ERROR
CREATE_ERROR
AUTH_ERROR
Error message variable: the variable which indicates where to store the error message and the stack trace.
Number of retries: the number of attempts after which a node is stored in ERROR.
Retry counter variable name: a variable which indicates where to store the data related to the retries.
Retry wait interval: the amount of time after which a new attempt to run a node is performed.
Microsoft Create Folder
Display name: the name of the node to be displayed (required).
Description: the description of the node (required).
Microsoft connector: from the dropdown list, select the Microsoft provider that has been already configured in the configuration tool (required).
Folder creator username: username of the folder creator.
Target folder is ID: if checked, the identification number can be entered in the Target folder field.
Target folder: the name or identification number of the folder where to store the document (required).
Document name: the name of the document (required).
Keep original file extension: if checked the file extension is not changed.
Keep original file name: if checked, the file name is not changed.
Sharepoint document ID: identification number of the document in the Microsoft sharepoint system.
Instance in error on fail: if checked, when an exception occurs, the process is closed in ERROR.
Response status variable: a variable which indicates the response status of the node. A response status can be:
SUCCESS
GENERIC_ERROR
CREATE_ERROR
AUTH_ERROR
Error message variable: the variable which indicates where to store the error message and the stack trace.
Number of retries: the number of attempts after which a node is stored in ERROR.
Retry counter variable name: a variable which indicates where to store the data related to the retries.
Retry wait interval: the amount of time after which a new attempt to run a node is performed.
Lookup Nodes Family
Group nodes are used to perform searches on DB and LDAP provider.
The nodes that are part of the Lookup family are:
Database lookup node
"Database lookup" node is intended to retrieve a value (or a list of values) from a database column. Select the database provider to use to connect to the target database. The database provider has to be configured in Genius Configuration tool in advance and is usable by more than one node that needs a database interaction.

Drag and drop the icon in the palette and fill in the configuration fields:
Display name: the name of the node to be displayed (required).
Description: the description of the node (required).
Db lookup provider: a selection provider list. A lookup provider needs to be configured in Configuration tool (required).
SQL query: it is the SQL query editor. Users can specify variables inside the query. The result must be a single text value (required).
Test button: press the button to test the query. Once the screen opens, enter the value and press Execute test.
Output variable: GENERIC_TEXT variable which contains the SQL query result.
Instance in error on fail: If checked, when an exception occurs, the process is closed in ERROR.
Response status variable: a variable which indicates the response status of the node. A response status can be:
SUCCESS.
GENERIC_ERROR.
Error message variable: the variable which indicates where to store the error message and the stack trace.
Number of retries: the number of attempts after which a node is stored in ERROR.
Retry counter variable name: a variable which indicates where to store the data related to the retries.
Retry wait interval: the amount of time after which a new attempt to run a node is performed.
LDAP lookup node
"LDAP lookup" node is intended to retrieve a value (or a list of values) from a Ldap/AD repository. Select the Ldap/AD provider to use to connect to the Ldap/AD. This Ldap/AD provider has to be configured in Genius Configuration tool in advance and is usable by more than one node that needs an LDAP/AD interaction.

Drag and drop the icon in the palette and fill in the configuration fields:
Display name: the name of the node to be displayed (required).
Description: the description of the node (required).
Ldap lookup provider: selection provider list. A lookup provider must be configured in Configuration tool (required).
Ldap query: query on AD/LDAP provider. Users can use variables in the query (required).
Field mapper: attribute to return.
Test button: press the button to test the query. Once the screen opens, enter the value and press Execute test.
Output variable: GENERIC_TEXT variable which contains the AD/LDAP query result.
Instance in error on fail: If checked, when an exception occurs, the process is closed in ERROR.
Response status variable: a variable which indicates the response status of the node. A response status can be:
SUCCESS.
GENERIC_ERROR.
Error message variable: the variable which indicates where to store the error message and the stack trace.
Number of retries: the number of attempts after which a node is stored in ERROR.
Retry counter variable name: a variable which indicates where to store the data related to the retries.
Retry wait interval: the amount of time after which a new attempt to run a node is performed.
DB Nodes Family
This node category allows the BPM engine to interact with the Database lookup providers, defined in Configuration tool (for further details, refer to installation and configuration manual, Bpm db lookup provider section).
The node part of the DB family is:
DB Interaction
"Db interaction" node is intended to execute SQL operations in a database table. SQL operations allowed in this node are CREATE, UPDATE, DELETE. SQL SELECT is not permitted in this node, use the lookup node, instead. You have to select the Database provider to use to connect to the target database. This database provider has to be configured in Genius Configuration tool in advance and is usable by more than one node that needs a database interaction.

Drag and drop the icon in the palette and fill in the configuration fields:
Display name: the name of the node to be displayed (required).
Description: the description of the node (required).
DB lookup provider: a selection provider list. A lookup provider needs to be configured in Configuration tool (required).
SQL query: it is the SQL query editor. Users can specify variables inside the query (UPDATE, INSERT, DELETE). The result must be a single text value (required).
Test: button to test the query.
Instance in error on fail: If checked, when an exception occurs, the process is closed in ERROR.
Response status variable: a variable which indicates the response status of the node. A response status can be:
SUCCESS.
GENERIC_ERROR.
Error message variable: the variable which indicates where to store the error message and the stack trace.
Number of retries: the number of attempts after which a node is stored in ERROR.
Retry counter variable name: a variable which indicates where to store the data related to the retries.
Retry wait interval: the amount of time after which a new attempt to run a node is performed.
In the following example, the query executed on the Genius Server database is
UPDATE aut_identity_detail
SET custom_field_0='${replacing_value[0].value}'
WHERE id='${startUser.id}'
and sets a value for a custom field into the identity details table. In particular, the query sets the custom_field_0 value, related to the start user, to the content of the BPM variable replacing_value.
Press the Execute test button to check the query result.
The result of the query above is Rows affected 1, it means that the query has been successfully executed and a row has been updated. A SQL exception is thrown for SQL syntax errors and wrong queries.
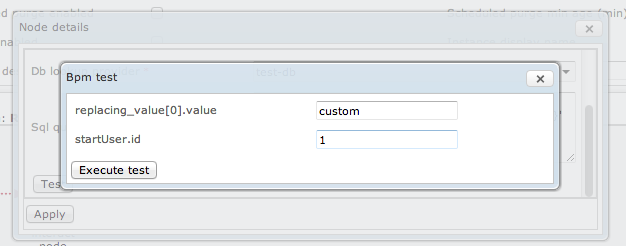
Script Nodes Family
The node part of the Script nodes family is:
Script Node
"Script" node is intended to execute Python or Javascript script. The scripting allows to access BPM variables and performs a deep data manipulation using the power of the script engines.

Drag and drop the icon in the palette and fill in the configuration fields:
Display name: the name of the node to be displayed (required).
Description: the description of the node (required).
Script engines: selection engine list. The selection of the script engine is between Javascript and Python (required).
Script: script editor. Where to enter instructions in the script engines selected above (required).
Test: button to test the script.
Instance in error on fail: If checked, when an exception occurs, the process is closed in ERROR.
Response status variable: a variable which indicates the response status of the node. A response status can be:
SUCCESS.
GENERIC_ERROR.
Error message variable: the variable which indicates where to store the error message and the stack trace.
Number of retries: the number of attempts after which a node is stored in ERROR.
Retry counter variable name: a variable which indicates where to store the data related to the retries.
Retry wait interval: the amount of time after which a new attempt to run a node is performed.
USAGE:
Users can use BPM variables in the text, the BPM variable name must be preceded by the prefix "bpmvar__":
Python: bpmvar__variable[0], bpmvar__variable
Javascript: util.binarySize(bpmvar__path.get(0).value);
It is also possible to write binary content to a document variable BpmELDocumentUtilFunction.writeBinaryContent(token, content)
Extends the Python Library: third PURE Python libraries can be imported copying the library sources into the
<phoenix-base>/ext-lib/python/path.Example: Suds is a lightweight SOAP Python client for consuming Web Services. Suds can be imported by unzipping the
tar.gzpackage (only the content of thesudssubfolder) to the<phoenix-base>/ext-lib/python/directory.The script below uses suds for converting a value from the Euro currency to the US Dollars. The conversion is performed by a conversion rate offered by a Web Service.
import suds

ws=suds.client.Client("http://www.webservicex.net/CurrencyConvertor.asmx?WSDL")

amountVal = int(bpmvar__amount[0].value)
rate =  ws.service.ConversionRate('EUR', 'USD')
dollars = amountVal * rate
bpmvar__output_value_EUR2USD[0].value = str(dollars)
The input
amountvariable is converted in US Dollars and shown in theoutput_value_EUR2USDvariable.
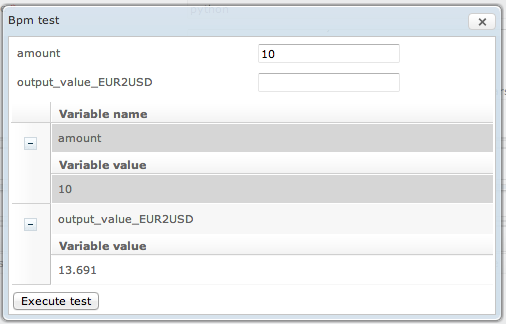
Logging in the python code: Users can directly use the
slf4jjava library on the top of the script.
from org.slf4j import LoggerFactory
log = LoggerFactory.getLogger("python")
...
log.debug("hrPrinterStatus {} for device {}", hrPrinterStatus, device.address)
Example in python:
in this example, the script code below parses an input date with "yyyyMMdd" pattern (e.g. 20140210) to a date expressed in the "dd/MM/yyyy" format (e.g. 10/02/2014).
bpmvar__billing_date[0].value = bpmvar__billing_date[0].value[6:8]+
                                    '/'+bpmvar__billing_date[0].value[4:6]+
                                    '/'+bpmvar__billing_date[0].value[0:4]
Test execution is shown in the images below.
The input date is a string which represents a date in the "yyyyMMdd" format (20140210).
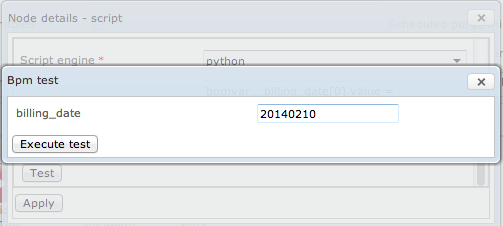
The test result is a string which represents the input date in the "dd/MM/yyyy" format. The new value replaces the original one in the input variable (billing_date).
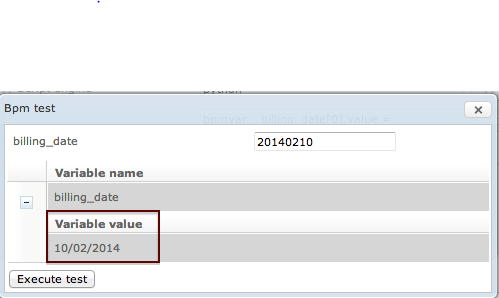
Example in Javascript:
in this example, the script code below extracts a fax number from a GENERIC_TEXT variable (recipient) and copies the result into another BPM text variable named resultFaxNumber.
The input string has the fax number preceded by the text "Fax number:" (e.g. "Fax number: 06123456")
try{

    var recipient = bpmvar__recipient.get(0).value.
    var posBlank = recipient.lastIndexOf(" ").
    bpmvar__resultFaxNumber.get(0).value = recipient.substring(posBlank+1).

} catch(err){
}
Test execution is shown in the image below.
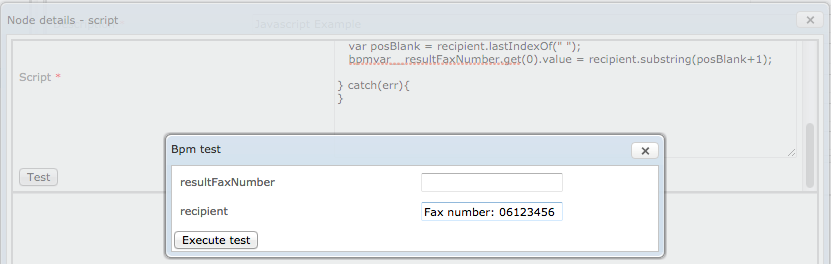
The test result shows the value of the BPM variable resultFaxNumber.
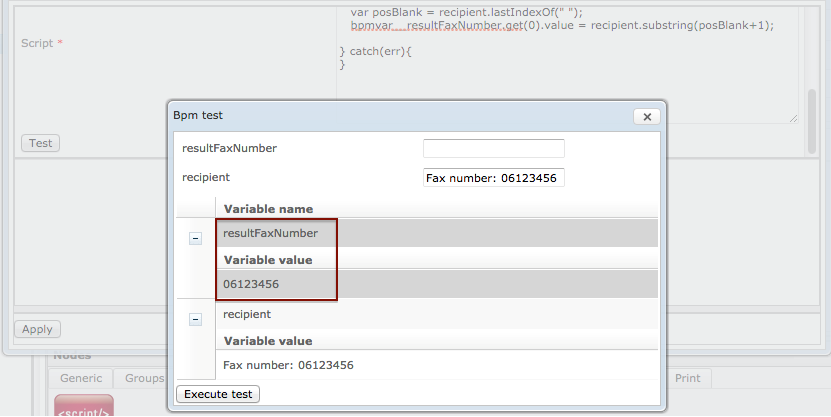
Assigning a Python Array to Multiple Values in a BPM Variable
To assign a Python array to multiple values of a BPM variable, a loop and the .add() operation can be used.
The variables expect strings as input, so integers have to be converted to strings, using str(num). For example:
pynumber = [1, 2, 3, 4]
pytext = ['apple', 'pea', 'banana', 'melon']

bpmvarobj__number.clear()
for num in pynumber:
    bpmvarobj__number.add(str(num))

bpmvarobj__text.clear()
for t in pytext:
    bpmvarobj__text.add(str(t))
Metafile Nodes Family
Nodes that are part of the Metafile family are:
Create Metafile Node
"Create metafile" node is intended to create a file (XML, TXT, CSV etc) with some values coming from BPM variables. Through this node, users can easily design the file structure and format expected by a third party system. To write the generated file in a physical location, use another node, for example the folder node.

Drag and drop the icon in the palette and fill in the configuration fields:
Display name: the name of the node to be displayed (required).
Description: the description of the node (required).
File name: the name of the file (required).
File extension: the extension of the file such as TXT, HTML, XML (required).
File content: text editor, where the content of the file is written (required). Press Change content to write the text.
Output variable: a DOCUMENT_OBJECT variable which contains the file document.
Instance in error on fail: If checked, when an exception occurs, the process is closed in ERROR.
Response status variable: a variable which indicates the response status of the node. A response status can be:
SUCCESS.
GENERIC_ERROR.
CREATE_ERROR.
Error message variable: the variable which indicates where to store the error message and the stack trace.
Number of retries: the number of attempts after which a node is stored in ERROR.
Retry counter variable name: a variable which indicates where to store the data related to the retries.
Retry wait interval: the amount of time after which a new attempt to run a node is performed.
Sap Document Creator Node
"Sap document creator" node can extract information from a Sap output file or text file and can generate a PDF document, based on a JasperReports template. Besides the file, also an expression language (EL) value (e.g. ${startUser.username}, refer to Placeholder and Expression Language section) can be added to the final document, specifying a parameter with the placeholder (e.g. startUser.username) into the Jasper template. BPM variables, included in a workflow, can store the content from parameters defined in the template.

Drag and drop the icon in the palette and fill in the configuration fields:
Display name: the name of the node to be displayed (required).
Description: the description of the node (required).
Only extract variables: only the attribute mapping is enabled. Output file document, report template and locale are not required.
Output file: A DOCUMENT_OBJECT variable which contains the output file document (e.g. outputdocument).
Input txt file: A DOCUMENT_OBJECT variable that stores the text or Sap file (e.g. ${inputfile}). Only one file is processed (required).
Input txt file type: the file type (e.g. Sap, TXT or CSV) (required).
Input file encoding: character encoding for the input file (e.g. ASCII, UTF-8, CP852, iso-8859-1, Ansi, Identity-H, CP1250, iso-8859-13) (required).
Sap code start column: starting column in the Sap file (default is 1).
Sap code length: the length of Sap files (default is 4).
Multipage txt strategy: the strategy to be applied on the txt multipage. It can be:
ROWS_NUMBER: number of rows for each page before the page break.
FORM_FEED_CHARACTER: the character for the page break.
Multipage txt page rows: number of rows for each page.
Multipage txt form feed: the character for the page break.
Input jasper template: A DOCUMENT_OBJECT variable which contains the JasperReports template (e.g. zip folder with a .jrxml file and logo).
Jasper template locale: it generates a report in different languages. It is useful for Report internationalization.
Output file encoding: encoding characters for the output file (e.g. ASCII, UTF-8, CP852, iso-8859-1, Ansi, Identity-H, CP1250, iso-8859-13).
Output file name: name of the output file.
Instance in error on fail: If checked, when an exception occurs, the process is closed in ERROR.
Response status variable: a variable which indicates the response status of the node. A response status can be:
SUCCESS.
GENERIC_ERROR.
Error message variable: the variable which indicates where to store the error message and the stack trace.
Number of retries: the number of attempts after which a node is stored in ERROR.
Retry counter variable name: a variable which indicates where to store the data related to the retries.
Retry wait interval: the amount of time after which a new attempt to run a node is performed.
Attribute mapping tab: it adds GENERIC_TEXT variables which store content of fields and parameters defined in the JasperReports template:
Name: name to be entered.
Value: variable value.
- USAGE:
The Jasper template locale field requires to define a property file named i18n_<locale>.properties, where locale is the Java locale string (e.g. en, en_US).
An example of the template:
#Invoice detail header
item.code=Item Code
unit.price=Unit Price
total.amount=Total Amount
In Jasper report template, the $R{item.code} placeholder is replaced by the locale translation related to the item.code key.
Example
The node extracts content from a Sap output file and creates a PDF document, according to a JasperReports template.
The following snippet from a Sap file has the data content for filling in the template.
002MyCompany                          1 Mystreet st.              Mycity
005Graphic card            XYZ 1000                2     50                  100
005CPU                     QWE 200                 1     300                 300
005Sound card              ASD 4000                3     20                  60
The template definition, made with the JasperReports software (iReport Designer) is shown in the image below. Fields and parameters are created to store unitary content (Parameters) or multi values content (fields, for values cyclically repeated).
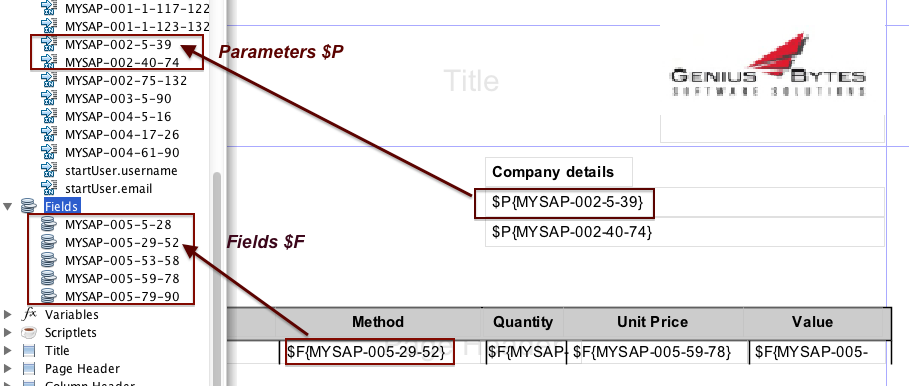
The output document is shown below.
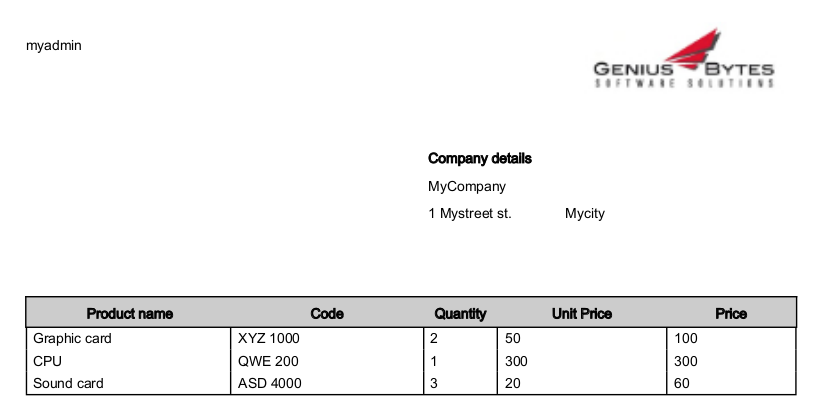
Txt to Template Node
"Txt to template" node is intended to extract a template in a txt document.

Display name: the name of the node to be displayed (required).
Description: description of the node (required).
Input txt file: A DOCUMENT_OBJECT variable that stores the text or Sap file (e.g. ${inputfile}). Only one file is processed (required).
Input file encoding: character encoding for the input file (e.g. ASCII, UTF-8, CP852, iso-8859-1, Ansi, Identity-H, CP1250, iso-8859-13) (required).
Input Jasper template: A DOCUMENT_OBJECT variable which contains the Jasper Reports template (e.g. zip folder with a .jrxml file and logo) (required).
Jasper template locale: it generates a report in different languages. It is useful for Report internationalization.
Is multipage txt: if checked, the txt is multipage.
Multipage txt form feed: the character for the page break.
Record detail start line: the line in which the record starts (required).
Record detail finish line: the line in which the record ends.
Regex line filter on detail (doesn't match): the regular expression to be used as a filter to exclude a part of the template.
Output file: A DOCUMENT_OBJECT variable, which contains the output file document (e.g. outputdocument) (required).
Output encoding: the encoding of the output file.
Output file name: the name of the output file (required).
Instance in error on fail: If checked, when an exception occurs, the process is closed in ERROR.
Response status variable: a variable which indicates the response status of the node. A response status can be:
SUCCESS.
GENERIC_ERROR.
Error message variable: the variable which indicates where to store the error message and the stack trace.
Number of retries: the number of attempts after which a node is stored in ERROR.
Retry counter variable name: a variable which indicates where to store the data related to the retries.
Retry wait interval: the amount of time after which a new attempt to run a node is performed.
Txt Extract Node
"Txt extract" node is intended to extract a .txt file.

Display name: the name of the node to be displayed (required).
Description: the description of the node (required).
Input txt file: A DOCUMENT_OBJECT variable that stores the text or Sap file (e.g. ${inputfile}). Only one file is processed (required).
Input file encoding: character encoding for the input file (e.g. ASCII, UTF-8, CP852, iso-8859-1, Ansi, Identity-H, CP1250, iso-8859-13)(required).
Instance in error on fail: if checked, when an exception occurs, the process is closed in ERROR.
Response status variable: a variable which indicates the response status of the node. A response status can be:
SUCCESS.
GENERIC_ERROR.
Error message variable: the variable which indicates where to store the error message and the stack trace.
Number of retries: the number of attempts after which a node is stored in ERROR.
Retry counter variable name: a variable which indicates where to store the data related to the retries.
Retry wait interval: the amount of time after which a new attempt to run a node is performed.
Attribute mapping tab: it adds GENERIC_TEXT variables which store content of fields and parameters defined in the JasperReports template:
Name: name to be entered. You can also add a location in the text file (input txt file) and a from-to configuration. Note that the location needs to be specified in this Name field. In the example below it is MYTXT-1-1-1-52.
MYTXT-<NumberStartLine>-<NumberEndLine>-<NumberStartCharacter>-<NumberEndCharacter>
Example:
MYTXT-1-1-1-52 From line one to line one, from char 1 to char 52.
The findings of the node will be writte to the BPM variable in the "value" field.
Value: variable value.
Report Creator Node
"Report creator" node is intended to create a Jasper report. The node can execute a report definition designed through Jasper Report Studio. The database connection is provided by the Genius Server and linked to its main database.
In the Jasper report definition, users can access to all BPM variables declaring Jasper parameters, which have the same name of BPM variable.

Drag and drop the icon in the palette and fill in the configuration fields:
Display name: the name of the node to be displayed (required).
Description: the description of the node (required).
DB provider: the available database providers set in Configuration tool.
Output file: A DOCUMENT_OBJECT variable, which contains the output file document (e.g. outputdocument).
Input Jasper template: A DOCUMENT_OBJECT variable which contains the JasperReports template (e.g. zip folder with a .jrxml file and logo) (required). The field also accepts variable input, e.g., ${inputJasperTemplate[0].value}.
Jasper template locale: it generates a report in different languages. It is useful for Report internationalization.
Output file format: file type (e.g. PDF, XLS, CSV and TSV).
Output file encoding: it encodes characters for the input file (e.g. ASCII, UTF-8, CP852, iso-8859-1, Ansi, Identity-H, CP1250, iso-8859-13).
Output file name: name of the output file.
Instance in error on fail: If checked, when an exception occurs, the process is closed in ERROR.
Response status variable: a variable which indicates the response status of the node. A response status can be:
SUCCESS.
GENERIC_ERROR.
Error message variable: the variable which indicates where to store the error message and the stack trace.
Report parameters:
In this tab, report parameters can be added by clicking the plus symbol. Enter a meaningful name and select the parameter type.
Types can be:
DATE
TEXT
INTEGER
DOUBLE
Finally enter the paramter value, e.g., ${inputTestDate[0].value}.
Existing parameters can be deleted by selecting them and clicking the red X symbol.
USAGE:
This field requires the definition of a property file named i18n_<locale>.properties, where locale is the Java locale string (e.g. en, en_US).
An example of the template:
#Invoice detail header
item.code=Item Code
unit.price=Unit Price
total.amount=Total Amount
In the Jasper report template, the $R{item.code} placeholder is replaced with the locale translation related the item.code key.
Warning
To use variables in the jasper node, create a parameter in Jasper Report Studio that has the same name of the variable (e.g. name[0].value).
Besides, the Report creator node supports some barcodes:
Interleaved 2 of 5.
ITF-14.
Code 39.
Code 128.
EAN-128, GS1-128 (based on Code 128).
Codabar.
UPC-A and UPC-E (with supplements).
EAN-13 and EAN-8 (with supplements).
POSTNET.
Royal Mail Customer Barcode (Four State).
USPS Intelligent Mail (4-State Customer Barcode).
Print Node Family
The node part of the Print node family is:
Print Node
"Print" node is intended to send a PDF file to a print queue. Print queue can be either a pull printing or a direct printing. The type of file sent to the queue is then moved to the printer straight forward. Verify if the file type (PDF, PCL, PCX, Postscript) is compatible with the printer.

Drag and drop the icon in the palette and fill in the configuration fields:
Display name: the name of the node to be displayed (required).
Description: the the description of the node (required).
Print user: the user who is sending the print job (required).
Print document: A DOCUMENT_OBJECT variable (e.g. printdoc) which contains one (e.g. ${printdoc[0].value}) or more documents to print (e.g. ${printdoc}) (required).
Queue name: name of the queue (required).
Instance in error on fail: If checked, when an exception occurs, the process is closed in ERROR.
Response status variable: a variable which indicates the response status of the node. A response status can be:
SUCCESS.
GENERIC_ERROR.
Error message variable: the variable which indicates where to store the error message and the stack trace.
Number of retries: the number of attempts after which a node is stored in ERROR.
Retry counter variable name: a variable which indicates where to store the data related to the retries.
Retry wait interval: the amount of time after which a new attempt to run a node is performed.
Import Nodes Family
Nodes that are part of the Import family are:
Internal Users Import Node
"Internal users import" node is intended to import users from CSV file. Through this node, users can apply a number of strategies according to the scenario of the Genius Server database.
Drag and drop the icon in the palette and fill in the configuration fields:
Display name: the name of the node to be displayed (required).
Description: the description of the node (required).
Input cvs file: input file of the CVS (required).
File encoding: encoding character of the file. Indicates the end of a cell.
Separator (def,): separators of lines and columns. Possible separators are ",", ".", "t". Indicates the end of a cell.
Quote character (def"): the quotation marks. Includes a whole sentence. What is contained between the double quotes should be kept together.
Escape character (def'\'): characters that are to be escaped, so that the process does not interpret them. Per default the "" character is an escape character. The list is komma separated.
Line to skip (def 0): lines to be skipped.
Strict quote (deg false): if checked and if a string starts with zero(s), it forces this zero to be displayed.
Ignoring leading whitespace (def true): if checked, the leading whitespaces are not taken into consideration.
User import strategy: there are 2 applicable strategies:
CREATE_UPDATE: if the record is found on the table, it updates all the corresponding CVS entries. otherwise a new record is created.
CREATE_UPDATE_DELETE: if the record is found on the table, it updtes all the corresponding CVS entries. otherwise a new record is created. All the records in the table, which are not in the CSV, are deleted.
Instance in error on fail: If checked, when an exception occurs, the process is closed in ERROR.
Response status variable: a variable which indicates the response status of the node. A response status can be:
SUCCESS.
GENERIC_ERROR.
Error message variable: the variable which indicates where to store the error message and the stack trace.
Number of retries: the number of attempts after which a node is stored in ERROR.
Retry counter variable name: a variable which indicates where to store the data related to the retries.
Retry wait interval: the amount of time after which a new attempt to run a node is performed.
Input attribute mapping tab: to add a GENERIC_TEXT variables which store content of fields and parameters defined.
Name: name to be selected.
Value: variable value (${MYCSV_x} where x is the number of the column to import).
Note, that the CSV file can only have one file per user. If multiple lines are added for the same user, the content of the last line will update the content of the first line.
Some attributes can be added multiple times to the CSV file (meaning mutliple columns per line / user), ie.,
username ${MYCSV_1}
costcenter ${MYCSV_2}
costcenter ${MYCSV_3}
The CAN_LOGIN attribute can be set by a column variable or set to be a fixed value by entering "true" or "false" in the attribute mapping.
Output attribute mapping tab: to add GENERIC_TEXT variables which store content of fields and parameters defined.
Name: name to be selected.
Value: variable value.
CSV Database Import Node
"CSV database import" node is intended to import data from CSV file into a custom table. The selection of the Database provider to connect to the target database is necessary. This database provider has to be configured in Genius Configuration tool in advance and is usable by more than one node that needs a database interaction.

Drag and drop the icon in the palette and fill in the configuration fields:
Display name: the name of the node to be displayed (required).
Description: the description of the node (required).
Input cvs file: input file of the CVS (required).
File encoding: encoding character of the file.
Separator (def,): separators of lines and columns, they are ",", ".", "t". It indicates the end of a cell.
Quote character (def"): the quotation marks. It includes a whole sentence. What is contained between the double quotes should be kept together.
Escape character (def'\'): characters that are to be escaped, so that the process does not interpret them. Per default the "" character is an escape character. The list is komma separated.
Line to skip (def0): lines to be skipped.
Strict quotes (def false): if checked and if a string starts with zero(s), it forces this zero to be displayed.
Ignoring leading whitespace (def true): if checked, the leading whitespaces are not taken into consideration.
Import strategy: users can import one of the four strategies:
DELETE_CREATE:it deletes all the records of the table and creates a new record for all the entries of the CSV.
CREATE_UPDATE: if the record is found on the table, it updates all the corresponding CVS entries. otherwise a new record is created.
CREATE_UPDATE_DELETE: if the record is found on the table, it updtes all the corresponding CVS entries. otherwise a new record is created. All the records in the table, which are not in the CSV, are deleted.
DELETE: it deletes every record of the table which corresponds to an entry of the CSV.
Database provider: the available database providers set in Configuration tool (required).
Database table name: name of the database table.
Instance in error on fail: if checked, when an exception occurs, the process is closed in ERROR.
Response status variable: a variable which indicates the response status of the node. A response status can be:
SUCCESS.
GENERIC_ERROR.
Error message variable: the variable which indicates where to store the error message and the stack trace.
Number of retries: the number of attempts after which a node is stored in ERROR.
Retry counter variable name: a variable which indicates where to store the data related to the retries.
Retry wait interval: the amount of time after which a new attempt to run a node is performed.
Input attribute mapping tab: to add GENERIC_TEXT variables which store content of fields and parameters defined:
Name: the name to be entered.
Type: cell types to be entered. they are SQL_TEXT. SQL_DATE. SQL_INTEGER. SQL_FLOAT. SQL_BOOLEAN. SQL_AUTO_GENERATED_KEY-.
It is a primary key: if the field has to be created or updated in the database.
Value: variable value (${MYCSV_x} where x is the number of the column to import).
Format: desired format.
Output attribute mapping tab: to add GENERIC_TEXT variables which store content of fields and parameters defined.
Name: name to be selected.
Value: variable value.
CSV Hostname Import Node
"CSV hostname import" node is intended to import printer hostname from a CSV file into the Hostnames section (Device Management -> Discovery -> Hostnames).

Drag and drop the icon in the palette and fill in the configuration fields:
Display name: the node name, also displayed on the Web Administrator Console, MFP devices and office client (required).
Description: the node description, also displayed on the Web Administrator Console, MFP devices and office client (required).
Input csv file: a DOCUMENT_OBJECT variable to fetch the csv file (e.g. ${csv_file[0].value}) (required).
Separator (def,): the character used as separator between two values (by default is comma) or an ADVANCED_SELECT variable to find the separator character (e.g. ${separator_char[0].value}).
Line to Skip (def 0): the number of the line to skip to not add the contained value in that line (by default is 0).
Hostname column (def 0): the number of the column that contains hostnames (by default is 0).
Hostname regular expression (def .*): a regular expression to define which hostnames fetch (e.g. to fetch only hostnames that start with AB, write AB.*).
Total added output: a GENERIC_NUMBER variable that gives as result the number of added hostnames (required).
Total skipped output: a GENERIC_NUMBER variable that gives as result the number of skipped hostnames (required).
Total error output: a GENERIC_NUMBER variable that gives as result the number of errors (required).
Press Apply to save.
Cost Center Pseudonym Import
Display name: the node name, also displayed on the Web Administrator Console, MFP devices and office client (required).
Description: the node description, also displayed on the Web Administrator Console, MFP devices and office client (required).
Input csv file: a DOCUMENT_OBJECT variable to fetch the csv file (e.g. ${csv_file[0].value}) (required).
File encoding: the encoding of the input file.
Separator (def ,): the character used as separator between two values (by default is comma) or an ADVANCED_SELECT variable to find the separator character (e.g. ${separator_char[0].value}).
Quote character (def "): the characters used for quoattion marks, default is ". Things written between those marks are meant to be kept together.
Escape character (def '\'): characters that are to be escaped, so that the process does not interpret them. Per default the "" character is an escape character. The list is komma separated.
Line to Skip (def 0): the number of the line to skip to not add the contained value in that line (by default is 0).
Strict quotes (def false): if checked, and if a string starts with zero(s), it forces this zero to be displayed.
Ignore leading whitespace (def true): if checked, the leading whitespaces are not taken into consideration.
Instance in error on fail: if checked, when an exception occurs, the process is closed in ERROR.
Response status variable: a variable which indicates the response status of the node. A response status can be:
SUCCESS.
GENERIC_ERROR.
Error message variable: the variable which indicates where to store the error message and the stack trace.
Number of retries: the number of attempts after which a node is stored in ERROR.
Retry counter variable name: a variable which indicates where to store the data related to the retries.
Retry wait interval: the amount of time after which a new attempt to run a node is performed.
For Input attributes mapping and Output attributes mapping tabs:
Here the cost center name(s) and pseudonym(s) can be entered for input and output attributes. COST_CENTER_NAME and COST_CENTER_PSEUDONYM can be assigned values, e.g., ${MYCSV_1} and ${MYCSV_2}. Add the values by clicking the plus button. Remove by selecting the value and press the X button.
Press Apply to save.
Office Conversion
Nodes that are part of the Office Conversion family are:
Convert Doc to Pdf Node
"Convert doc to pdf" node is intended to covert MS word .doc documents into .pdf ones.

Display name: the name of the node to be displayed (required).
Description: the description of the node (required).
Input documents: input(s) of a document variable (the source image for OCR recognition, e.g. ${ImageForRecognition[0].value}) (required).
Output document: output(s) of a document variable (e.g. outputDoc, a DOCUMENT_OBJECT variable) (required).
Keep the original filename (one input file): if checked, the file name is not changed.
Page orientation: the orientation of the document. It can be:
PORTRAIT.
LANDSCAPE.
Paper size: the size of the document. It can be:
A4.
A3.
LEDGER.
LETTER.
Instance in error on fail: If checked, when an exception occurs, the process is closed in ERROR.
Response status variable: a variable which indicates the response status of the node. A response status can be:
SUCCESS.
GENERIC_ERROR.
Error message variable: the variable which indicates where to store the error message and the stack trace.
Number of retries: the number of attempts after which a node is stored in ERROR.
Retry counter variable name: a variable which indicates where to store the data related to the retries.
Retry wait interval: the amount of time after which a new attempt to run a node is performed.
Convert Xls to Pdf Node
"Convert xls to pdf" node is intended to covert MS Excel .xls documents into .pdf ones.

Display name: the name of the node to be displayed (required).
Description: the description of the node (required).
Input documents: input(s) of a document variable (the source image for OCR recognition, e.g. ${ImageForRecognition[0].value}) (required).
Output document: output(s) of a document variable (e.g. outputDoc, a DOCUMENT_OBJECT variable) (required).
Keep the original filename (one input file): if checked, the file name is not changed.
Page orientation: the orientation of the document. It can be:
PORTRAIT.
LANDSCAPE.
Paper size: the size of the document. It can be:
A4.
A3.
LEDGER.
LETTER.
Instance in error on fail: If checked, when an exception occurs, the process is closed in ERROR.
Response status variable: a variable which indicates the response status of the node. A response status can be:
SUCCESS.
GENERIC_ERROR.
Error message variable: the variable which indicates where to store the error message and the stack trace.
Number of retries: the number of attempts after which a node is stored in ERROR.
Retry counter variable name: a variable which indicates where to store the data related to the retries.
Retry wait interval: the amount of time after which a new attempt to run a node is performed.
Convert Ppt to Pdf Node
"Convert ppt to pdf" node is intended to covert MS Power Point .ppt documents into .pdf ones.

Display name: the name of the node to be displayed (required).
Description: the description of the node (required).
Input documents: input(s) of a document variable (the source image for OCR recognition, e.g. ${ImageForRecognition[0].value}) (required).
Output document: output(s) of a document variable (e.g. outputDoc, a DOCUMENT_OBJECT variable) (required).
Keep the original filename (one input file): if checked, the file name is not changed.
Paper size: the size of the document. It can be:
A4.
A3.
LEDGER.
LETTER.
Instance in error on fail: If checked, when an exception occurs, the process is closed in ERROR.
Response status variable: a variable which indicates the response status of the node. A response status can be:
SUCCESS.
GENERIC_ERROR.
Error message variable: the variable which indicates where to store the error message and the stack trace.
Number of retries: the number of attempts after which a node is stored in ERROR.
Retry counter variable name: a variable which indicates where to store the data related to the retries.
Retry wait interval: the amount of time after which a new attempt to run a node is performed.
Convert Pdf to Doc Node
"Convert pdf to doc" node is intended to covert .pdf documents into MS word .doc ones.

Display name: the name of the node to be displayed (required).
Description: the description of the node (required).
Input documents: input(s) of a document variable (the source image for OCR recognition, e.g. ${ImageForRecognition[0].value}) (required).
Output document: output(s) of a document variable (e.g. outputDoc, a DOCUMENT_OBJECT variable) (required).
Keep the original filename (one input file): if checked, the file name is not changed.
Instance in error on fail: If checked, when an exception occurs, the process is closed in ERROR.
Response status variable: a variable which indicates the response status of the node. A response status can be:
SUCCESS
GENERIC_ERROR
Error message variable: the variable which indicates where to store the error message and the stack trace.
Number of retries: the number of attempts after which a node is stored in ERROR.
Retry counter variable name: a variable which indicates where to store the data related to the retries.
Retry wait interval: the amount of time after which a new attempt to run a node is performed.
SUCCESS
GENERIC_ERROR
Error message variable: the variable which indicates where to store the error message and the stack trace.
Number of retries: the number of attempts after which a node is stored in ERROR.
Retry counter variable name: a variable which indicates where to store the data related to the retries.
Retry wait interval: the amount of time after which a new attempt to run a node is performed.
Convert Eml to Pdf Node

Display name: the name of the node to be displayed (required).
Description: the description of the node (required).
Input documents: the mail address (required).
Output document: output(s) of a document variable (a DOCUMENT_OBJECT variable) (required).
Output document name: the name of the PDF which is generated.
Page orientation: the orientation of the document. It can be:
PORTRAIT.
LANDSCAPE.
Paper size: the size of the document. It can be:
A4.
A3.
LEDGER.
LETTER.
Instance in error on fail: If checked, when an exception occurs, the process is closed in ERROR.
Response status variable: a variable which indicates the response status of the node. A response status can be:
SUCCESS.
GENERIC_ERROR.
Error message variable: the variable which indicates where to store the error message and the stack trace.
Number of retries: the number of attempts after which a node is stored in ERROR.
Retry counter variable name: a variable which indicates where to store the data related to the retries.
Retry wait interval: the amount of time after which a new attempt to run a node is performed.
Nscale/KWM
Nodes that are part of the Nscale/KWM family are:
Nscale/KWM Create Document Node
Display name: the name of the node to be displayed (required).
Description: the description of the node (required).
Nscale/KWM provider: the Nscale/KWM provider that has been configured in /conf (required).
Document creator username: the username of the document creator (required), e.g. ${nscaleUser[0].value}.
Password is an expression: if checked, the Nscale/KWM password is an expression.
Document creator password: the password of the document creator (required if "Password is an expression" is not checked).
Document creator password expression: the expression for the folder creator password. This field is required, if "Password is an expression" is checked, e.g. ${nscalePW[0].value}.
Content file: the variable for the content file, e.g., ${doc}.
Target folder: the path to the target folder for saving the document, e.g., ${path[0].id}.
Document name: the name or naming pattern for the document.
Keep original file extension: if checked, the original file extension is not changed.
Keep original file name: if checked, the original file name is not changed.
Overwrite document: if checked, the document is overwritten by the new version.
Nscale/KWM document ID: the document id.
Instance in error on fail: if checked, when an exception occurs, the process is closed in ERROR.
Response status variable: a variable which indicates the response status of the node. A response status can be:
SUCCESS.
GENERIC_ERROR.
Error message variable: the variable which indicates where to store the error message and the stack trace.
Number of retries: the number of attempts after which a node is stored in ERROR.
Retry counter variable name: a variable which indicates where to store the data related to the retries.
Retry wait interval: the amount of time after which a new attempt to run a node is performed.
Nscale/KWM Create Folder Node
Display name: the name of the node to be displayed (required).
Description: the description of the node (required).
Nscale/KWM provider: the Nscale/KWM provider that has been configured in /conf (required).
Folder creator username: the username of the folder creator (required), e.g. ${nscaleUser[0].value}.
Password is an expression: if checked, the Nscale/KWM password is an expression.
Folder creator password: the password of the folder creator (required).
Folder creator password expression: the expression for the folder creator password, if "Password is an expression" is checked, e.g. ${nscalePW[0].value}.
Target folder: the path to the target folder, e.g., ${path[0].id}.
Folder name: the folder name, e.g., ${folderName[0].value}.
Nscale/KWM folder id: the folder id.
Instance in error on fail: if checked, when an exception occurs, the process is closed in ERROR.
Response status variable: a variable which indicates the response status of the node. A response status can be:
SUCCESS.
GENERIC_ERROR.
Error message variable: the variable which indicates where to store the error message and the stack trace.
Number of retries: the number of attempts after which a node is stored in ERROR.
Retry counter variable name: a variable which indicates where to store the data related to the retries.
Retry wait interval: the amount of time after which a new attempt to run a node is performed.
Built-in BPM Definition List
It is possible to create a new BPM process utilizing and/or editing existing processes.
The default BPM definitions are the following:
Scan2me,
Scan2mail,
Scan2homefolder and
Scan2fax.
To start to use one of them, complete the following steps:
Go to BPM and select Editor.
Select Definition and then Open/Delete
The Open existing BPM definition window opens.
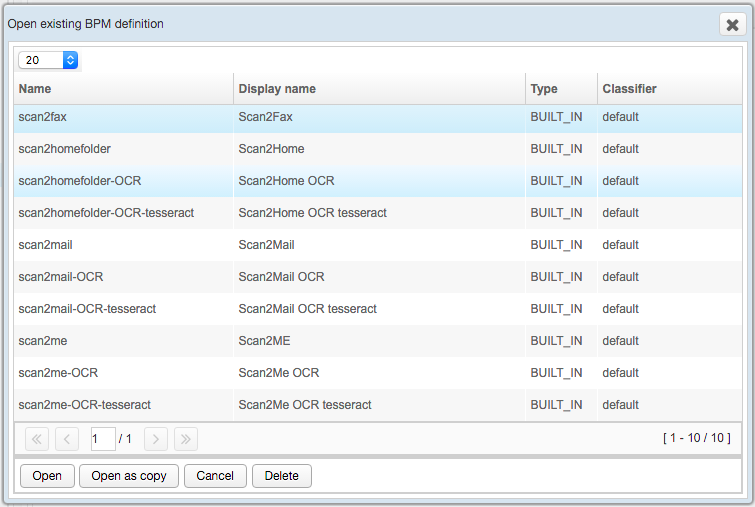
Select the prefered definition and press Open (to use and/or modify the default definition) or Open as copy (to create a default definition copy and modify it).
Scan2me
Use this definition to scan a document and send it to the start user email.
The definition parameters are the following:
Name: scan2me
Display name: Scan2ME
Model version: 1
Zone: Default
Description: Scan a document and send it to your mail address.
View type: SHORTCUT
Classifier:default
Scheduled purge enabled: checked
Scheduled purge min age (min): 60
History enabled: not checked
Instance display name:
Instance description:
The Start node parameters are the following:
Name: st1
Display name: Scan2ME
Description: Scan to me
Assignee actor: myDefaultActor
Complete action label: Send mail
Auto complete: checked
Quick auto complete: checked
Wizard enabled: not checked
Join subsequent task: not checked
Add user to instance viewers: checked
Add user to instance managers: not checked
Required 2nd Factor Auth: not chosen.
Input form tab: document 1:1 (by default it is possible to scan and send only one document).
Enable client types: EMBEDDED_MFP (by default it is possible to start the process only from the device).
Device group: no group.
The Send mail node parameters are the following:
Display name: Send mail
Description: Send mail
SMTP Provider name: myDefaultSMTPServer
Sender address: ${startUser.email}
Recipients: ${startUser.email}
Cc recipients:
Bcc recipients:
Subject: Scan from MyMFP
Body: Scan from MyMFP
Attachments: ${document}
Instance in error on fail: checked
Send mail response status variable:
File base name:
File page suffix:
Keep original file extension: checked
Keep original file name: checked
Enable S/MIME Encryption:
Enable send body in plain text: not checked
Scan2mail
Use this definition to scan a document and send it via email.
The definition parameters are the following:
Name: scan2mail
Display name: Scan2Mail
Model version: 1
Zone: < ANY >
Description: Scan a document and send it to the inserted mail address
View type: SHORTCUT
Classifier:default
Scheduled purge enabled: checked
Scheduled purge min age (min): 60
History enabled: not checked
Instance display name:
Instance description:
The Start node parameters are the following:
Name: st1
Display name: Scan2Mail
Description: Scan to Mail
Assignee actor: myDefaultActor
Complete action label: Send mail
Auto complete: checked
Quick auto complete: checked
Wizard enabled: not checked
Join subsequent task: not checked
Input form tab:
document 1:1 (by default it is possible to scan and send only one document).
email 1:n (by default it is possible to send the document to different emails).
Enable client types: EMBEDDED_MFP (by default it is possible to start the process only from the device).
Device group: no group.
The Send mail node parameters are the following:
Display name: Send mail
Description: Send mail
SMTP Provider name: myDefaultSMTPServer
Sender address: ${startUseremail}
Recipients: ${email}
Cc recipients:
Bcc recipients:
Subject: Scan from MyMFP
Body: Scan from MyMFP
Attachments: ${document}
Instance in error on fail: checked
Send mail response status variable:
File base name:
File page suffix:
Keep original file extension: checked
Keep original file name: checked
Enable S/MIME Encryption:
Enable send body in plain text: not checked
Scan2homefolder
Use this definition to scan a document and store it in the start user folder.
The definition parameters are the following:
Name: scan2homefolder
Display name: Scan2Home
Model version: 1
Zone: < ANY >
Description: Scan a document and send it to home folder
View type: SHORTCUT
Classifier:default
Scheduled purge enabled: checked
Scheduled purge min age (min): 60
History enabled: not checked
Instance display name:
Instance description:
The Start node parameters are the following:
Name: st1
Display name: Scan2Home
Description: Scan to home folder
Assignee actor: myDefaultActor
Complete action label: Scan To home
Auto complete: checked
Quick auto complete: checked
Wizard enabled: not checked
Join subsequent task: not checked
Input form tab: document 1:1 (by default it is possible to scan and send only one document). Enable client types: EMBEDDED_MFP (by default it is possible to start the process only from the device). Device group: no group.
The Save to home node parameters are the following:
Display name: Save to home
Description: Save to home folder
Folder URL: \localhostshared${startUser.homeFolder}
Enable anonymous access: not checked
Folder domain:
Folder username: gb
Password is an expression: not checked
Folder password: ••
Expression folder password:
File base name: mymfpdocument.pdf
File page suffix:
Files: ${document}
Overwrite existing file: not checked
Create folders: checked
Keep original file extension: not checked
Keep original file name: not checked
Instance in error on fail: checked
Response status variable:
Error message variable:
Scan2fax
Use this definition to scan a document and send it via fax.
The definition parameters are the following:
Name: scan2fax
Display name: Scan2Fax
Model version: 1
Zone: < ANY >
Description: Scan a document and send it to the inserted fax number
View type: SHORTCUT
Classifier: default
Scheduled purge enabled: checked
Scheduled purge min age (min): 60
History enabled: not checked
Instance display name:
Instance description:
The Start node parameters are the following:
Name: st1
Display name: Scan2Fax
Description: Scan2Fax
Assignee actor: myDefaultActor
Complete action label: Send fax
Auto complete: checked
Quick auto complete: checked
Wizard enabled: not checked
Join subsequent task: not checked
Input form tab:
document 1:1 (by default it is possible to scan and send only one document).
telephone number 1:1 (by default it is possible to send the document to one fax).
Enable client types: EMBEDDED_MFP (by default it is possible to start the process only from the device). Device group: no group.
The Send mail node parameters are the following:
Display name: Send mail
Description: Send mail
SMTP Provider name: myDefaultSMTPServer
Sender address: ${startUser.email}
Recipients: ${number[0].value}@yourfaxserver.com
Cc recipients:
Bcc recipients:
Subject: Scan from MyMFP
Body: Scan from MyMFP
Attachments: ${document}
Instance in error on fail: checked
Send mail response status variable:
File base name:
File page suffix:
Keep original file extension: checked
Keep original file name: checked
Enable S/MIME Encryption:
Enable send body in plain text:
Warning
During the installation, the Send mail node has to be configured with the correct recipient.