
[Advanced] Microsoft Providers (Conf)
Before configuring the provider inside the Genius Server, some changes have to be made on the Azure website. Please refer to MS Azure Configuration. The Microsoft Provider needs the Azure Server Application configuration.
After configuring the Azure Server Application proceed below.
Create a New Microsoft Provider
The next step leads us away from the Azure website. Access the corresponding section on the /conf website. It is in the Advanced view in the Module section.
Click the button New Microsoft provider or click Edit if there already is an existing one which should be edited. The fields are described below. Check further down for the configuration of the Microsoft Provider.
This step is necessary if BPMs are to be used with Azure.
Connection
Tenant name: the name of the microsoft domain.
Default domain: if checked, the user can login without the domain and the tenant name will be used automatically.
Web/API Client ID: the client ID created inside the azure portal.
Web/API Secret: the secret created inside the azure portal.
Confirm Web/API Secret: confirm the above entered secret.
Testing the Connection
Now you can and should test your connection. Possible tests are: List folders (on Microsoft Providers), Authentication or Get user details found on the top right.
If everything is configured correctly, press Save, then Back. You can Edit existing providers or Delete them. The order of the providers can be changed by clicking on the blue arrows next to the Delete button.
Create a New Authentication Provider
To configure the authentication for Azure, go to Authentication Providers found on the /conf website -> configuration -> Advanced -> Module.
Click on New Microsoft AZURE Provider or choose an existing one. See Authentication Providers (Conf) for details on the settings.
Note
When configuring the provider, make sure to trust the certificates that lead to the Microsoft Graph-API. We recommend to configure the Genius Server to use the Windows truststores to keep certificate handling more simple. For an introduction on this topic, please refer to the whitepaper GB-Whitepaper-SSL-ENG.pdf which can be found in the download area.
How to Configure a Print Job Owner in Microsoft Provider
In some environments it can happen that users do not see their print jobs. This happens due to a missmatch of the printjob owner that has been sent by either printjob or LPR protocol. To configure correct ownership procceed as follows:
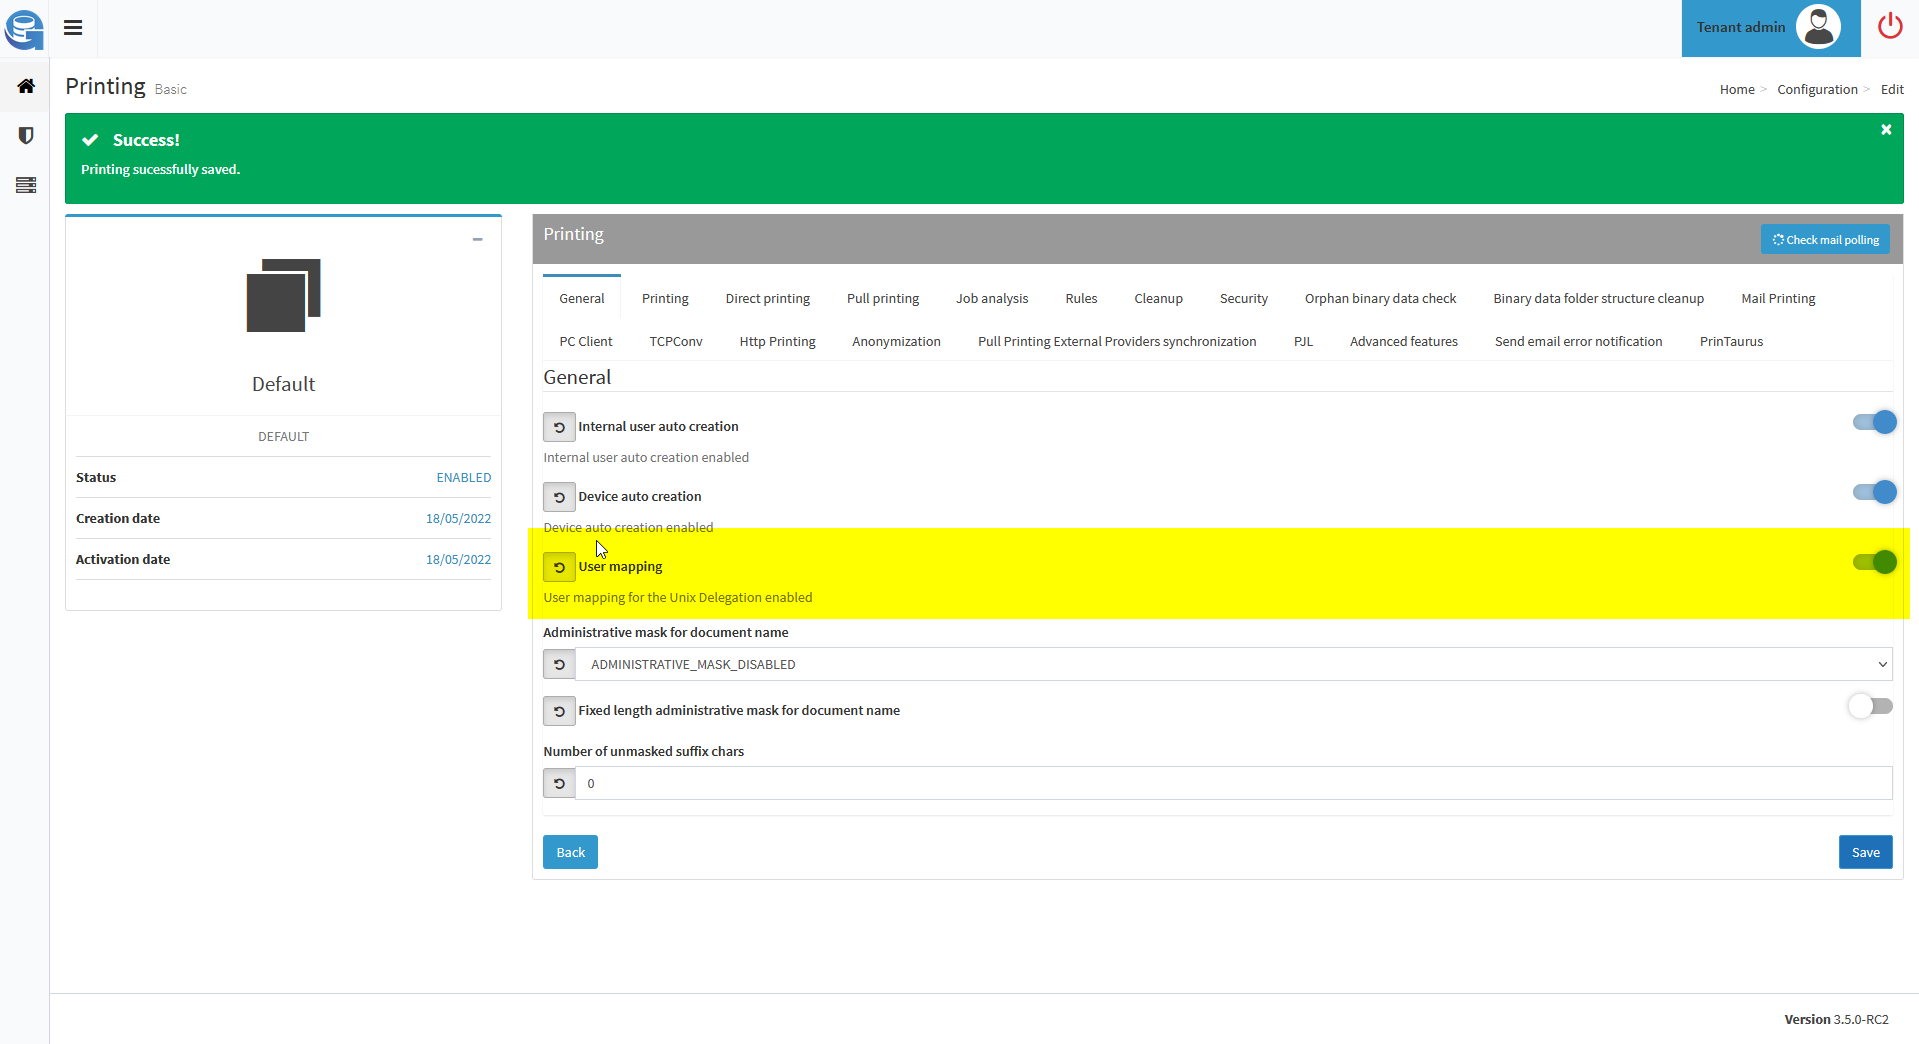
Enable user mapping in Genius Server. To do this open Genius Server web configuration (/conf) and go to Configuration. Switch to Adavanced Configuration -> Printing and set User mapping to on as shown below.
Navigate back to Module -> Microsoft Provider, select it and click Edit and navigate to the tab Attribute Mapping.
The field Printjob owner can handle string operations using java expression language, an example configuration could be: displayName; ${my:toLowerCase(my:trim(my:replaceAll(displayName, "\s","")))}.
To explain:
the configuration needs to start with the attribute name followed by a semicolon. In the example above this is "displayName;"
the expression above deletes empty spaces (regEx s) from the displayName attribute.
the additional is required to escape the second in s.
After configuring the printjob owner field as described above, press Save.
To test the configuration click on Get user details. The resulting printjob owner will be shown in this test.
Note that the users will have to login to create a mapping to the database. Also, the first printjob will be mapped after that login. Previous printjobs are not shown!
Warning
This feature delivers unique results, so printjob owners have to be uniqe. No duplicates.