
Organization
In this section it is possible to divide identities and devices in organization units. Each organization unit has its own traits (dynamic assets, location, cost centers). This kind of organization is useful to optimize and distribute the workload on different services.
Organization Unit
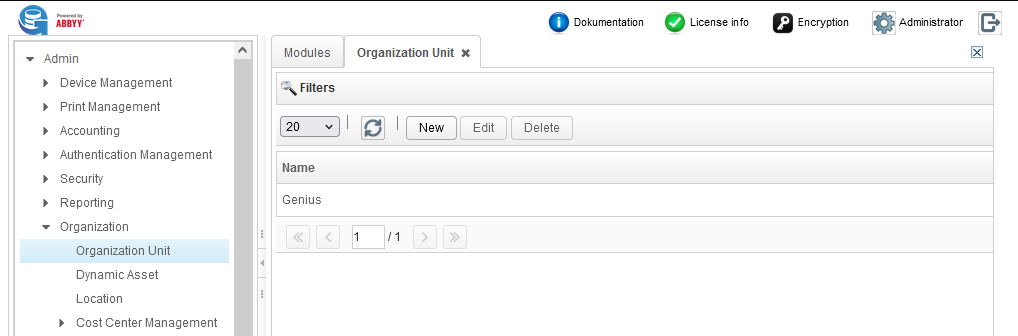
Genius is an organization unit created by default.
To add a new organization unit, press the New button, and fill in the following fields:
Name: the name of the organization unit.
Description: the description of the organization unit.
Then press the Save and Close button to save.
To edit an organization unit, select it and press the Edit button. Change the name and/or the description and press the Save and Close button to save.
To delete an organization unit, select it, press the Delete button and press Delete again to confirm.
Warning
If a device is associated to an organization unit, the last one cannot be deleted. Proceed to delete the device first and then delete the unit.
To add a new device to the unit, select it, press the Add devices button, select the device and press the Select button at the end of the list to confirm.
A “Device successfully add * to ” message is displayed, press **OK* to close it.
To delete a device, select it and press the Delete button.
Dynamic Asset
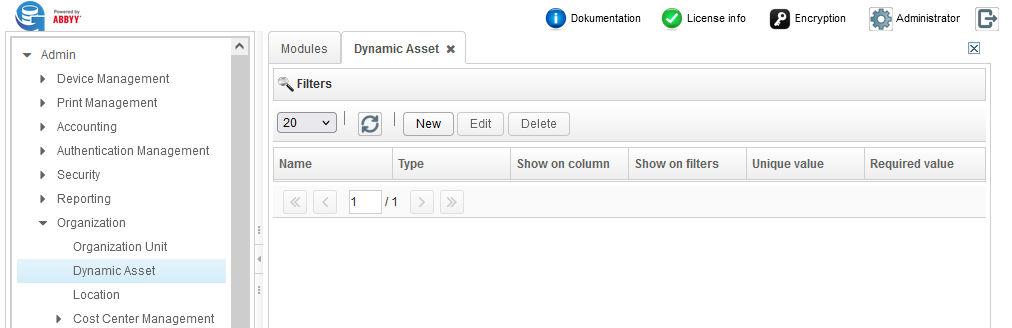
In this section, it is possible to add supplementary information to the organization units.
To define a new dynamic asset, press the New button and fill in the following fields:
Name: the name of the dynamic asset (required).
Type: how the dynamic asset is visualized into the organization unit (required). It can be:
CHECKBOX: a box to select.
TEXT: a string where to write a text.
COMBOBOX: a list of elements to choose from.
DATE: a date to enter.
DATE_TIME: a date and a time to enter.
INTEGER: a number to enter.
DOUBLE a number with a comma to enter.
Values: enter a value and press the + button to add it. To delete a value, select it and press the x button. This setting is displayed only selecting COMBOBOX.
Show on column: if checked, the dynamic asset is displayed on the column of the organization unit section.
Show on filter: if checked, the dynamic asset is displayed on filters in the organization unit section.
Unique value: if checked, the dynamic value becomes a unique value of the organization unit. This setting is displayed only selecting TEXT or INTEGER.
Required value: if checked, the dynamic asset becomes a required value to enter in the organization unit.
To save a dynamic asset, press the Save and close button.
To edit a dynamic asset, select the asset, press the Edit button, perform the changes and then press the Save and close button to save.
To delete a dynamic asset, select the asset, press the Delete button and press Delete again to confirm.
Location
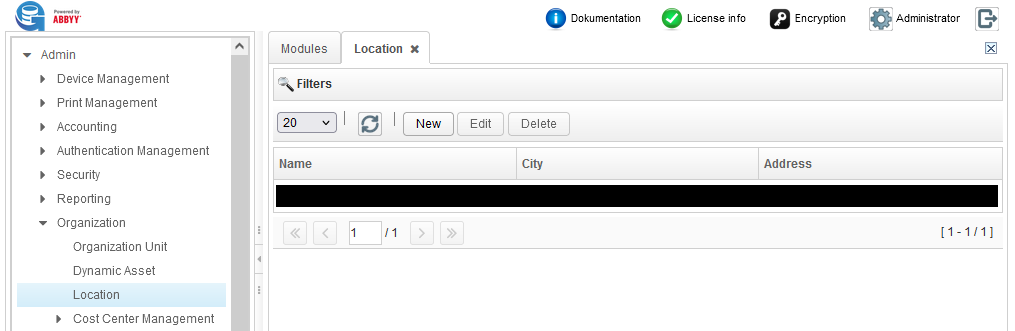
In this section, it is possible to create a location, thus it can be associated to a device to exactly know where it is situated.
To create a new location, press the New button and fill in the following fields:
Name: the univocal name of the location (required).
City: the city of the location.
Address: the address of the location.
Zip code: the postal code of the location.
Then press the Save and Close button to save.
To edit a location, select it, press the Edit button, perform the changes and then press the Save and close button to save.
Editing the location, three new tabs are displayed: Site name, Building and Address.
In the Site name section, it is possible to add the name of a sublocation pressing the Add button. To modify the sublocation name, select it, press the Edit button and then press Save. To delete the sublocation name, select it and press the Delete button.
In the Building section, it is possible to add the building of a sublocation pressing the Add button. To modify the sublocation building, select it, press the Edit button and then press Save. To delete the sublocation building, select it and press the Delete button.
In the Address section, it is possible to add the address of a sublocation pressing the Add button. To modify the sublocation address, select it, press the Edit button and then press Save. To delete the sublocation address, select it and press the Delete button.
To delete a location, select it, press the Delete button and press Delete again to confirm.
Cost Center Management
In this section, it is possible to create cost centers and groups of cost centers, and associate them to identities and devices.
Cost Center Group
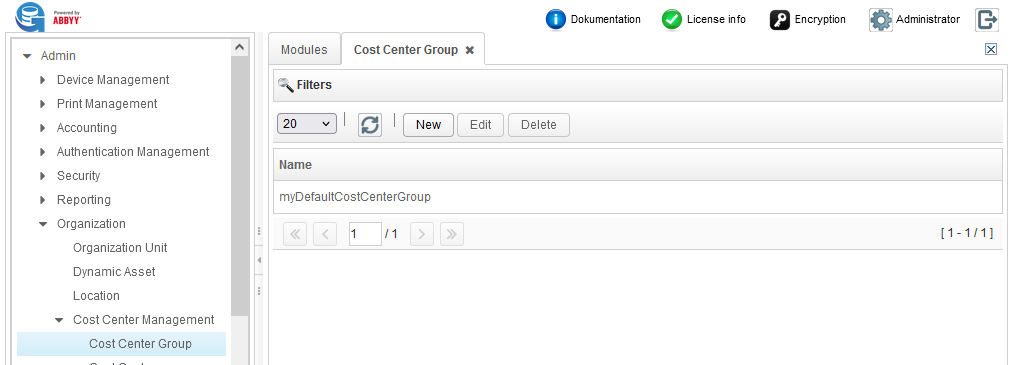
The cost center group myDefaultCostCenterGroup is created by default.
To create a new cost center group, press the New button and enter a name. Press the Save and Close button to save.
To modify a cost center group, select it, press the Edit button and press Edit again. Once performed the changes, press the Save and Close button to save.
To delete a cost center group, select it, press the Delete button and press Delete again to confirm.
Cost Center
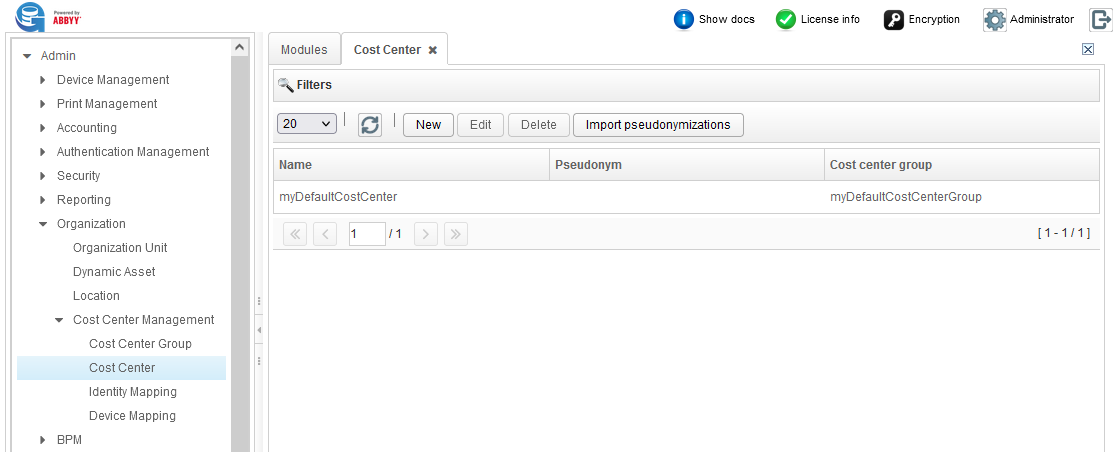
The cost center myDefaultCostCenter is created by default.
To create a new cost center, press the New button, enter a name and choose a cost center group pressing the magnifying glass. Press the Save and Close button to save.
To modify a cost center, select it, press the Edit button and press Edit again. Once performed the changes, press the Save and Close button to save.
To delete a cost center, select it, press the Delete button and press Delete again to confirm.
To import a csv file that inlcudes pseudonymizations click the button Import pseudonymizations. A window will pop up:
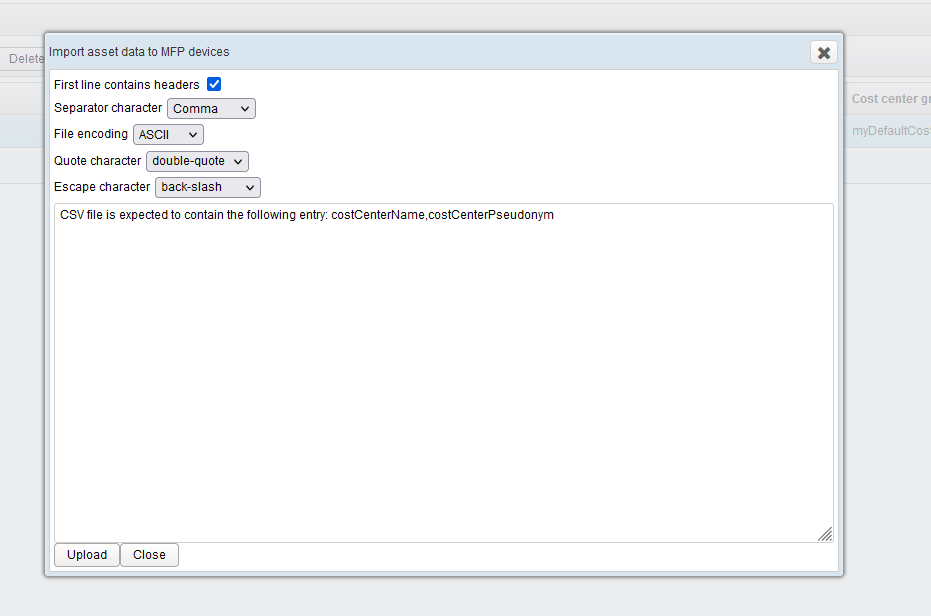
First line contains headers: check this, if the first line of the csv file contains headers.
Separator character: choose the separator used in the csv file. Per default this is set to Comma. Possible separators are: comma, pipe and semicolon.
File encoding: choose the file encoding of the csv file. Possible values are ASCII, UTF-8 and UTF-16.
Quote characters: choose which characters are used for qoutes. Either " or ' are possible.
Escape character: choose the character that is used for escaping. Back slash or forward slash are possible.
Click Upload and choose your csv file.
Identity Mapping
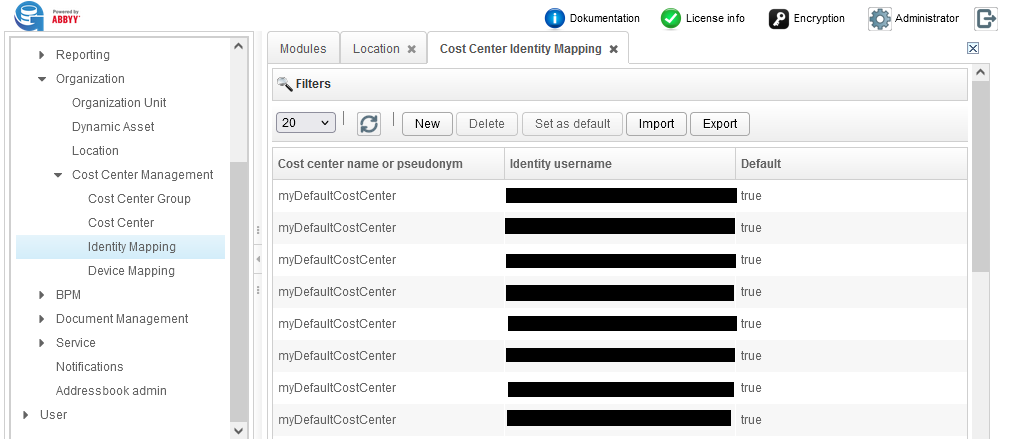
Associate an identity to a cost center, press the New button and fill in the following fields:
Identity username: press the magnifying glass and choose from the list an identity that already exists in the User section (for further details about the creation of an identity, refer to User).
Cost center name: press the magnifying glass and choose from the list a cost center that already exists.
Default: if checked, the chosen cost center is the default one for the selected identity.
Then press the Save and Close button to save.To delete a cost centeridentity mapping, select it and press the**Delete** button.
To set a cost center as default, select it and press the Set as default button.
To import the cost center identity mapping, press the Import button and then select the following options:
Create not existing entities: if enabled, the not existing identities and the not existing cost centers listed in the csv file are automatically created.
First line contains headers: if enabled, the first line of the csv file, that contains headers, is not imported.
Then press the Upload button, choose a csv file and press Open. Once uploaded, press the Close button.
To export the cost center identity mapping, press the Export button and a .csv file is downloaded.
Hint
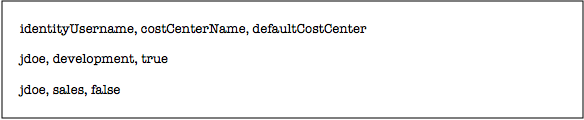
Following an example of how to write a .csv file:
Device Mapping
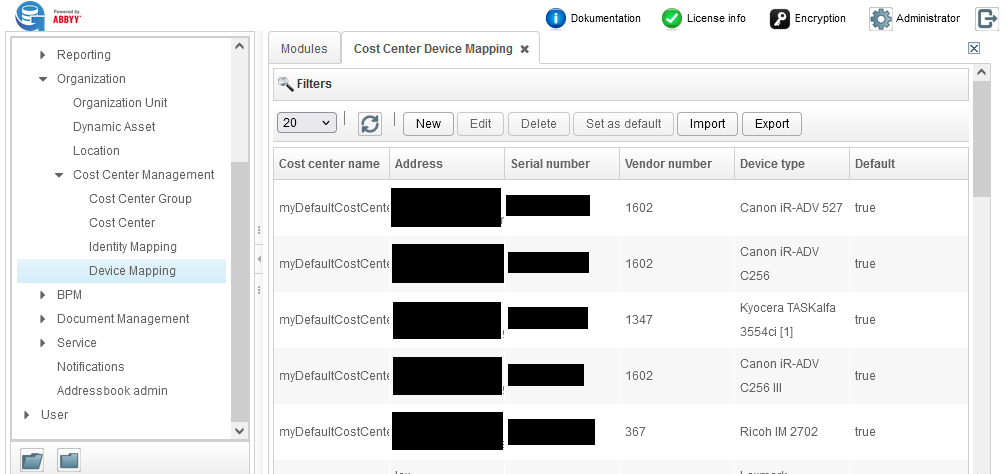
To associate a device to a cost center, press the New button and fill in the following fields:
Serial number: press the magnifying glass and choose from the list a device that already exists in the devices section (for further details about the creation of a device, refer to the Devices chapter).
Cost center name: press the magnifying glass and choose from the list a cost center that already exists.
Default: if checked, the chosen cost center is the default one for the selected device.
Weight: the percentage assignment of a cost center to a device (e.g. 80%).
Then press the Save and Close button to save.
To delete a cost center device mapping, select it and press the Delete button.
To set a cost center as default, select it and press the Set as default button.
To import the cost center device mapping, press the Import button and then select the following options:
Create not existing entities: if enabled, the not existing devices and the not existing cost centers listed in the .csv file are automatically created.
First line contains headers: if enabled, the first line of the .csv file, that contains headers, is not imported.
Then press the Upload button, choose a .csv file and press Open. Once uploaded, press the Close button.
To export the cost center device mapping, press the Export button and a .csv file is downloaded.