
Genius Server Installation
Genius Server Overview
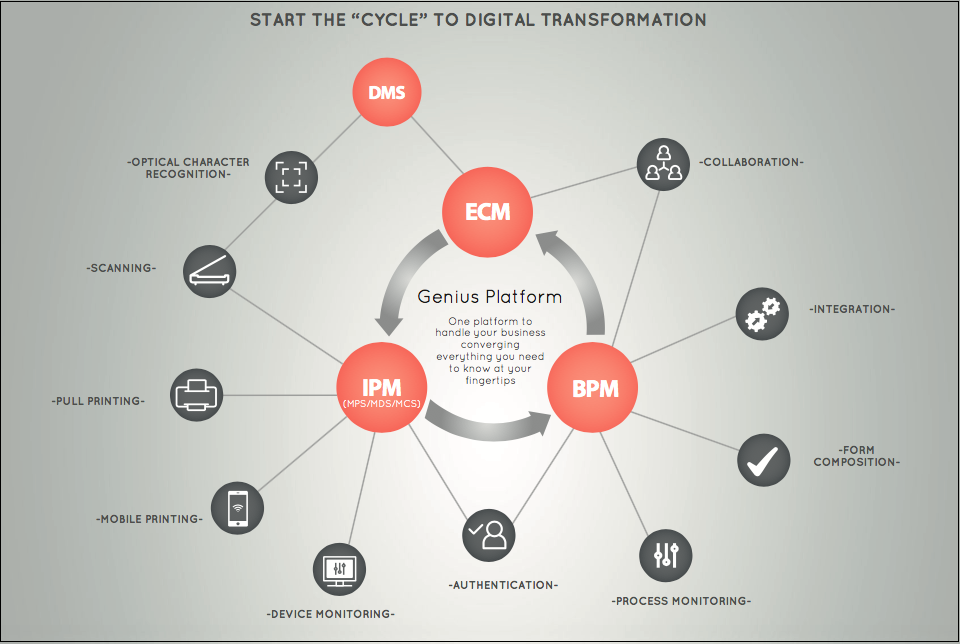
Genius Bytes Solutions meets the requirements of all enterprises focusing on the transition to a digital office, and optimized sharing of information. This innovative and unique platform enables fluid and efficient information management and interaction among users through tailor-made processes.
Its single integrated interface for all corporate devices allows users to interact in a simple way, choosing the most suitable device for their activities. Our product provides solutions for business process automation and information management through our flexible and scalable software platform, which is highly integrated in embedded devices as well as in the client’s infrastructure.
The Genius Platform consists of three main components: BPM (Business Process Management), ECM (Enterprise Content Management) and IPM (Imaging Print Management).
These three components provide an end-to-end office document management system that offers to companies:
Standardization and automation of processes,
Process monitoring,
Structured and organized document archiving,
Secure and cost-effective printing,
Cloud strategy and a
Location-independent solution (across multiple buildings, premises and even countries) using a central database storage.
The benefits of Genius Server consist of:
Cost reduction
Increased efficiency and quality
Traceability
Waste reduction
Enjoy Our Software!
Getting Started
Before starting the installation:
Check the minimal requirements for the Genius Server found in the corresponding white paper,
make sure you obtained the correct Genius Server installation file,
create an external dedicated DB and
create an external dedicated storage.
Check the update compatibility and updating to 3.10.0 or higher sections below!
Note
The white paper for the minmal requirements can be found in the download area or requested under this e-mail address: service@geniusbytes.com.
Update Compatibility
When updating Genius Server, an update from 2.27.4 to 3.4.x or higher has been tested and is possible. If a version smaller than 2.27.4 is in use, upgrade to 2.27.4 first, before updating to 3.4.1 or higher.
Updating to 3.10.0 or Higher
When you update your Genius Server from a version smaller than 3.10.0, there is an important thing to note.
Since the Apache Commons Daemon component has been updated it is mandatory to backup your changes to the Genius Server Windows service, if you made any.
Because of the update, the Genius Server installer will remove the Windows service and reinstall it with default options. If you do not backup your changes, they are gone and this can result in a system failure.
This change affects Genius Server and Genius Relay.
Also, starting with this version, you will need to set a LogOn user if you want to install a cluster environment. Refer to How to Customize the Windows Service at the end of this chapter for details on this.
Database Creation
Create a database by using a Database Management System (DBMS), e.g. SQL Management Studio of Microsoft SQL.
Once the database is created, run the appropriate script to create the DB structure. If the necessary scripts are unknown, it is possible to obtain them after the installation of the server in the file system: C:\Program Files\Genius CDDS Server\ddl.
Warning
Depending on the operating system and the selections made during the installation process, the scripts' path may be different.
Build scripts are provided for all databases supported by the solution. The name of the scripts varies according to the database (e.g. cdds-2.x.x-ddl-create-POSTGRES.sql is associated to PostgreSQL).
For the encoding process, use UTF8.
Warning
The embedded DB (H2 DB) can be used during the installation to test functionalities, but it is not to be used in a productive environment.
Database Scripts
Database |
Script |
Language settings |
Encryption |
|---|---|---|---|
Microsoft SQL server |
MS SQL 2005: cdds-2.x.x-ddl-create-SQLSERVER_2005.sql MS SQL 2008 and higher: cdds-2.x.x-ddl-create-SQLSERVER_2008.sql |
Settings for characters are accent sensitive but not case sensitive: COLLATE Latin1_General_CI_AS. |
Microsoft JDBC Driver 4.0 for SQL server provides a database connection through SSL Encryption (for further details refer to Database). |
PostgreSQL |
cdds-2.x.x-ddl-create-POSTGRES.sql |
Settings for characters are accent sensitive and case sensitive. |
Use UTF8 to encode. |
Oracle |
cdds-2.x.x-ddl-create-ORACLE-10G.sql or cdds-2.x.x-ddl-create-ORACLE-9I.sql |
Settings for characters are accent sensitive and case sensitive. |
Use UTF8 to encode. |
For further details about database configuration, refer to the Database section.
Firewall Configuration
To make the Genius Server communicate with MFP devices and print servers, verify that the following ports are open and are not in use by any other application or service:
8080: used for the communication with MFP devices (http) and the web-based administration.
8443: used for the encrypted communication with MFP devices (https) and the web-based administration (optional).
161 and 162: used for the SNMP to make a request to MFP devices. These ports are usually open by default.
515: used for sending and receiving print jobs.
Note
Verify that these ports are correctly routed in the company networks.
Hint
On a Windows Server, the port 515 can be blocked by the LPD Daemon service, which is an option of the Print and Document Service role. If you have this option installed, you only have to stop and disable the service.
Antivirus Configuration
To make the Genius Server work properly, disable the antivirus for the following services:
Genius Server services
External folders
Database (if it is installed on the same server)
Storage
Asposy
Abbyy
Java
Installation
Download the installer from the Download Area:
genius-server-3.18.2.0-setup-win64.exe
Warning
In case of a Linux environment, refer to the Genius Server Installation on Linux Environment chapter.
To install the Genius Server, complete the following steps:
Double-click on the installer and press Yes to confirm the operation. The system asks for the confirmation because the user is downloading a file from the web.
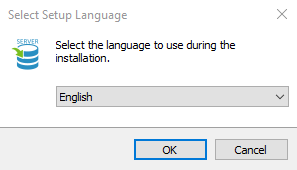
Select the preferred language and press OK (this selection refers only to the installation process and does not affect the software installed).
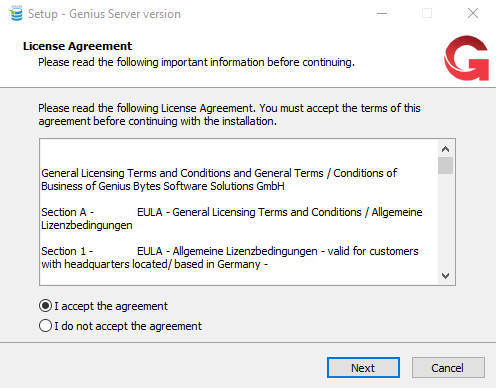
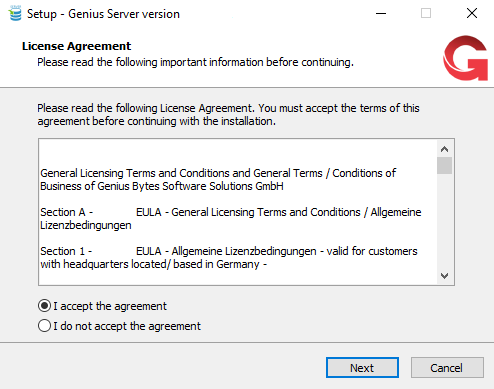
Read and accept the license agreement. Click Next to proceed.
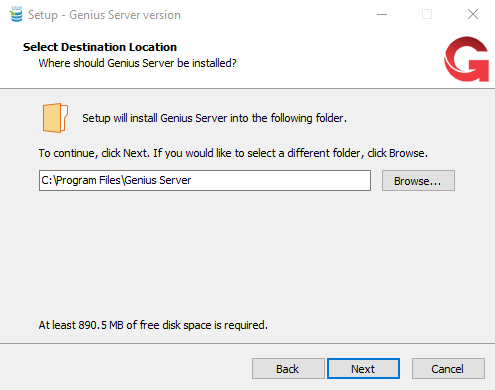
Specify the path where to install the software and press Next.
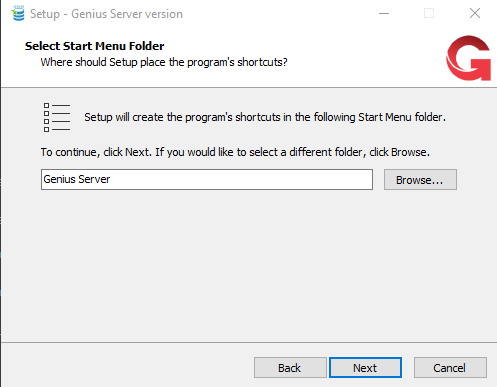
Chose the start menu folder where to create the program’s shortcut, then press Next.
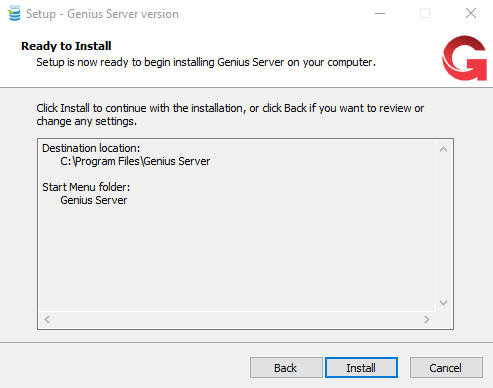
The next windows shows a summary of the selections made before. Confirm that everything is correct and press Install to continue with the installation.
Once the installation ends, press Finish.
Note
If Microsoft Visual C++ Redistributable 2017 is not already installed the Genius Server installer will install it. This procedure might require a server restart.
Genius Server has been successfully installed.
Once the software has been installed, the Confguration Tool automatically opens and the main settings can be configured (for further details about the Configuration Tool, refer to Configuration Tool Overview).
Note, that you will need a demo license or a productive license to actually run Genius Server. More information about this license file can be found here Genius Server License.
Backup Procedure
The backup activity allows users to archive data on storage media in order to prevent permanent data loss.
Warning
Please check Updating to 3.10.0 or Higher before continuing this procedure.
To protect Genius Server data files, a backup is necessary for:
Genius Server program files (included into the Genius Server installation directory),
the database used by the current installation and
the phoenix base folder (Genius Server configuration files).
The phoenix base is part of the Genius Server installation folder and contains data processed by server engines (Print, BPM, DMS, Report generator, Mailer, OCR recognizer, Pdf builder). To preserve binary data and temporary files created by server modules, save the content of the following folders:
conf: property files for configuring server engines. Data from thecddsfolder are handled by the Configuration Tool. Thewebfolder contains settings for the web console (connection settings and logs).bpm: binary data created during an instance execution and temporary files.database: (Optional) Genius Server's embedded database. Generally, DBMSs are used instead of an embedded solution. Backup and recovery procedures of external databases depend on the DBMS in use.dms: documents in the internal Data Management System.logs: all log files and metrics for Genius Server and the web console.mailer: binary data coming from emails processed by the mailer.print: binary data processed by the print engine.reporting: reports in a binary data form, temporary files used in report creation and templates.pdfbuilder: libraries that allow the engine (pdf creator) to work properly and temporary files.aspose: libraries that allow the engine (pdf creator in Windows OS) to work properly and temporary files.abbyy: files that allow the engine (OCR processor for Windows OS) to work properly (libraries and configuration files).tesseract: engine (OCR processor) output folder and temporary files.
Database backup and restoring procedures depend on database types:
embedded database: backup the content of the
databasefolder (included into the Genius Server installation directory) and restore data copying the folder content in the database folder.external database: refer to the DBMS reference manual.
Note
Depending on the Genius Server version, database schema may be different.
Warning
Stop the Genius Server before backing up or restoring data.
Update Tool
The update tool's purpose is to update an existing Genius Server installation to a new version.
The upgrade process affects all files and folders, which are included in the Genius Server installation and in the database in use.
Genius Server version system has a specific scheme: X.Y.Z, where X = product version, Y = major version, Z = minor (bugfix) version.
We recommend to always use the latest version of our software in the product version you use, or the latest version of the newest available product version.
For product version updates (e.g., 2.yy.zz to 3.y.z, please refer to the release notes for a recommended update path). Usually it is recommended to upgrade to the latest available major version of a product version, before performing an update of the product version. For example: 2.26.4 -> 2.27.4 -> 3.y.z.
To update the Genius Server, go to the download area and browse to the section "MyMFP current release" (to obtain account credentials, contact support@geniusbytes.com). Then, download the installer for Windows.
Warning
Before starting the update, first check Updating to 3.10.0 or Higher and then follow the backup procedure described in the Backup Procedure section. Performing a backup is useful in case of update failure. If the Genius Server has been deployed on a virtual environment, before starting the update, run a snapshot of the virtual machine. Ensure that the database is locally stored on the virtual machine as well, otherwise an additional backup of the external database is required.
Ready to Update
Note
For the embedded database, the update procedure is not supported!
To update the Genius Server, the update tool needs to be installed.
Start the installation by double clicking on the installer. According to your security settings, confirm the windows security prompt.
Select the language and press Ok.
Read and accept the license agreement and press Next.
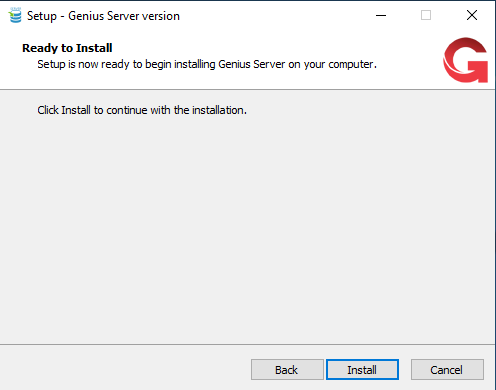
Press Install.
Press Finish after the installation ran through.
Warning
Before proceeding to the next steps, be sure that the Genius Server service is stopped before starting the update and that the Configuration Tool is closed before starting the update.
Once verified, proceed in completing the following steps:
Click on the Start migration icon.
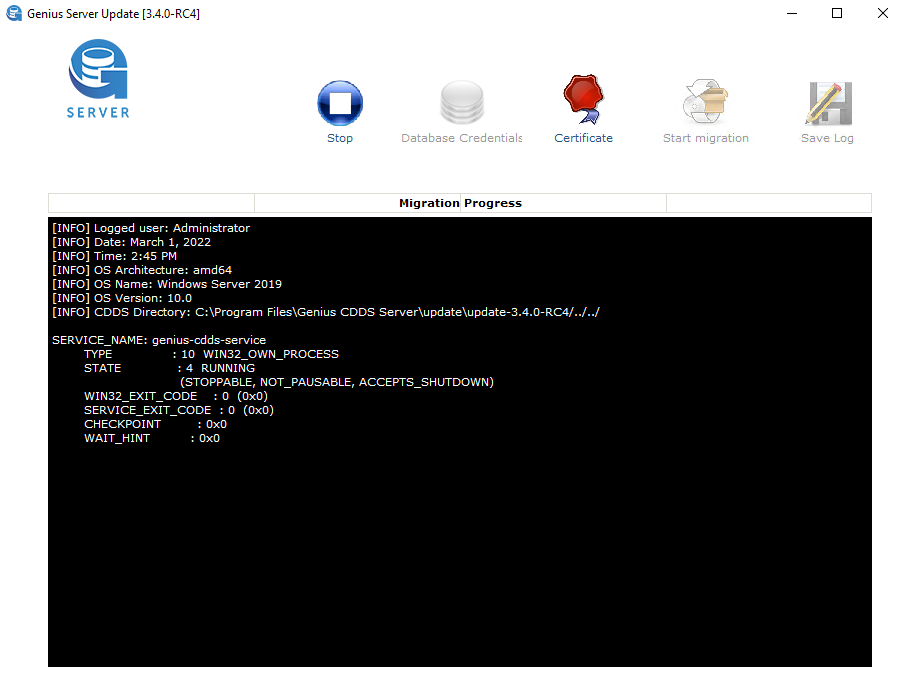
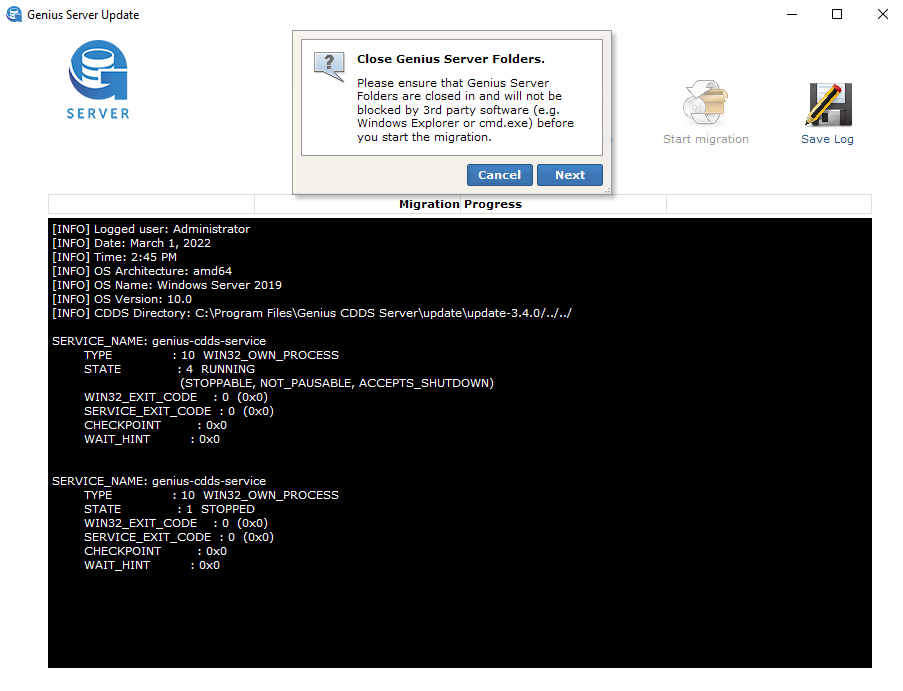
Once again, ensure that the Configuration Tool is closed and then press the Next button.
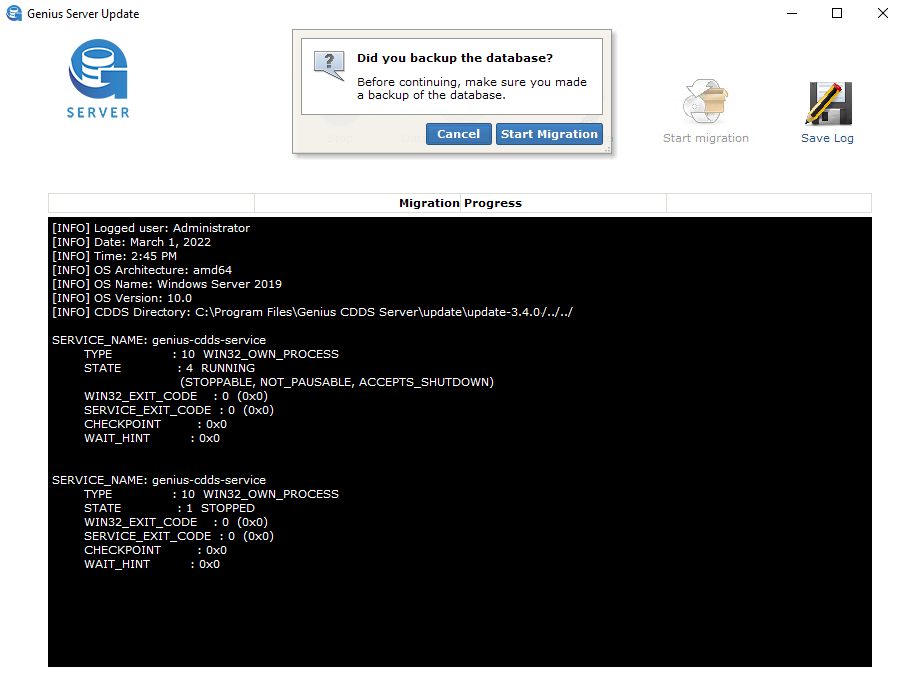
Make sure that the database backup has been correctly performed, then press the Start Migration button.
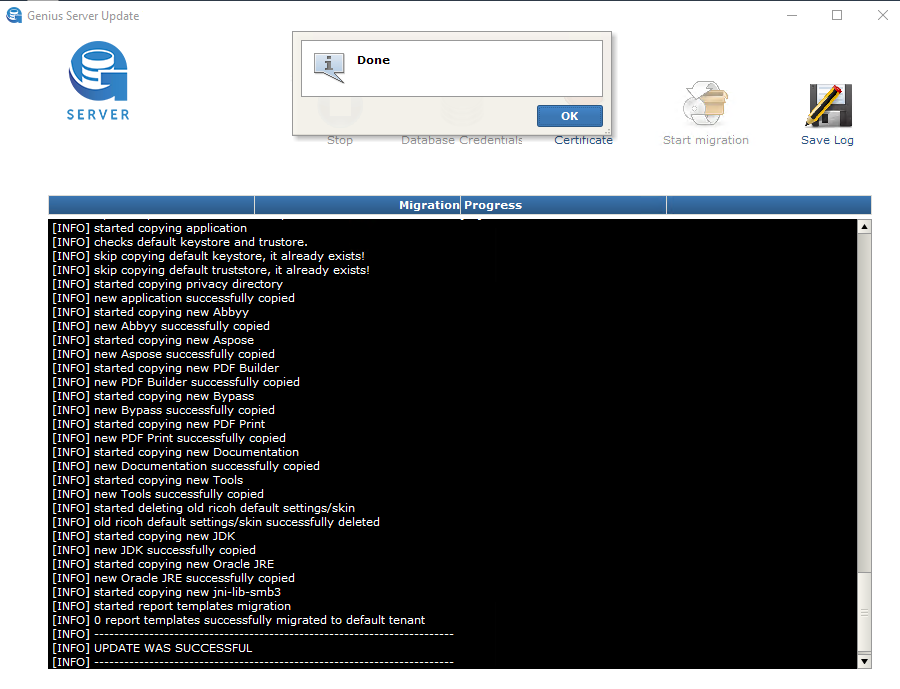
Once the update has been performed, press the Ok button to end the procedure.
Hint
If you experience problems after the upgrade, restore your database backup and the previous Genius Server directories, and then retry the update.
Note
If Microsoft Visual C++ Redistributable 2017 is not already installed the Genius Server updater will install it. This procedure might require a server restart.
Configure the Update Tool for SSL Communication
In case of SQL(S) or encryption in the JDBC-URL, a configuration of the Update Tool for SSL communication is required before starting the update. To allow the Update tool to access the truststore where the public SSL certificate is stored, perform the following steps:
Install the Update Tool.
Close the Update Tool.
In the Genius Server installation folder, go to the
updatefolder, select the last update version folder and then go to the bin directory (e.g.C:\Program Files\Genius CDDS Server\update\update-3.x.x\bin).Modify the
update-app.batfile (Windows OS): at the end of theEXTRA_JVM_ARGUMENTSline, add the Java property to specify the truststore-Djavax.net.ssl.trustStore="%DIR%/../"default-truststore.jks. Users can enter a full path into the quotation marks (e.g.C:\Program Files\Genius CDDS Server\conf\cdds\default-truststore.jks). For the “default-truststore.jks”, use the configured truststore taken in the productive environment. To verify the update, go to Configuration tool-> Base -> Certificate -> < Test > -> Read Truststore.Open the command prompt as administrator and run the “start-update.bat”.
Check the connection between the database and the Update Tool.
Run the update process.
Warning
If the Genius Server service is usually started by a user with administrative rights, use the same credentials to start the Update Tool to allow a correct database migration.
How to Customize the Windows Service
This chapter explains how to customize the Windows service as well as how to set a LogOn user.
Setting the LogOn User
In case of a Genius Server cluster environment, setting the LogOn user is mandatory. To set the LogOn user, proceed as shown below:
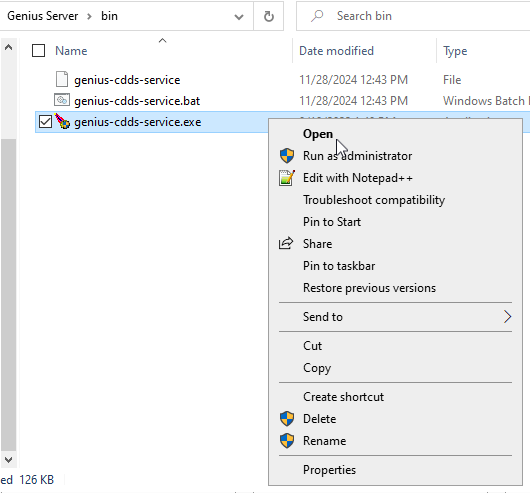
Locate the folder where the file genius-cdds-service.exe is located. Per default this is
C:\Program Files\Genius CDDS Server\bin.Right click the file genius-cdds-service.exe and select Open.
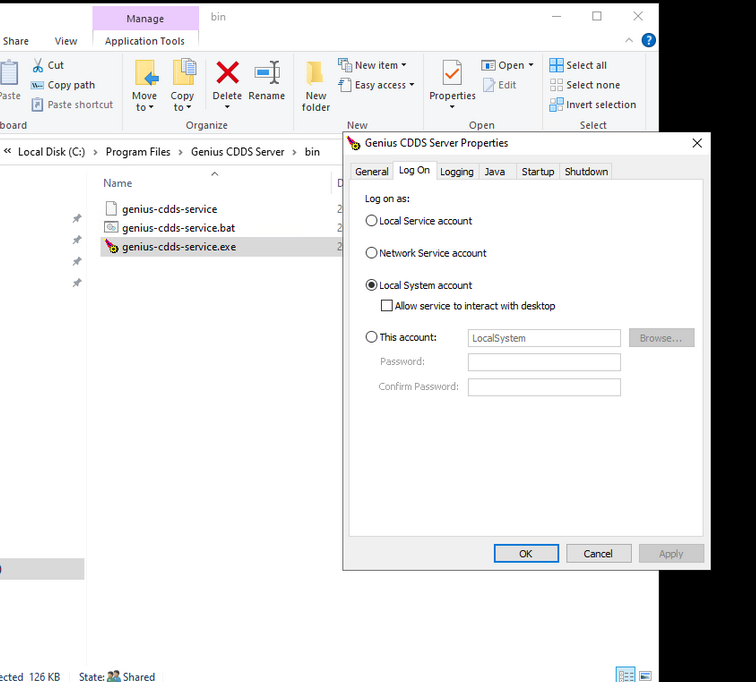
Navigate to the tab Log On and set the log on to Local System account. Do not forget to press Apply to save the changes.
Setting Memory Settings and Java Options
To change memory settings and set java options, which can be necessary for Genius Relay follow these steps:
Locate the folder where the file genius-cdds-service.exe is located. Per default this is
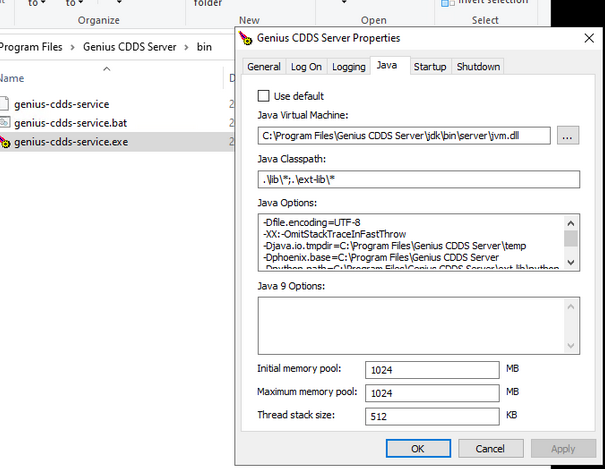
C:\Program Files\Genius CDDS Server\bin.Right click the file genius-cdds-service.exe and select Properties.
Navigate to the tab Java. Here you can change the memory pools, and add Java Options.
Note
When changing Java options, the local JMX connection is lost. Please refer to How to Configure the JMX Connection found in the Relay chapter of this document for more information on this topic.