Easy Admin
Through a minimal web interface, the Easy Admin console simplifies the device management. The provided operations allow the administrator to add devices, modify their status (activate/deactivate) and location, define new cost center associations and generate counter snapshots.
Before you open the Easy Admin interface, assign the Easy device admin role grant to the administrator group. For further details on how to add permissions, refer to Grant section.
Note
Some of the Easy Admin features are also available in the Device Management section.
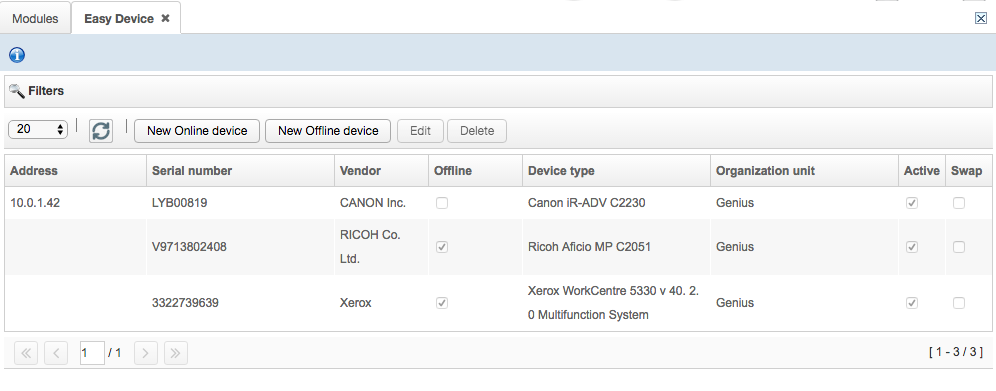
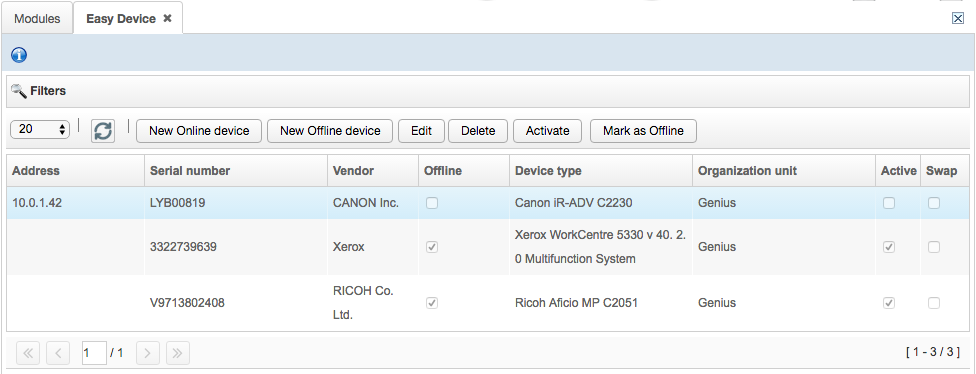
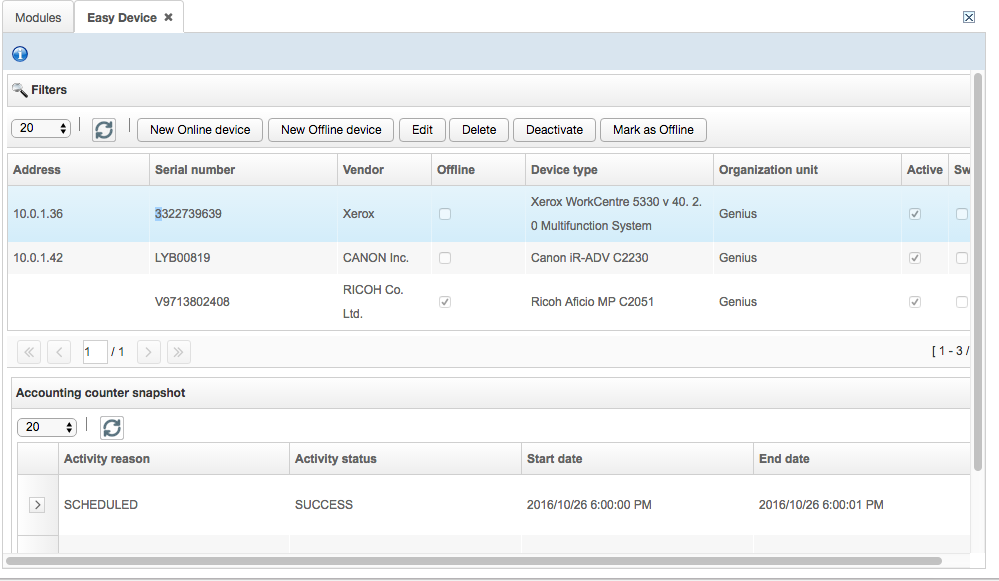
In the start page the detected device list is displayed.
Accounting Snapshot Counter Event
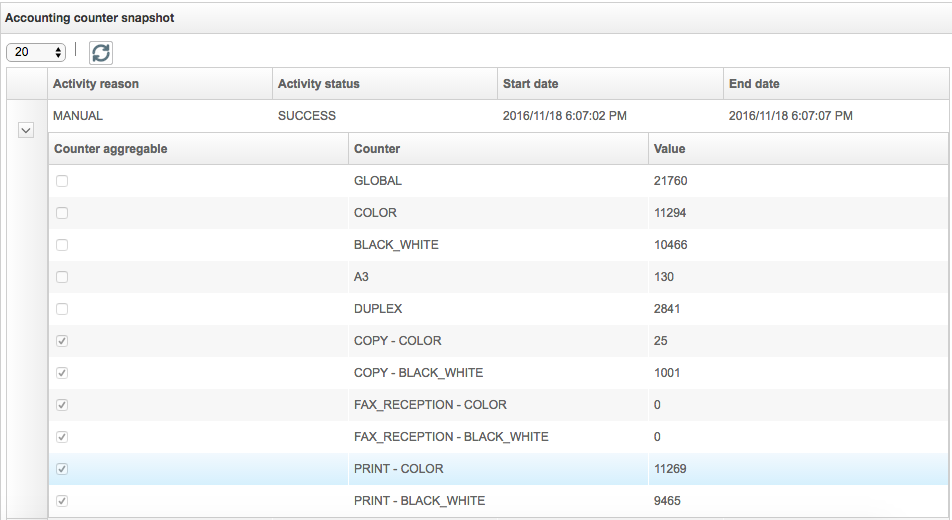
Device counters collect information on the printer usage (e.g. number and document size for prints and copies or number of scans).
This section shows the counter snapshot list related to the printer of each device. Every time a new MFP is added, activated or deactivated, a counter snapshot is reported on the list.
Online Device
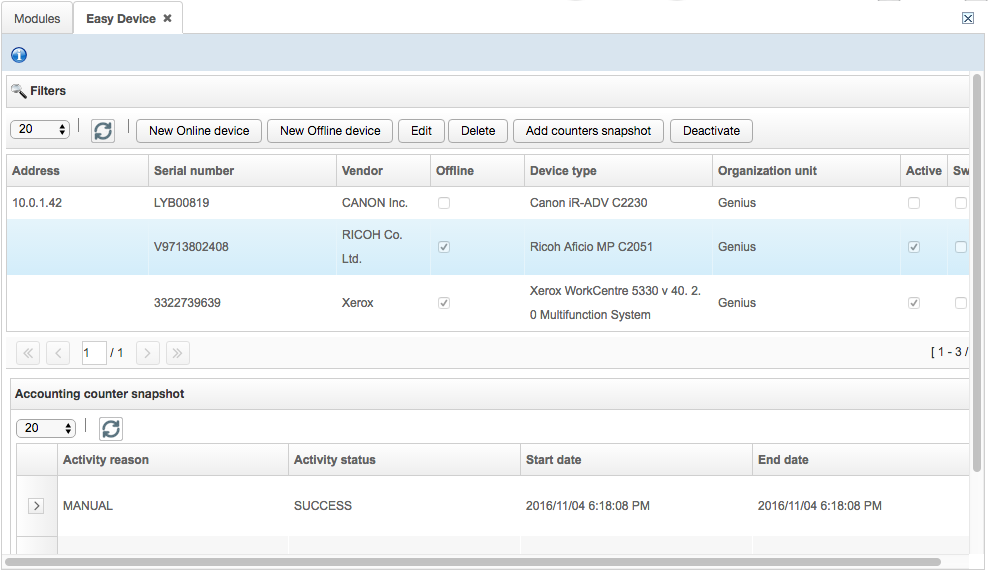
When a new online device is added, the process creates a counter snapshot, which is displayed on the Accounting snapshot counter event list. Every time a device changes its status (Activate/Deactivate), a new snapshot is reported on the list.
The image below shows a list of snapshots for a specific device:
To check counter details, press the cross button +.
Offline Device
The automatic reading counter process is not available for offline devices, thus add them manually. After the creation of a new device, counter details are manually added filling in a specific form.
To add the counter snapshot for a new offline device, press the Activate button.
The activation process requires the addition of device counters. Therefore, according to the counter values, fill in the form fields. The column value contains the last values added or detected for that device (for a new device, no counters have been read before). On the top of the window it is possible to choose the Date of Reading.
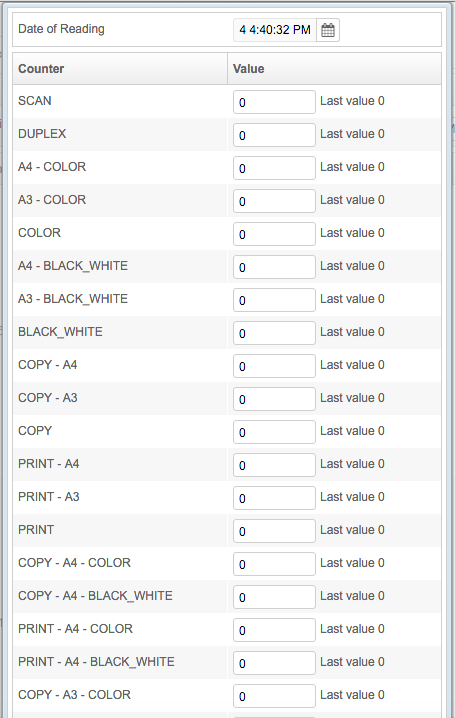
To save counters, without activating the device, press the Activate button or the Manual counters snapshot button.
Devices Already Activated
To add counters to an offline device already activated, follow the instructions below:
Select an offline device, and press the Add counters snapshot button.
Enter a value in each field and then press the Manual counters snapshot button to save .
When an offline device changes its status (Activate/Deactivate), the administrator has to add counter values manually.
Enter the values according to the device status and press the Activate or Deactivate button. If the status shall not change, press the Manual counters snapshot button to save the snapshot without having the status changed.
Edit a Discovered Device
To modify the device location or the cost center association, go to the Edit page. Double click on a device row or select it then press the Edit button.
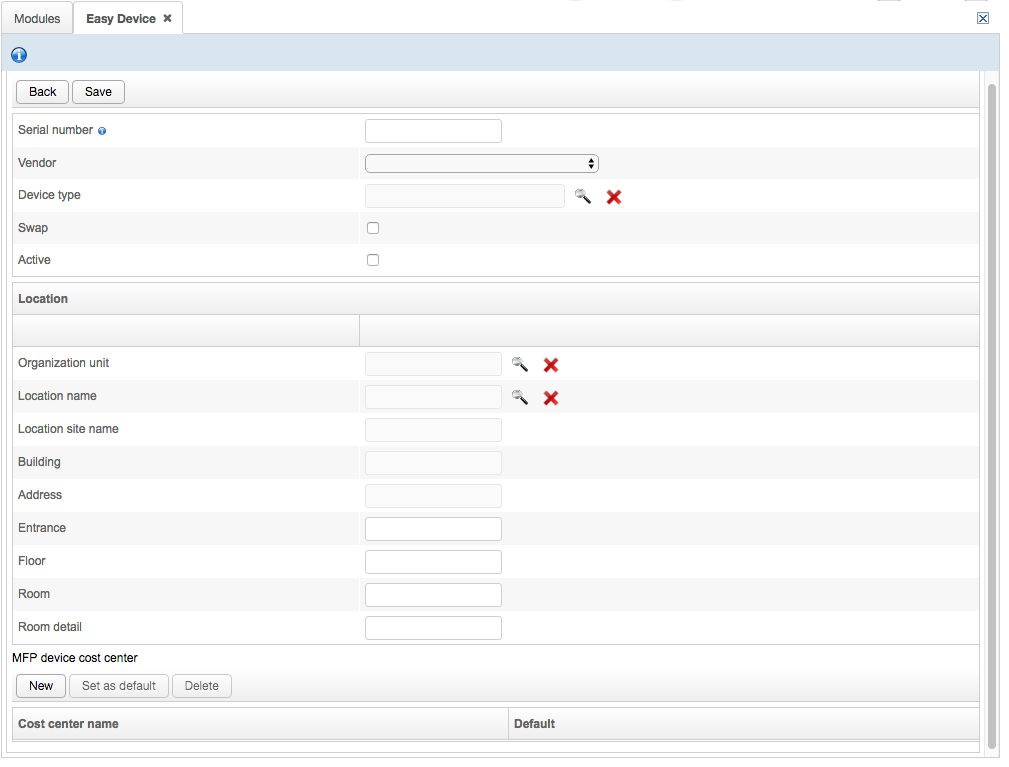
Available changes are:
Swap: if checked, the device has been swapped.
Location: if the location has been changed. Information about the location is:
Organization Unit,
Location name,
Location site name,
Building,
Address,
Entrance,
Floor,
Room detail and
Room.
To add a new cost center, press the New button, select the cost center and press Select to confirm. To set a cost center as default, press the Set as default button. To delete a cost center, press the Delete button
To apply changes, press the Save button.
New Online Device
Through this procedure, the administrator can add a new online MFP: connect the device to the Genius Server local network to make it reachable. Press the New Online device button and enter the IP address of the device. The Genius Server automatically collects the information required (vendor, serial number, Mac address and other details) from the device.
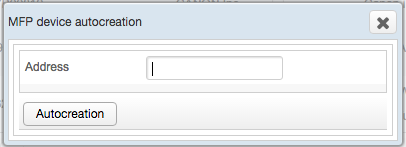
To perform the detection, press the Auto create button.
When the device is detected, the device detail page opens.
Note
Counters are automatically added during the device creation, for further details, refer to the Accounting Snapshot Counter Event section.
New Offline Device
Through this procedure, the administrator can add a new offline device either if it is powered off or not connected to the network.
Press the New Offline device button and enter the device details. Required fields are:
Serial number: the serial number of the device.
Vendor : the vendor of the device.
Device type: the type of the device.
To add the new device to the list, press the Save button.
Note
Add counters value manually, for further details, refer to the Offline Device section.
Activate/Deactivate Device
Devices status can be modified from deactivated to activated or vice versa. In the Easy device home page, select the device and press the Deactivate or Activate button.
Note
Counters are reported as the device status is changed, for further details, refer to the Accounting Snapshot Counter Event section.
Delete Device
Devices can be deleted from the device list. In the Easy device home page, select the device and press the Delete button.
Mark as Offline
This feature allows a device, which was on the online device list, to be marked as offline. To set an online device to an offline status, select the item and press the Mark as offline button.
The operation implies a change on device status and the deletion of the IP address.
To change the device offline status, create a New Online Device or perform a discovery from the Device Management section.
Filters
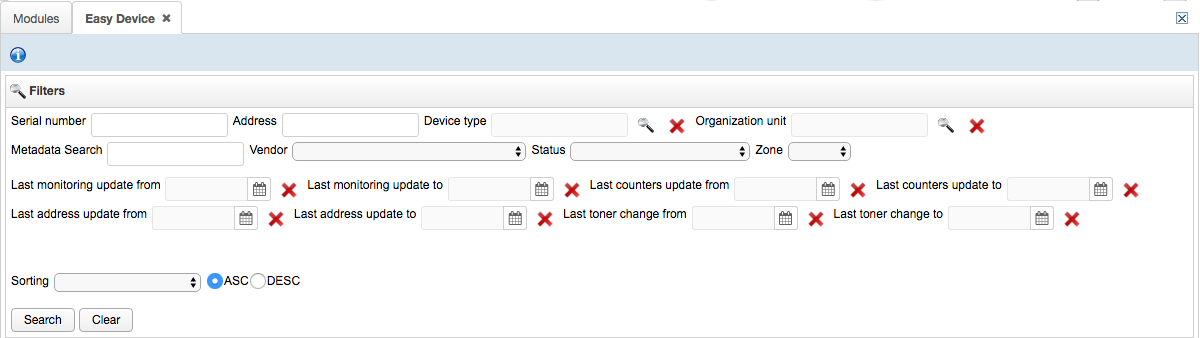
Perform a search on the device list matching customizable criteria. According to the specific device or the group of printers you are searching for, fill in the relative fields.
The search result can be sorted in three different ways: within the first sorting result, the administrator can specify other two sorting levels.
Help Button
To perform an easy accessibility to documentation, press the i (info) icon button at the top of the page.
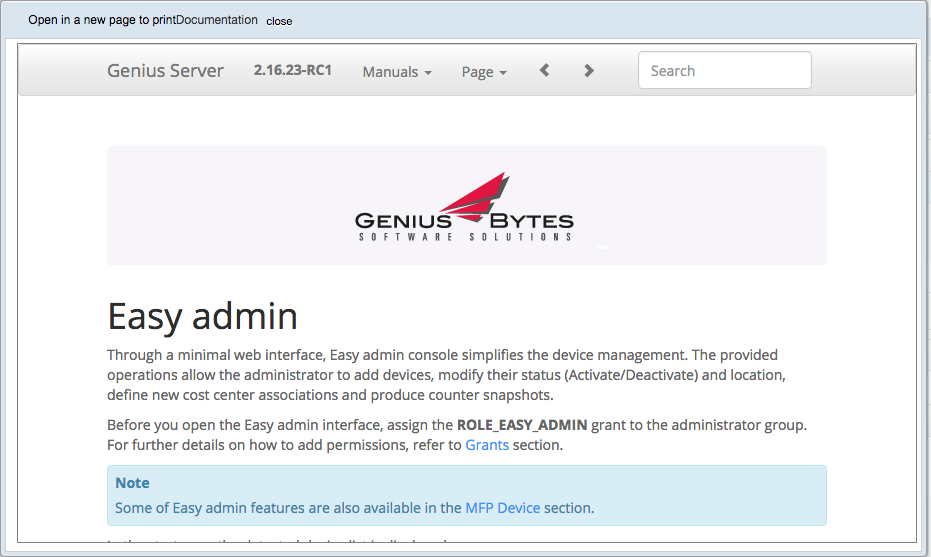
The documentation page is displayed below. You can open it in a new tab.