
Configuration Tool Overview
The Genius Server configuration tool, or config tool for short, is used to configure and maintain the functions of the Genius Server.
With the config tool, the administrator can configure the global functions that are relevant for all tenants. If you were previously using Genius Server version 2, you might notice, that some functions are seemingly missing inside the config tool.
The functions are not gone, they have been moved to the web configuration page, to accomodate multitenancy. Refer to chapter Genius Conf for further information.
To summarize: Configurations that affect all tenants are made inside the config tool and require a restart of the Genius Server service. Configurations made for a specific tenant are made on the web configuration page and usually do not require a restart of the Genius Server service, as long as not noted otherwise.
After the Genius Server has been installed, the config tool automatically opens. It also creates a shortcut on the desktop as well as an entry in the Windows start menu for later access, named Genius CDDS Server (64bit) Tools.
Hint
When accessing the tool always access it as administrator.
Once opened, two types of configuration are available:

Wizard Configuration
The wizard configuration option is meant as a quick configuration to make the Genius Server work in a few steps. For more complex enviroments the Standard Configuration offers more options. Changes to the configuration can be made after a wizard configuration, too, though.
To start the wizard configuration, click on the Wand symbol. It is a guided configuration through the following modules:
For further details about the modules listed above, refer to the corresponding sections in the Base section (for database, e-mail, printing and web) and in the MyModule section (for cluster).
All configurations made inside the wizard configuration can be tested, by selecting the < Tests > button on the top right of the config tool.
Do not forget to click Save after all changes in a section have been made.
To navigate through the different modules, press the Next or Previous button.
To exit the wizard configuration, press Next until the last module (cluster) is reached. There press End wizard. Only press this if everything is setup as intended and saved.
Standard Configuration
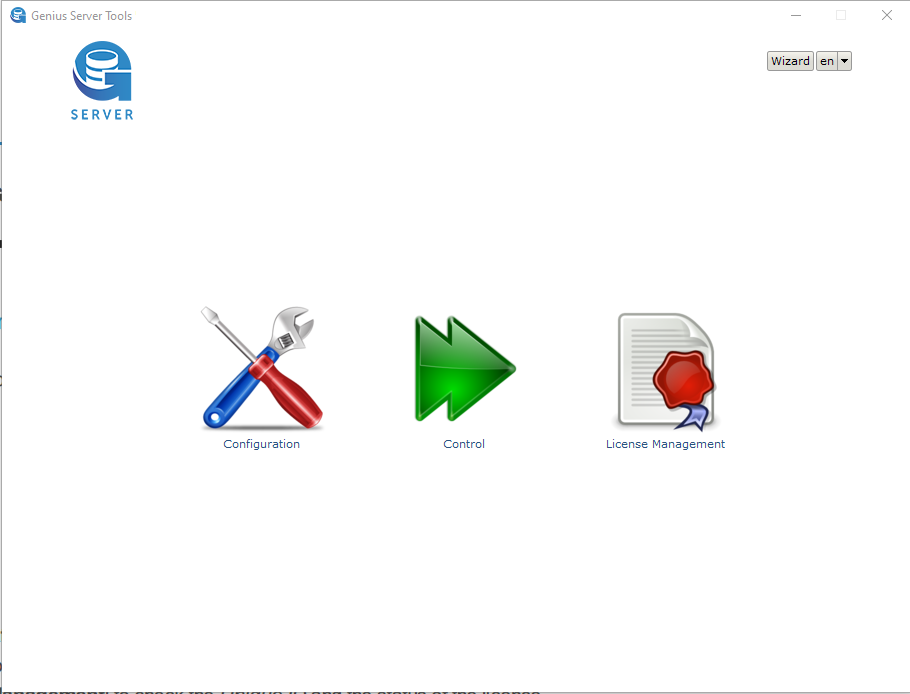
The overview of the standard configuration opens either after finishing the Wizard Configuration or after clicking the screwdriver and pliers symbol.
The standard configuration is composed of three sections:
Configuration: to check and modify the Genius Server configuration,
Control: to start and stop the Genius Server service as well as checking the status and
Licence Management: to check the Unique ID (also called Installation ID).
Note
Note that the settings behind the Configuration button include the Base, MyModule and System sections. Those sections have a basic and an advanced view which can be toggled by pressing the corresponding button. The sections will be discussed further below.
Installing a Productive License
In order for the Genius Server to run with a productive license on your server, the Genius Bytes order team needs to activate your license. For this they need the Unique ID or Unique ID (UUID).
Refer to Genius Server License for details.