
MS Azure Configuration
Registering the Server Application
Connect and login to the Azure website e.g.: [external link] https://azure.microsoft.com/de-de/features/azure-portal
Hint
The user performing this configuration should have admin rights.
The page shown should look like this:
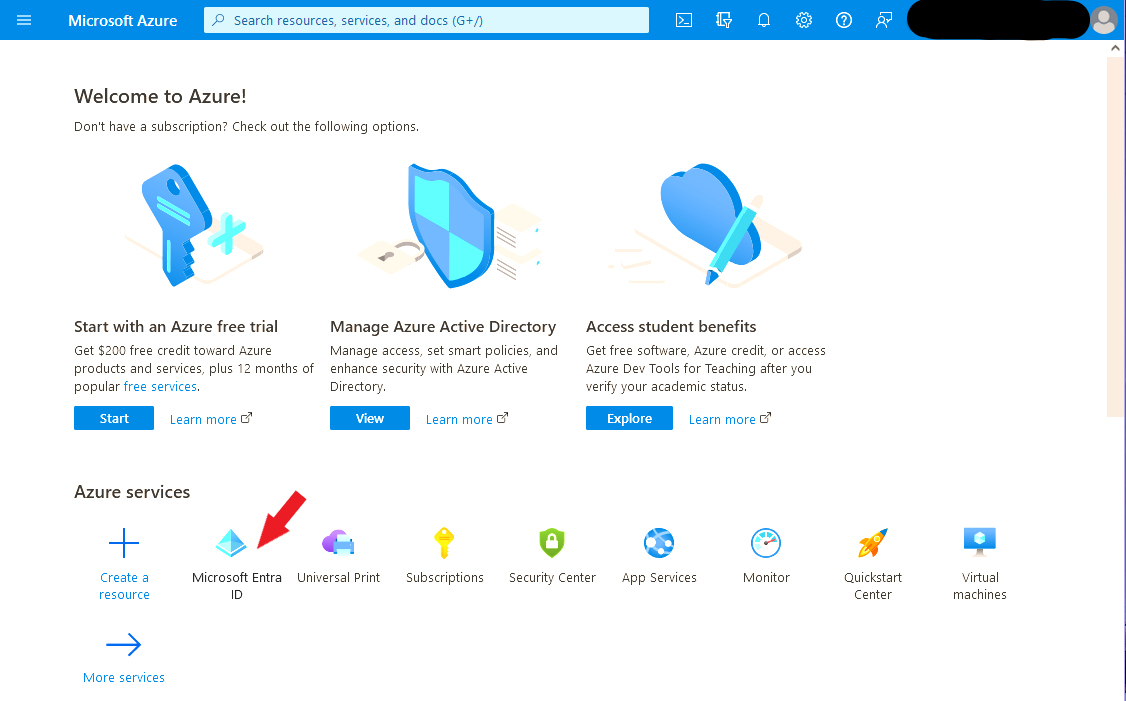
Click on Microsoft Entra ID. Hint: If it does not show in this list, click on More services and then there on Microsoft Entra ID.
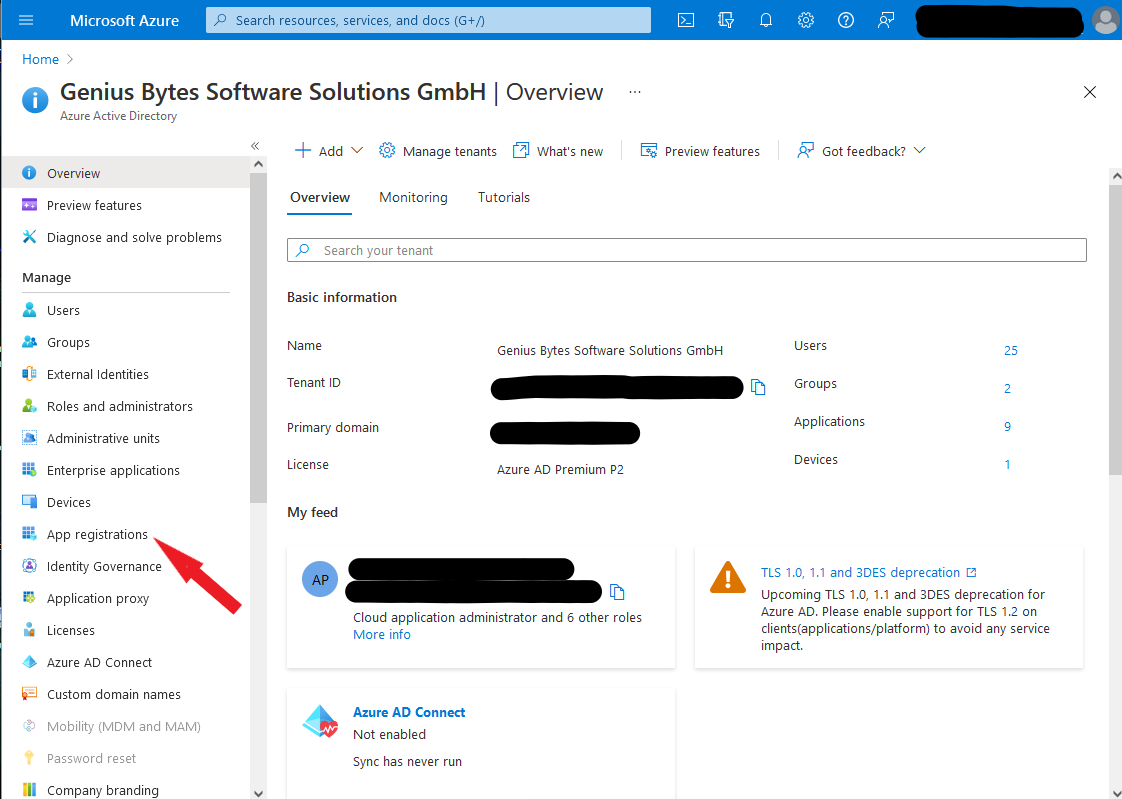
An overview page opens. Click on App registrations on the left side:
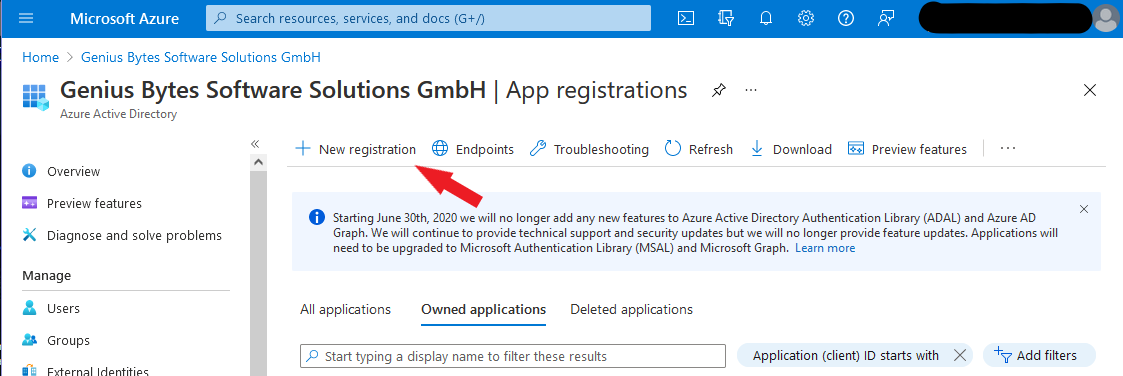
In the new window click on + New registration:
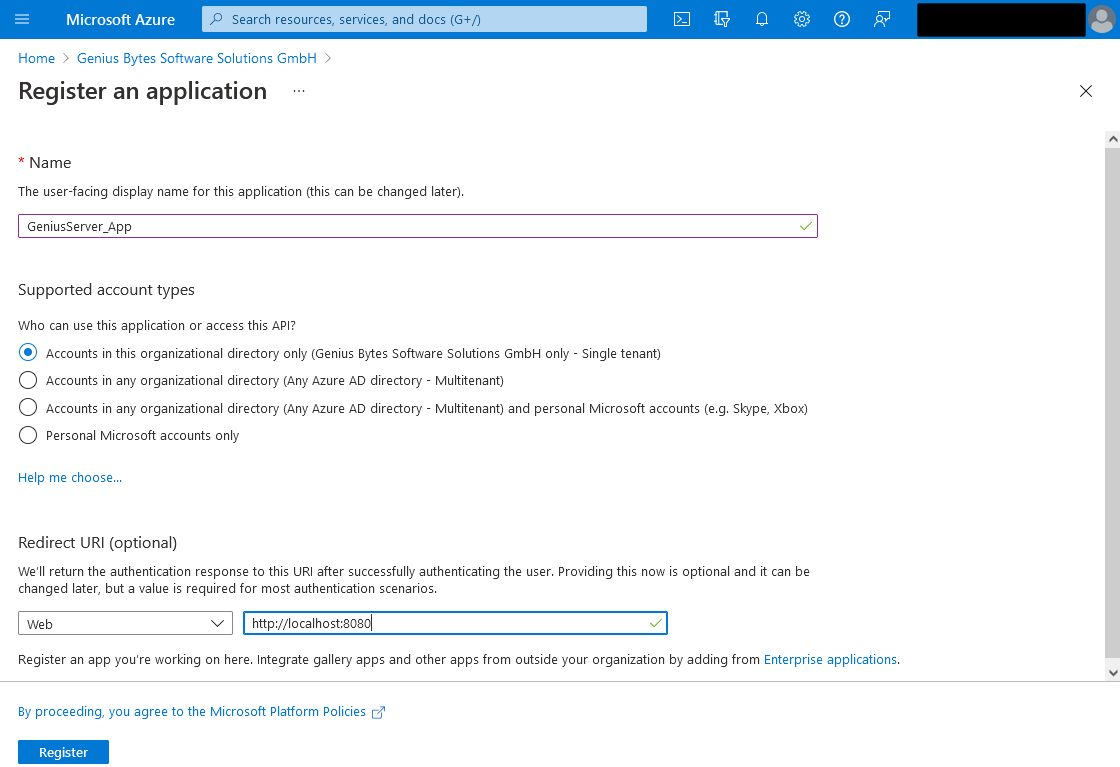
A new window opens. Enter a name for the App, (e.g. GeniusServerApp), configure the supported account types and set the redirect URI. For this app, the URI should be configured as in the screenshot below, so in the dropdown menu choose Web and as URI enter
http://localhost:8080.
When you want to use single-sign-on, correct URLs have to be configured with the correct FQDN, see following URL Examples:
https://<FQDN>:8443/gweb/j_spring_security_check
https://<FQDN>:8443/admin/j_spring_security_check
If the single sing on URLs are correctly configured the following links can be used to skip the tenant selection on admin or gweb login:
https://<FQDN>:8443/admin/j_spring_security_check?sso_login=MICROSOFT&j_tenantcode=<TenantCode>
https://<FQDN>:8443/gweb/j_spring_security_check?sso_login=MICROSOFT&j_tenantcode=<TenantCode>
Also make sure to set the single-sign-on mode to a value that is not "disabled". Wildcards in FQDNs are possible to save only using the manifest. Check Microsoft documentation in Azure for recommendations about wildcards in URLs.
Click on Register after everything is set.
Note
For the supported account types, choose the one fitting your environment. If multiple tenants are to use the API, choose the multitenant option. If, for example an external administrator needs access, too, choose the option that also includes personal Microsoft accounts.
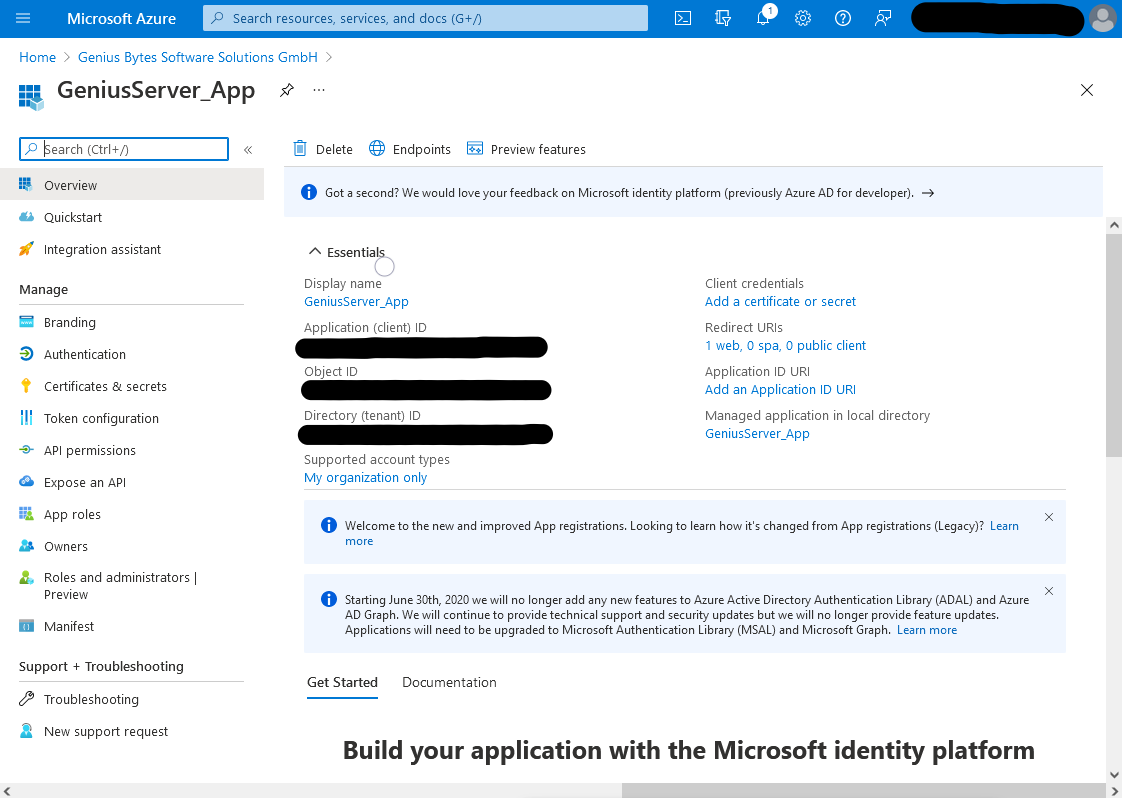
The overview should now look like this:
Warning
Important: Copy the Application (client) ID and save it in a text file. You will need it later when configuring the provider inside the Genius Server configuration tool.
Configuration of Certificates
Now the certificates and secrets for the registered APP need to be configured:
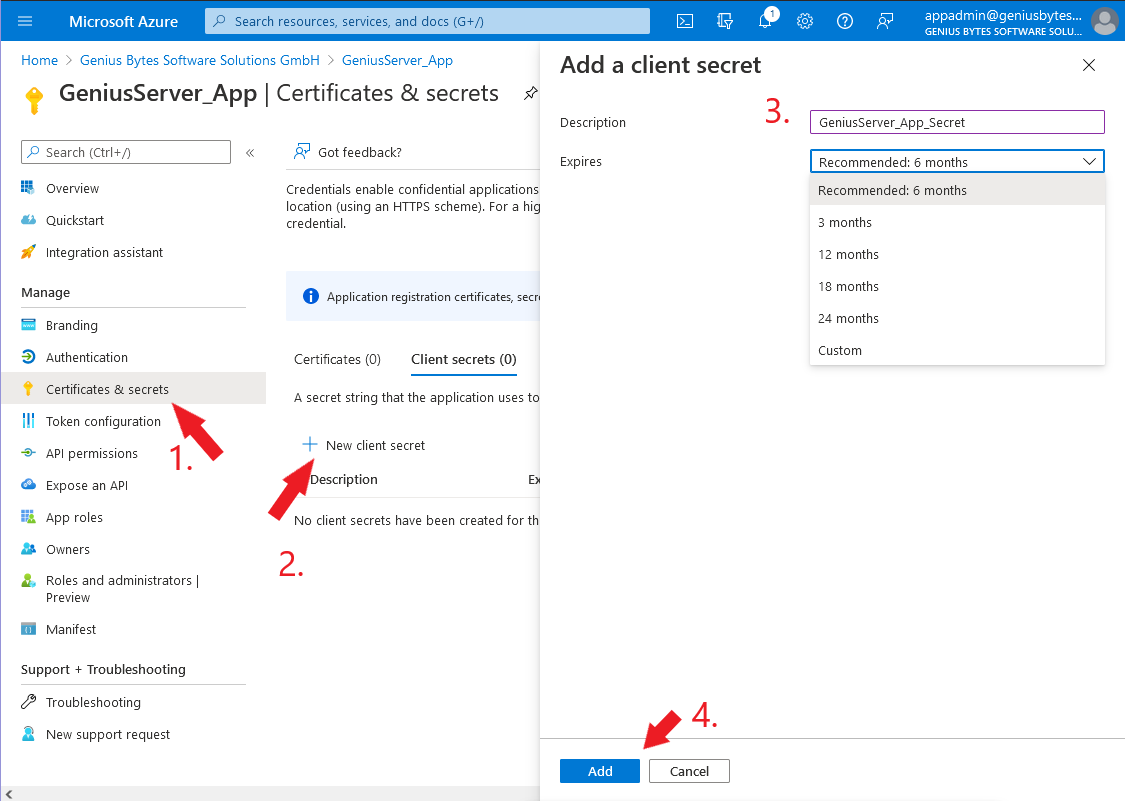
In the app overview, that opened in the last step, click on Certificates & secrets on the left side and then click New client secret. To the right a popup will open. There, enter a description, e.g. GeniusServerApp_Secret and set an expire date. Click on Add after you are done.
Hint
The expire date determines how long the secret is valid. If it expires you have to add a new secret after that amount of time.
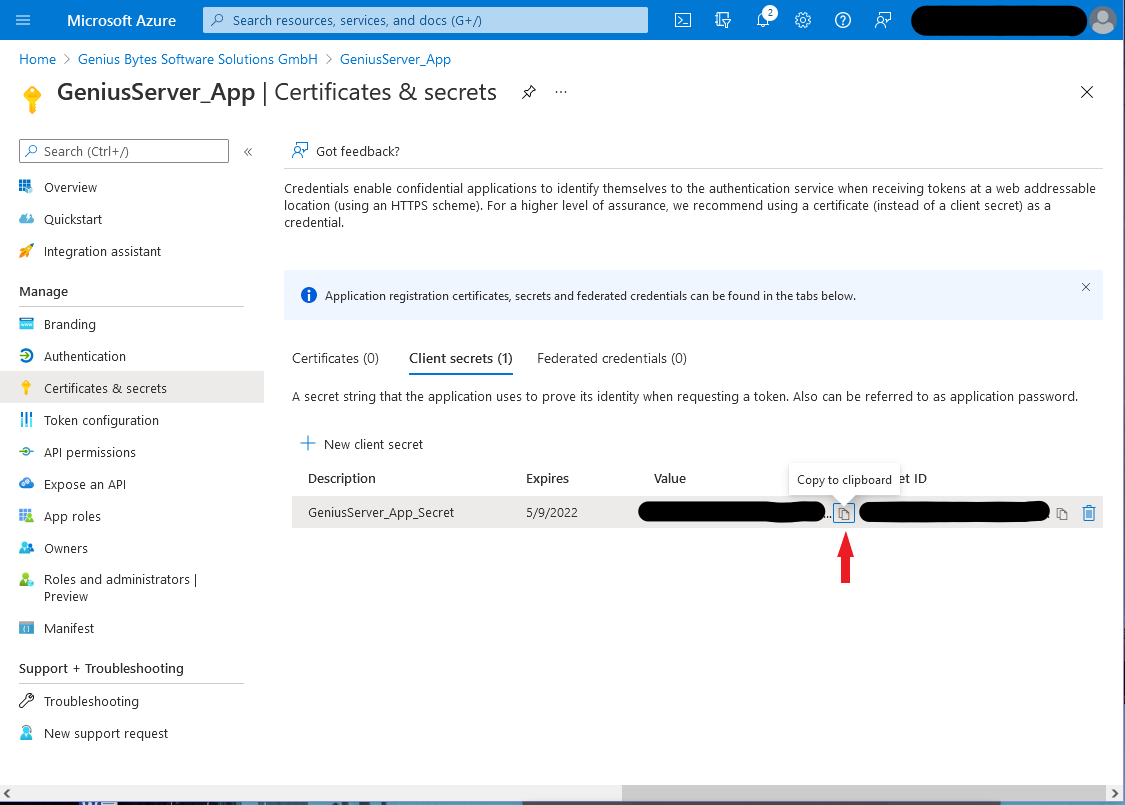
Copy the value of the new client secret and save it somewhere safe! Do it now, since the secret will be visible only once:
Hint
We will need this secret later in the Genius Server configuration. Remember where you saved it.
Configuration of API Permissions
The next step is to configure the API permissions.
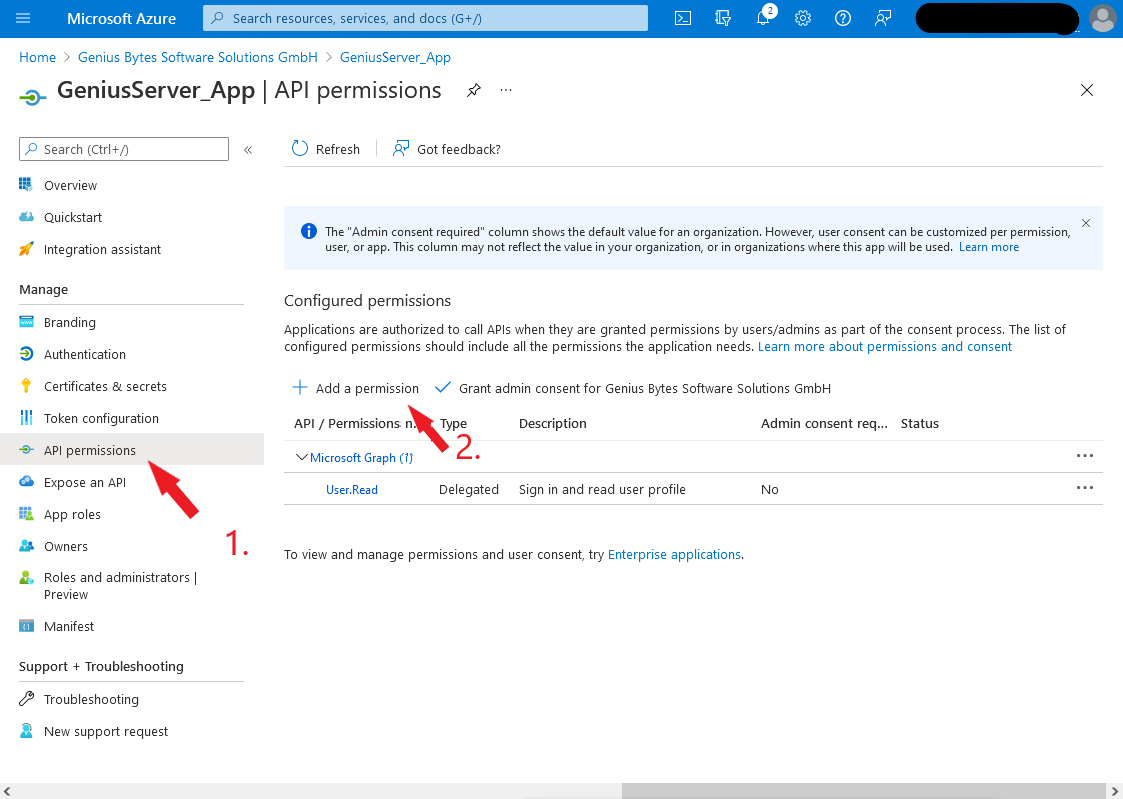
In the app overview click on API permissions on the left side. Then click Add a permission.
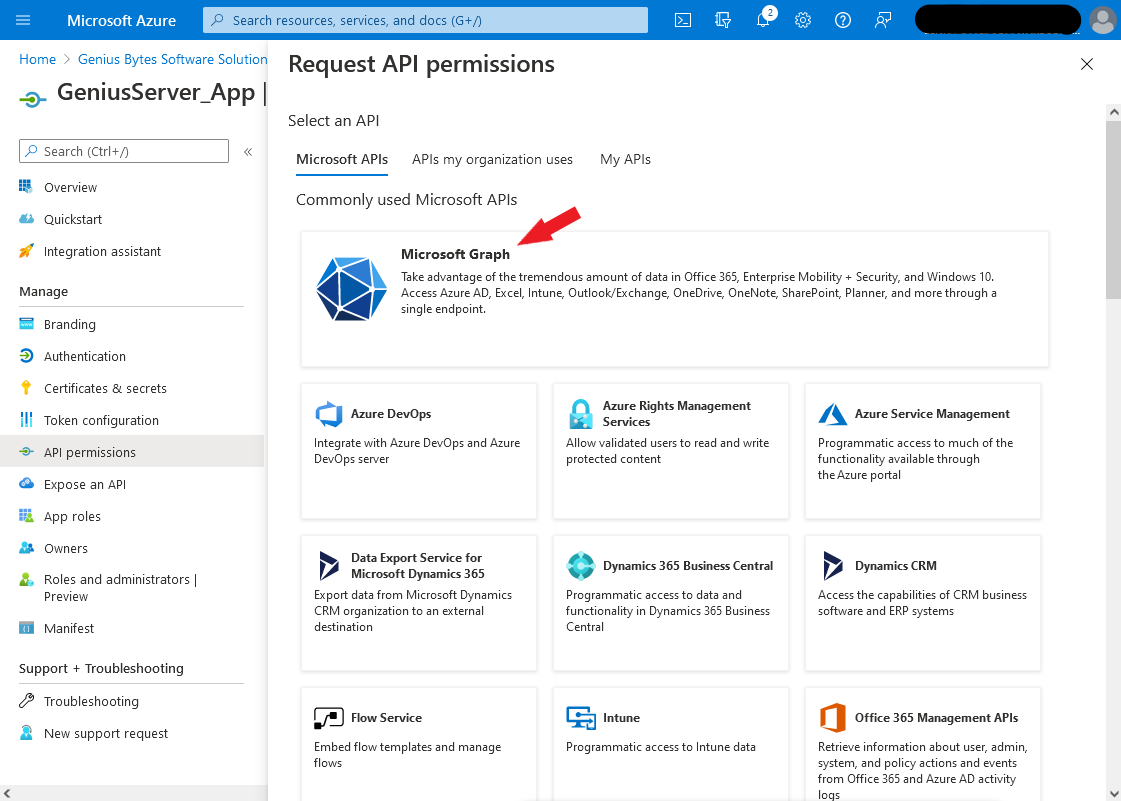
In this view click on Microsoft Graph.
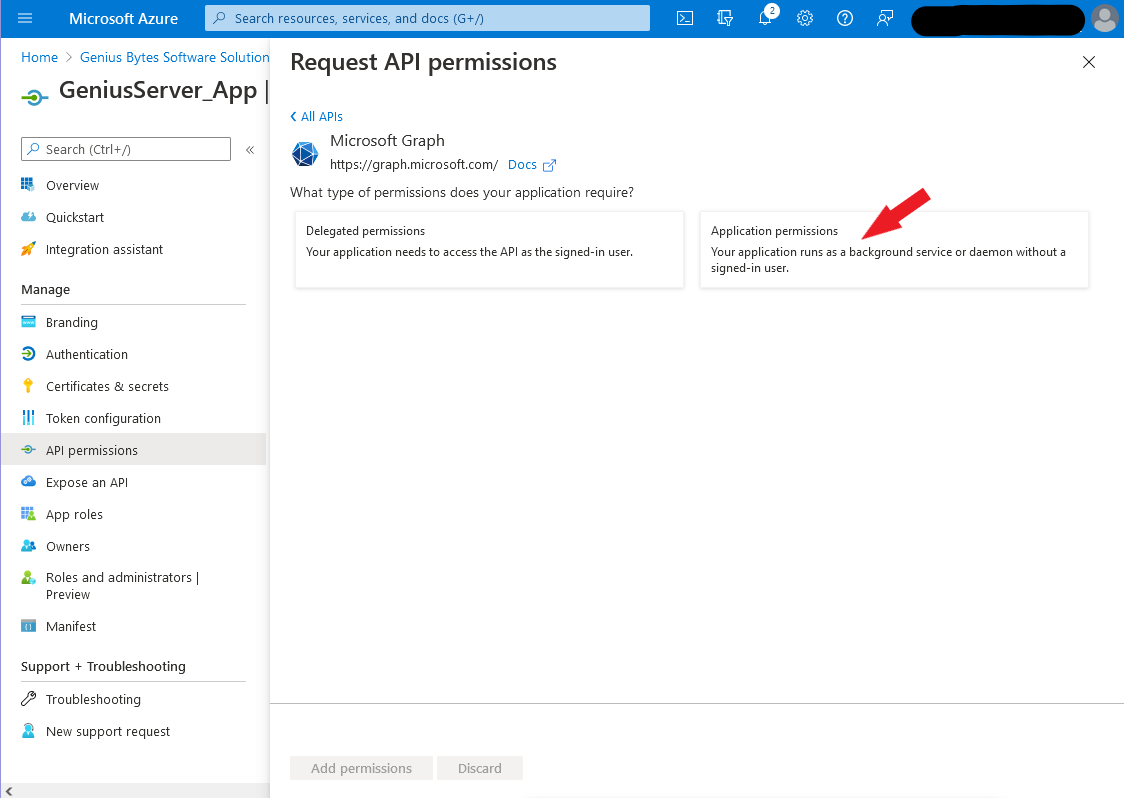
Click on Application permissions:
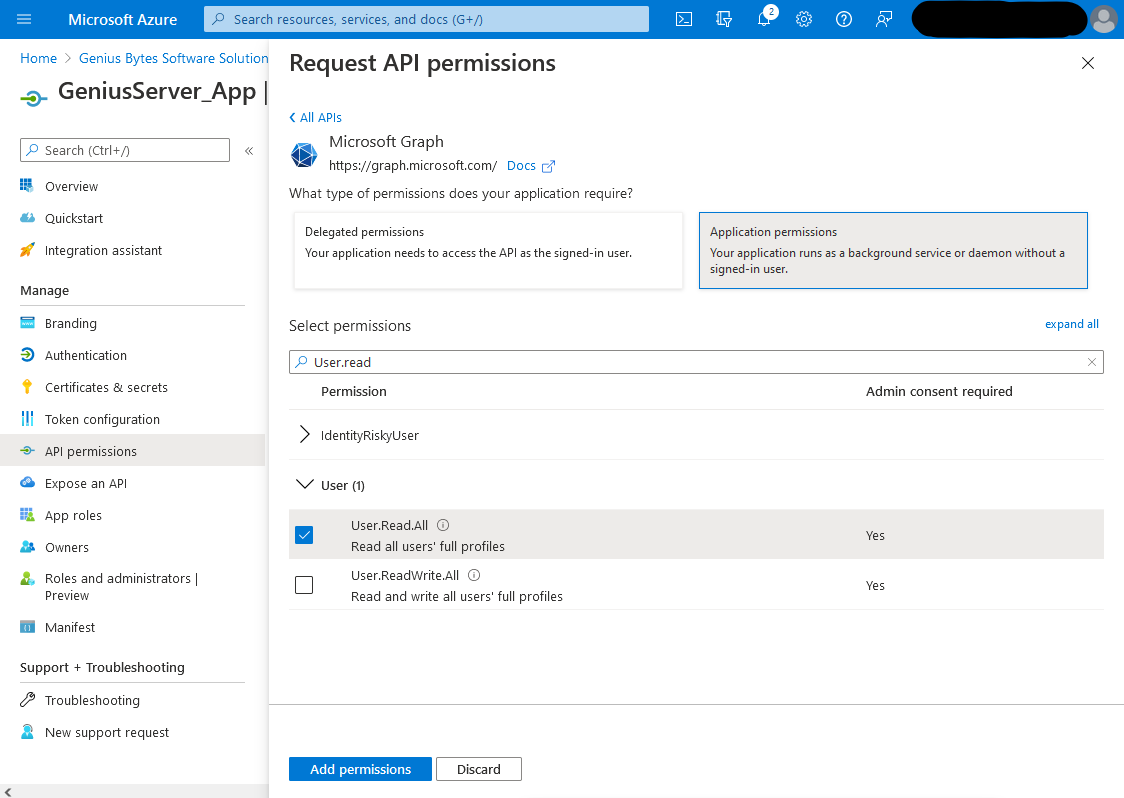
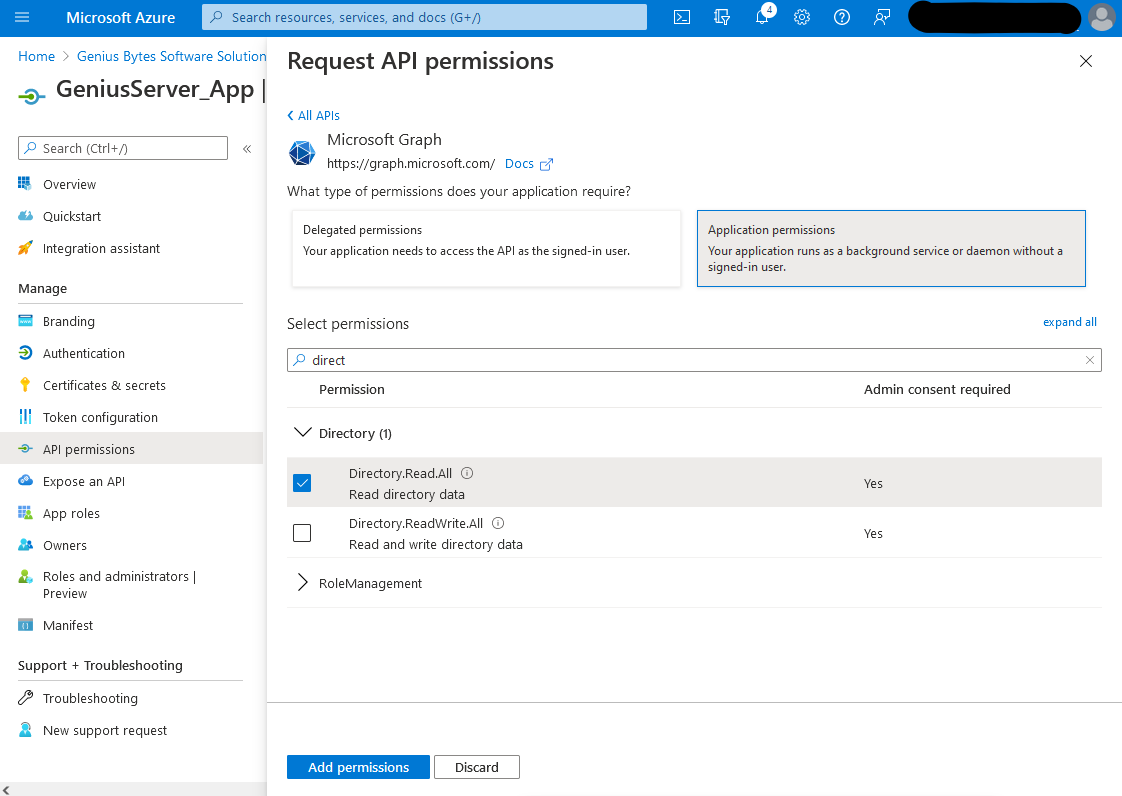
4. Now, we need to add a few permissions in addition to the preconfigured permission. We need: User.Read.All, Files.ReadWrite.All and Directory.Read.All. Search for the permissions in the search field, check the checkbox next to it and press Add permissions at the bottom of the page.
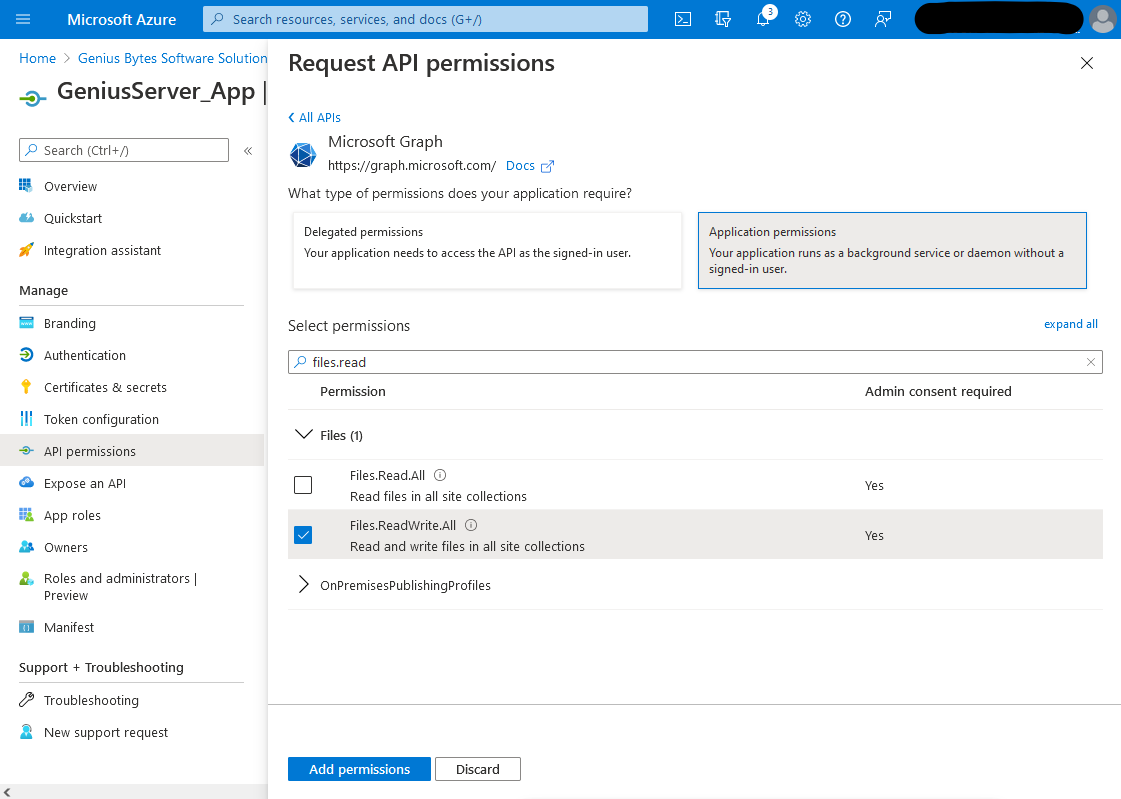
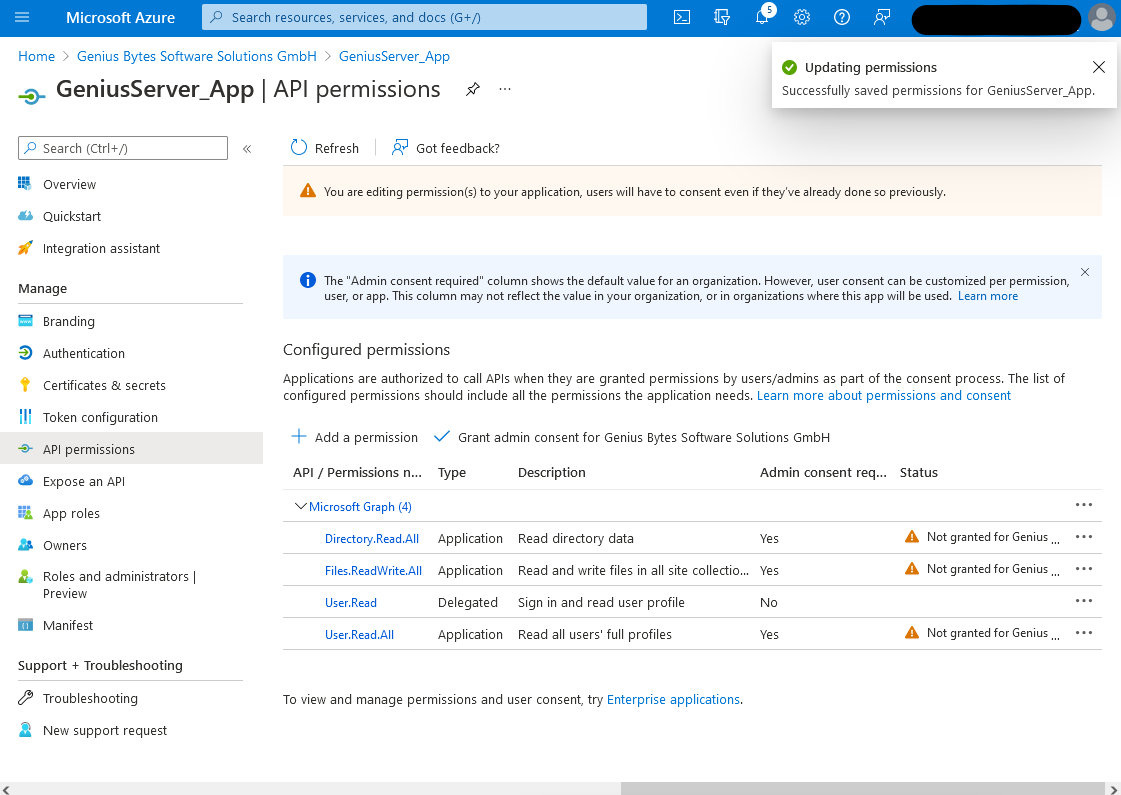
After adding the permissions, it should look like this:
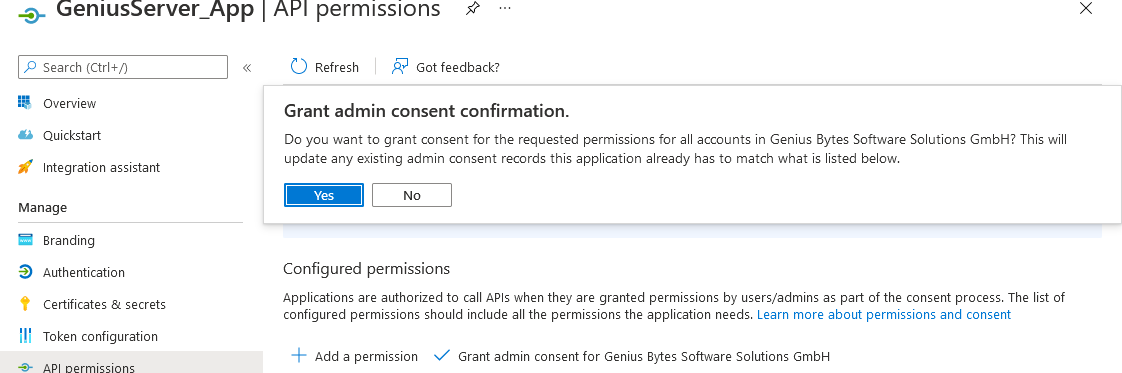
Now, admin consent needs to be granted. Click on Grant admin consent next to "Add a permission" and then on Yes:
Note
If the user who is configuring these permissions, does not have admin rights an administrator now needs to grant consent.
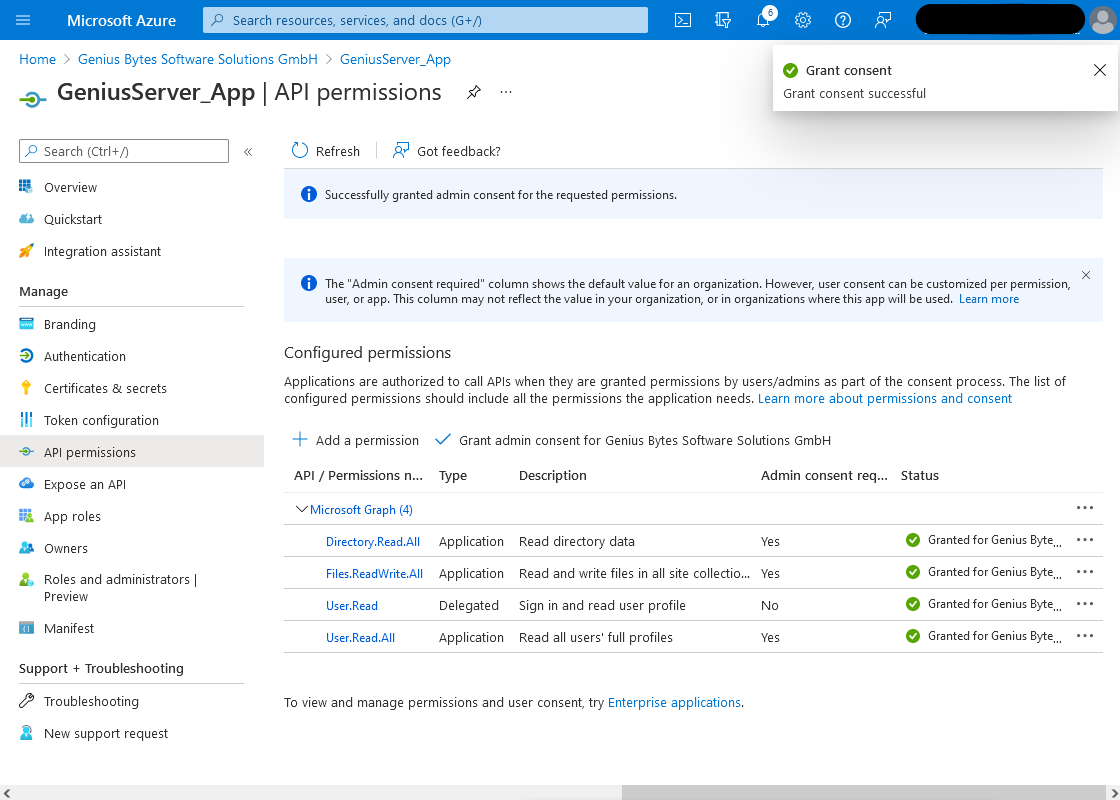
If the consent has been granted it should look like this:
Configuration of Authentication
The next thing to configure is the Authentication.
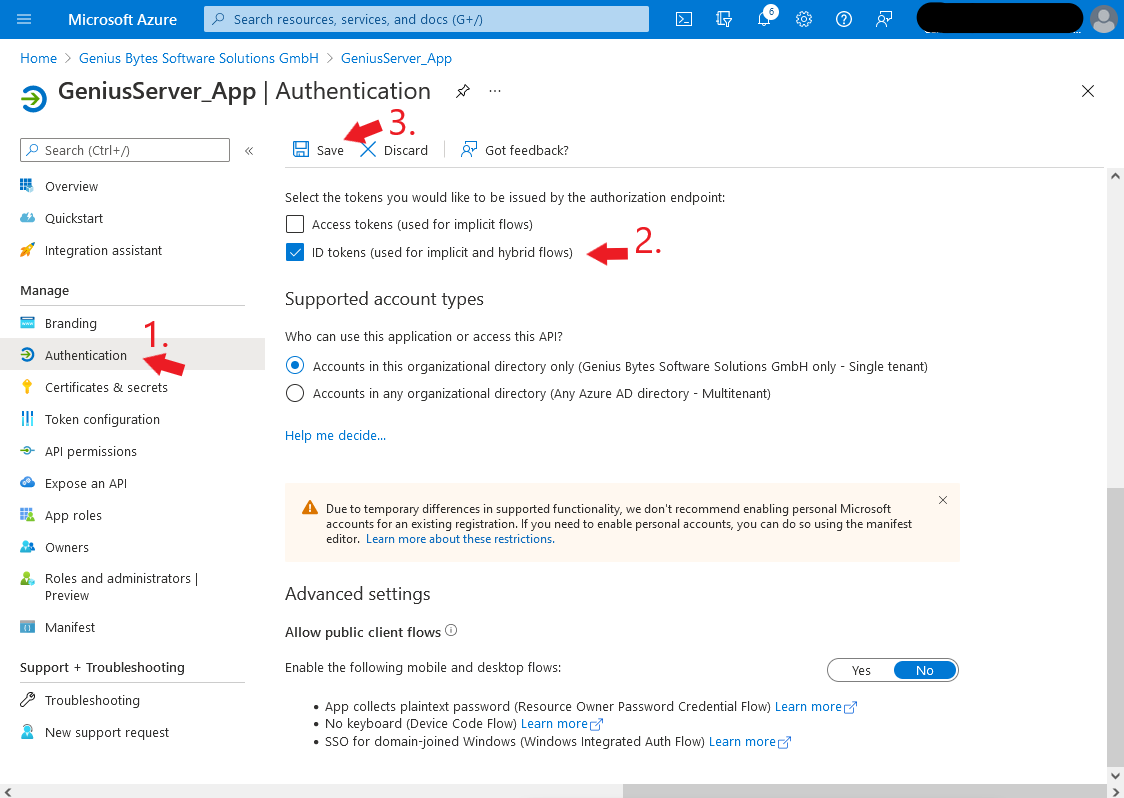
First click on Authentication on the left side. Scroll down and make sure that the checkbox ID Tokens is checked. Afterwards press Save on the top of the page.
Hint
"Supported account types" shows which accounts are allowed to acces this API. It should automatically be set to the same that was configured in the beginning of the app registration process.
Registering an Authentication Application
Now the authentication application needs to be registered.
Like before, when we were registering the server application, again, go to app registrations and click New registration.
Hint
To get to this page, simply click on the link next to Home > at the top of the page. In our screenshot it would be "Genius Bytes Software Solutions GmbH".
Configure the name, supported account types and the redirect URI as shown below. Note that you need to select Public client/native (mobile&desktop) from the drop down menu:
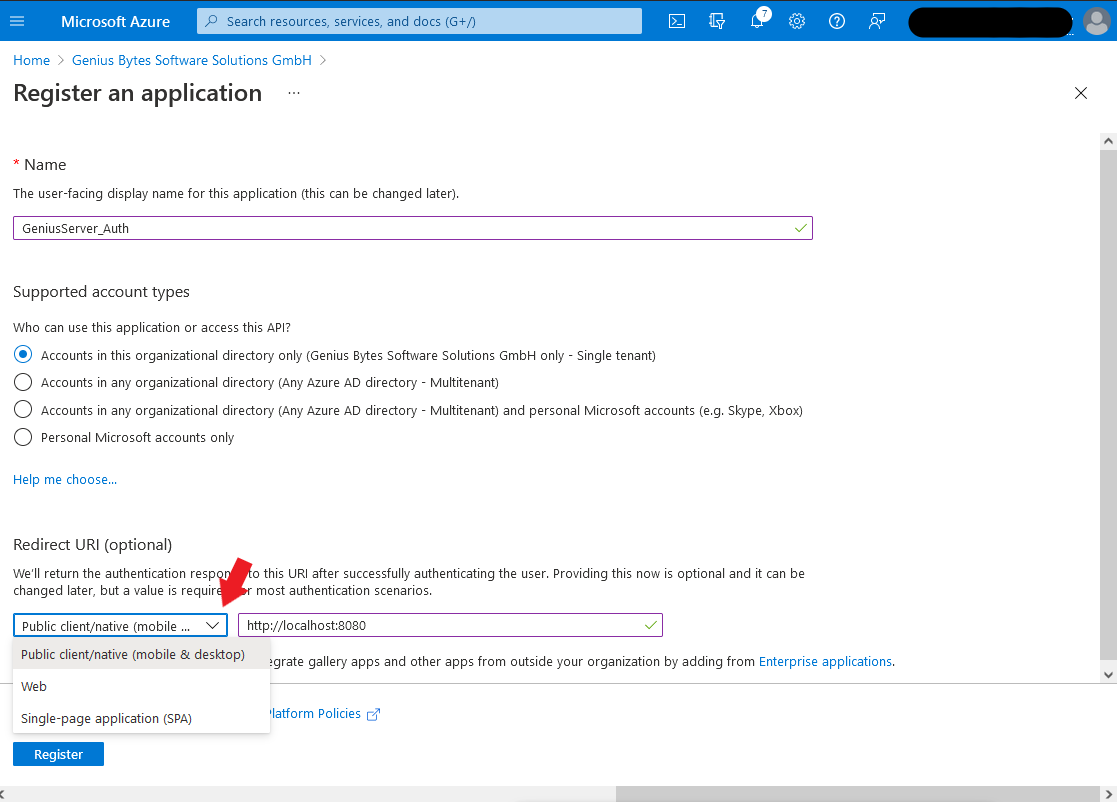
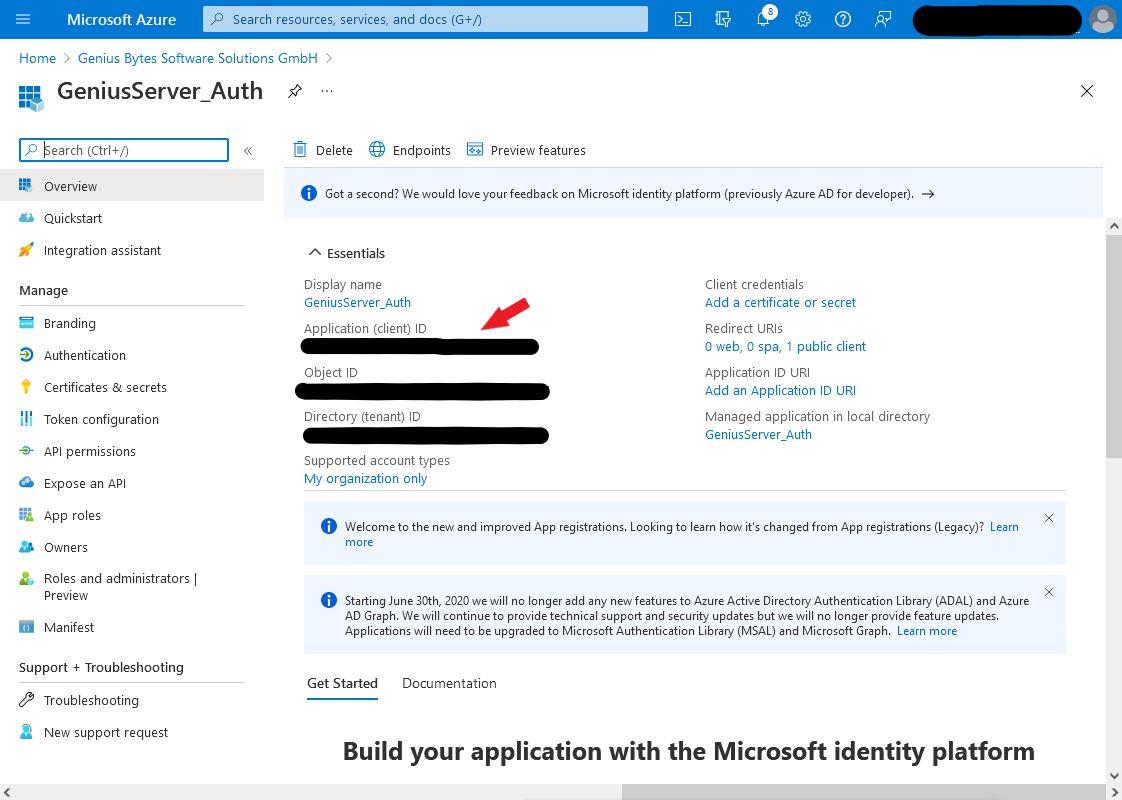
When everything is configured, press Register. The overview is shown, it should look like shown below. Copy the Application (client) ID from this page and store it somewhere safe!
Authentication Application API permissions
Now the API permissions need to be configured for this application:
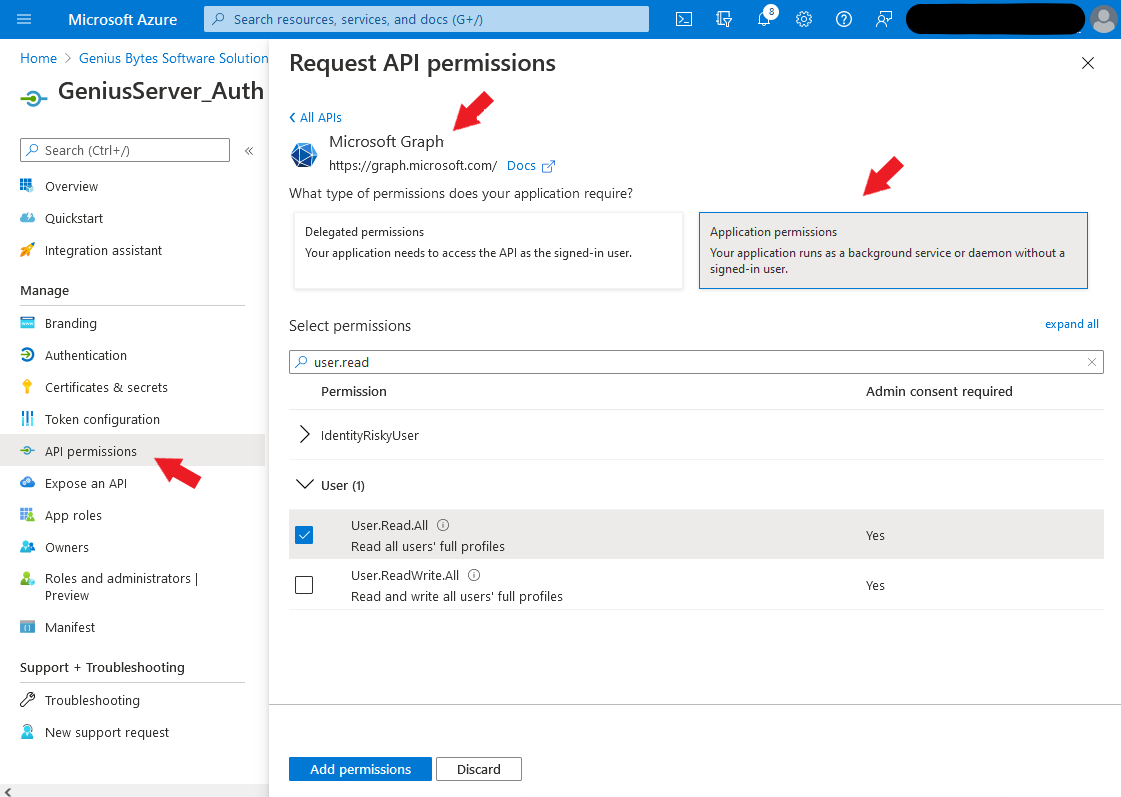
As before, click on API permissions, then on Microsoft Graph and then on Application permissions. For the authentication application we only need to add one permission, namely User.Read.All:
Hint
Depending on the configuration of the environment, the permissions openid and profile need to be activated, too. For most enviroments it is sufficient to only activate User.Read.All.
Do not forget to click Add permissions after you are done!
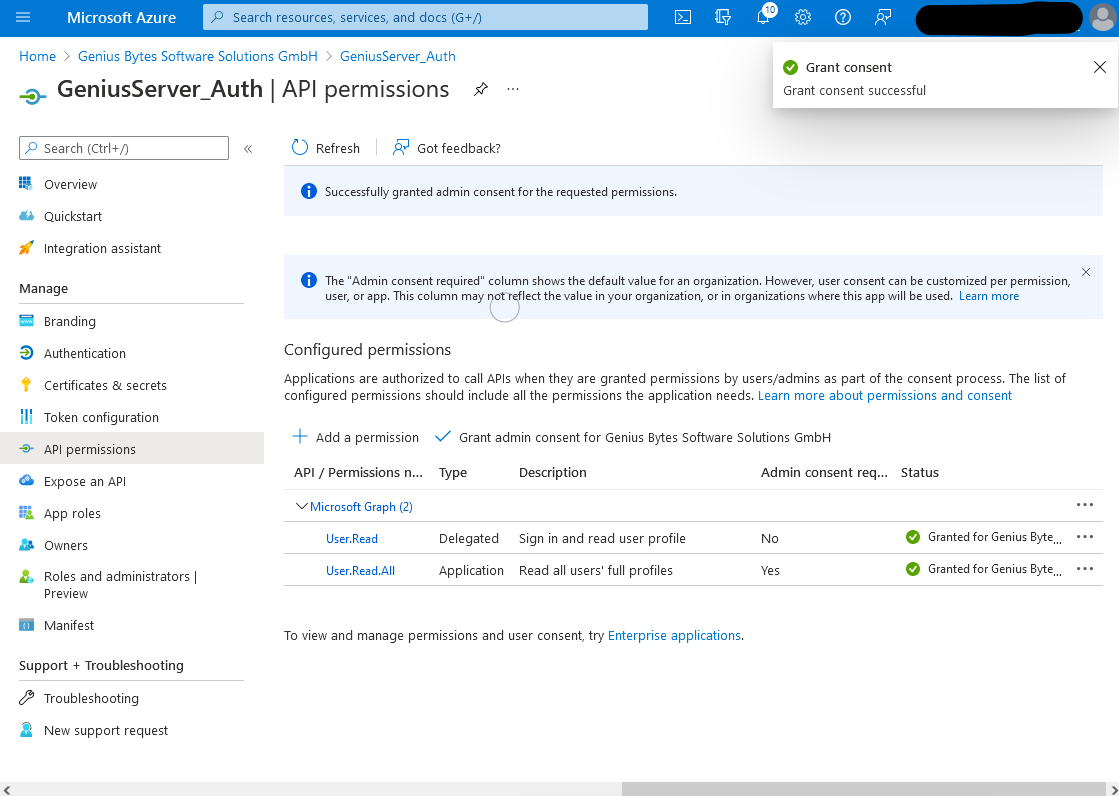
Now we need admin consent for the permission(s) configured above. As before, click on Grant admin consent. It should then look like this:
Authentication Application Authentication
The last thing to configure is the authentication configuration.
Click on Authentication, the following page is shown:
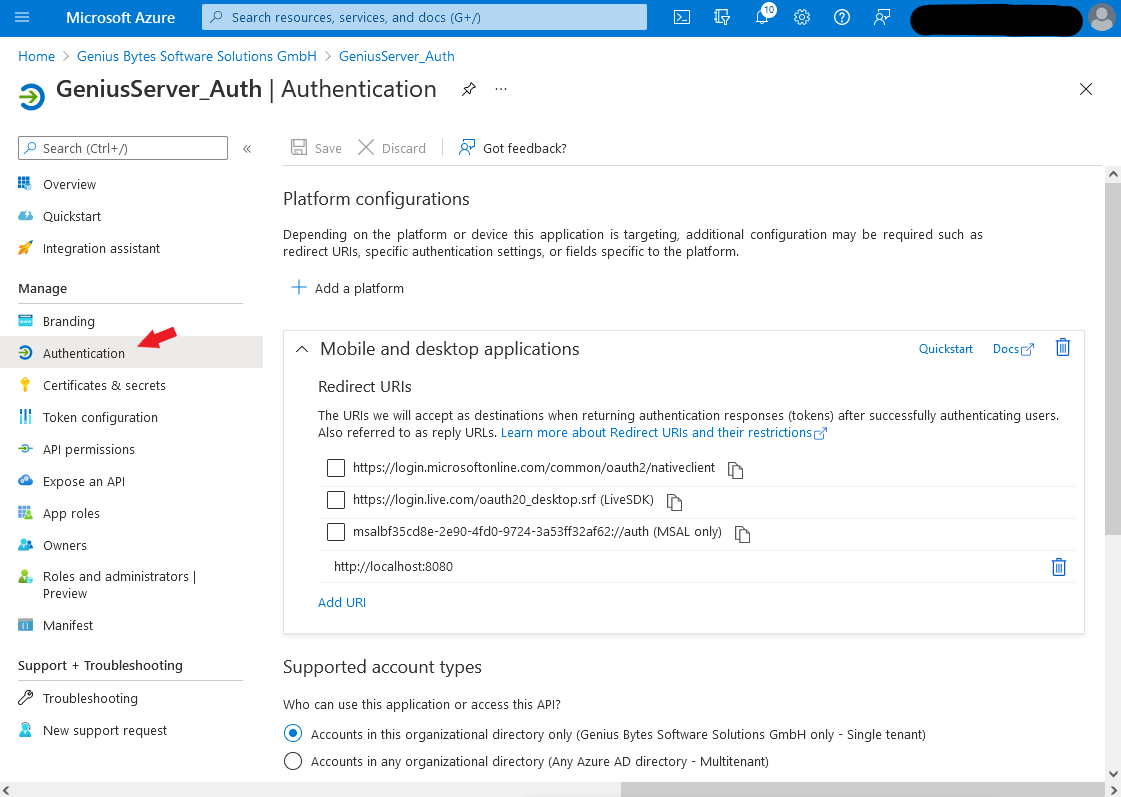
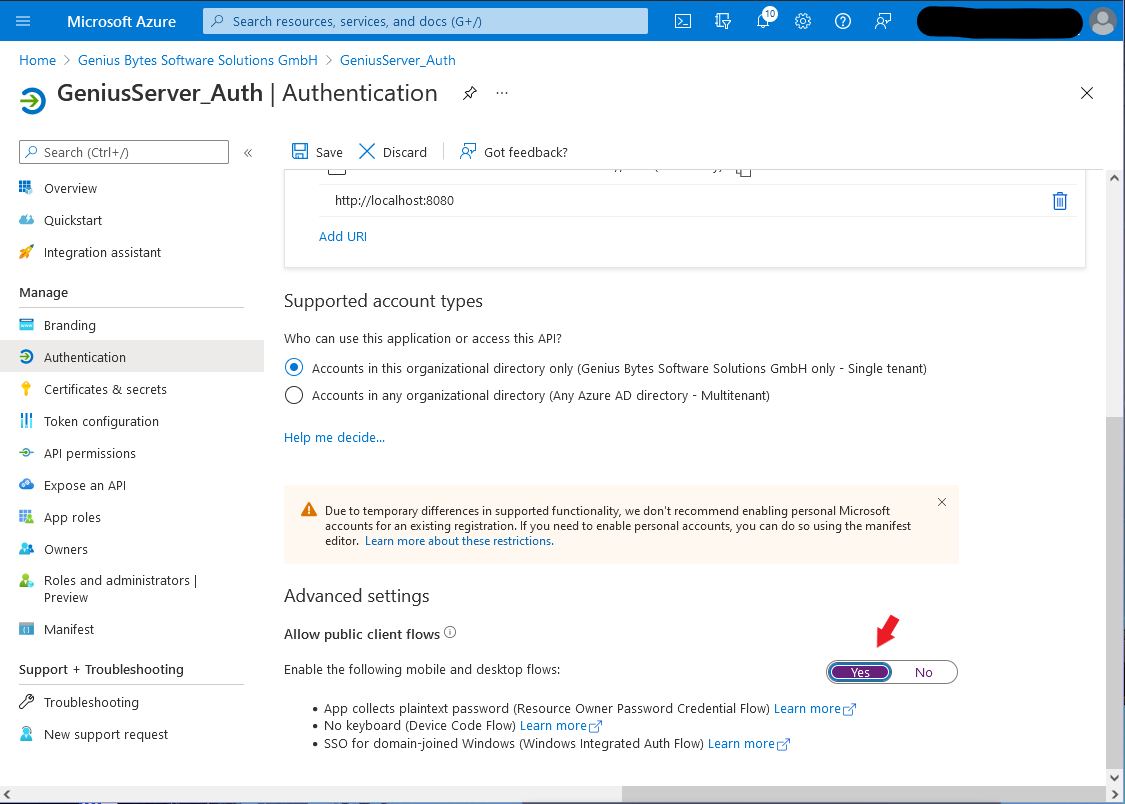
Scroll down and make sure that the default client type is set to yes. Do not forget to press Save on the top of the screen!
Hint
The above described steps might be subject to slight changes, since Microsoft is in constant growth so it might be necessary to configure some additional rights.