5. Client Configuration
To configure the Genius MFP Ricoh SmartSDK Client, proceed as described below:
Enter the URL
https://<device-ip>/rws/sop/geniusmfp/settingsin the web browser.
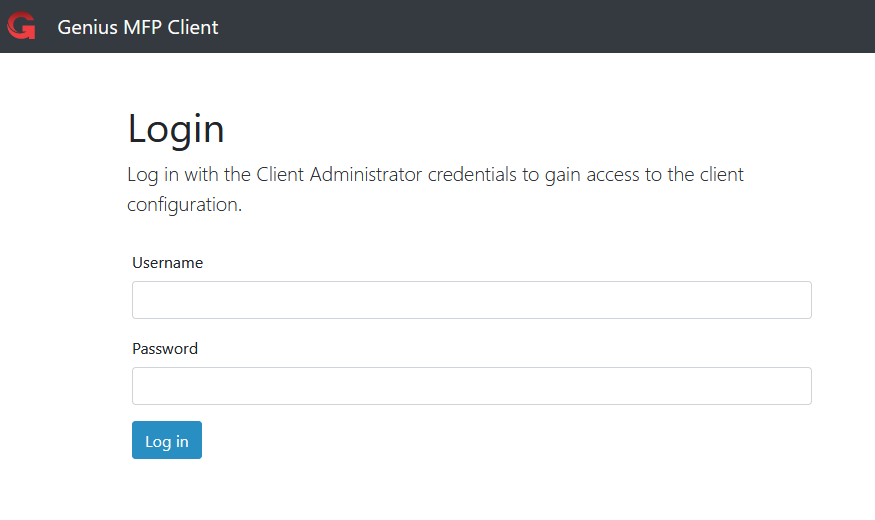
Enter the administrator credentials, which are per default:
Username: admin
Password: admin
Once authenticated, the configuration page opens:
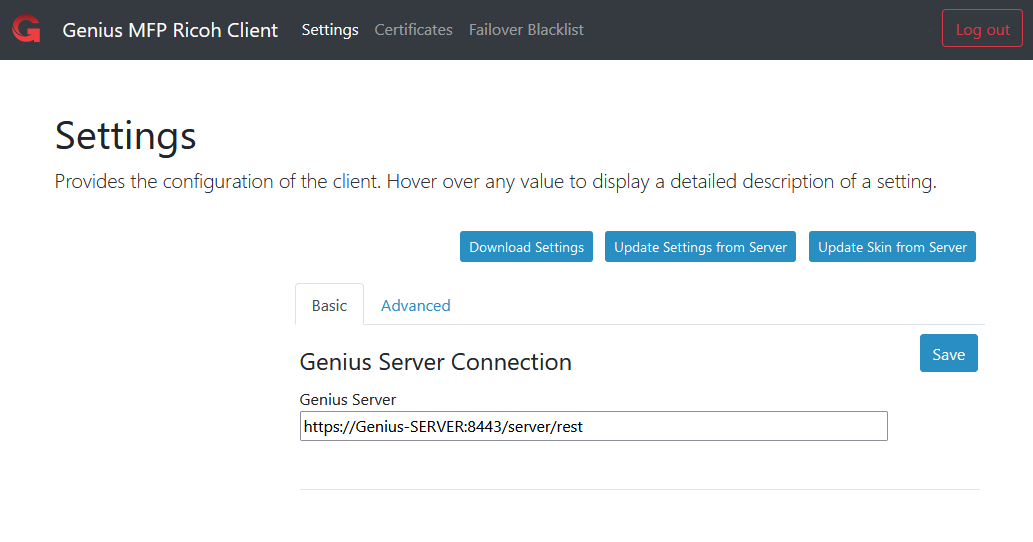
5.1. Settings
In this section, there are two tabs:
Basic: this tab includes the basic settings for the Genius MFP Ricoh SmartSDK Client which consists only of the Genius Server url configuration.
Advanced: in this tab all advanced Genius MFP Ricoh SmartSDK Client settings are shown.
Clicking on Advanced leads to this view:
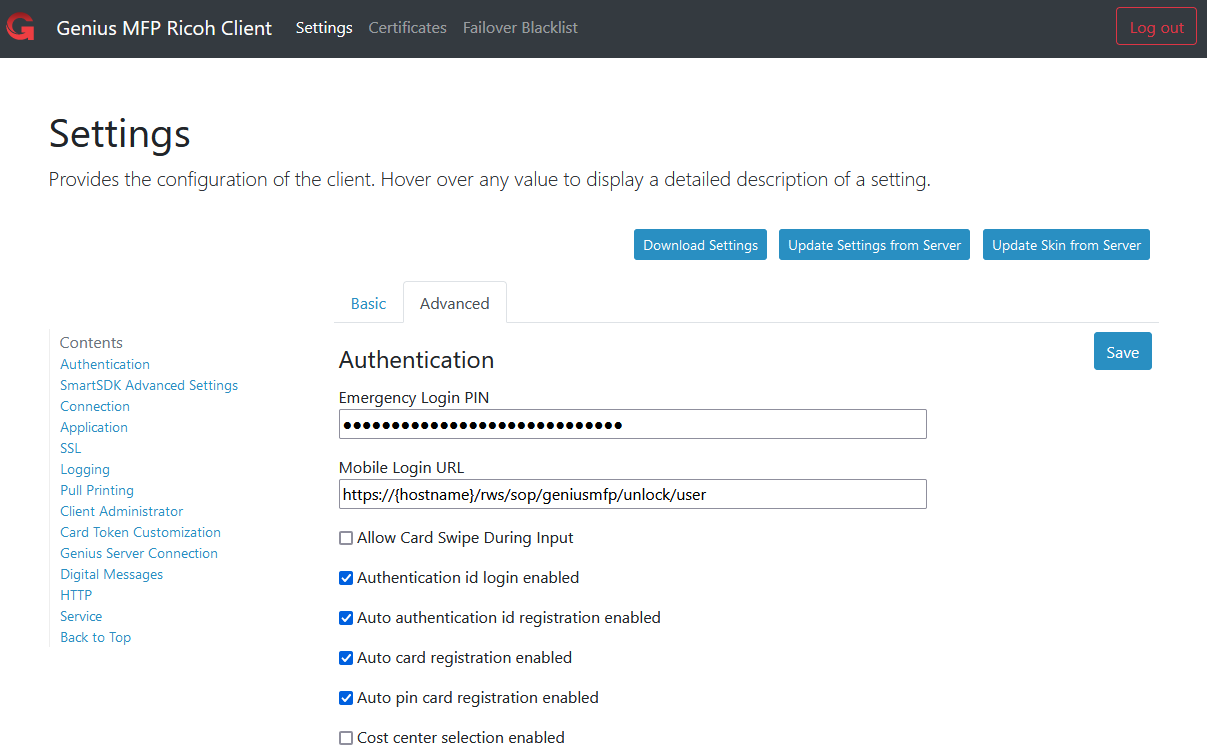
On the left side the contents of the page are shown. By clicking on the title the user gets directed to the respective category. The Back to Top button leads the user back to the top of the page.
The Save button can be reached from any point of the page and saves changes to the settings.
Both in the basic configuration and advanced configuration, three buttons are visible:

Download Settings: the administrator can download the file with the current client settings in order to upload it on the server property file.
Update settings from Genius Server: selecting this button, the administrator forces the client to update its settings from a property file placed in the Genius Server (for further details refer to Update Settings From Server).
Update skin from Genius Server: the administrator can customize the icons on MFP devices by uploading a new image to the server installation directory (for further details refer to Update Skin From Server).
5.2. Client Settings
The settings section, as mentioned above, consists of the Basic and the Advanced settings. The Basic settings only contain one entry at the time:
Genius Server: IP Address, hostname or FQDN of Genius Server.
5.2.1. Advanced Settings
When clicking on Advanced the advanced settings are shown. Please note, that the order of the setting categories, as well as the settings inside such categories, differ from device type to device type.
5.2.2. Application
This section is used to configure everything that is related to application usage.
Please note that depending on the device used, the order of the settings might look slightly different.
Scan additional pages time out (seconds): the time available to confirm or not if another scan should be performed (by default, it is set to 50sec.). If no interaction occurs, at the end of the time the scan automatically ends.
Hint
Note that the devices "wait for next originals timer" needs to be set to a higher value than the setting Scan additional pages time out. Otherwise a scan job, which is waiting for the next original will be aborted, when the devices "wait for next originals timer" is running out. The device's timer can be found here: Device Webinterface -> Device Management -> Configuration -> Scanner -> Scan Settings -> Wait Time for next Original(s) -> "Exposure Glass" and "SADF".
Address book history size: the max. number of contacts inside the address book history. The default value is 10.
Cancel Jobs on Logout: if checked, scan- and copy jobs are deleted during user logout. Waiting jobs might prevent other users from logging in.
Change cost center timeout (millis): the time available to change the cost center (by default, it is set to 60000 ms). If no interaction occurs, at the end of the time a logout is performed.
Default language: the default language of the Genius MFP Ricoh SmartSDK Client. The default is en, but possible values are en, en_US, de, fr_FR, it and any language with an appropriate .properties file placed in the messages folder.
Dialog Autoclose Timeout (seconds): the autoclose timeout in seconds. Entering a value larger than zero will automatically close dialogs after the set time. This can be useful for dialogs with sensitive content.
Enable Native Browser: if enabled, the Genius MFP Ricoh SmartSDK Client will provide a button inside the client main menu, which will redirect the user to the native browser.
Enable Native Copy: if enabled, the Genius MFP Ricoh SmartSDK Client will provide a button inside the client main menu, which will redirect the user to the native copy application.
Enable Native Fax: if enabled, the Genius MFP Ricoh SmartSDK Client will provide a button inside the client main menu, which will redirect the user to the native fax application.
Enable Native Home: if enabled, the Genius MFP Ricoh SmartSDK Client will provide a button inside the client main menu, which will redirect the user to the native home menu of the MFP.
Enable Native Scan: if enabled, the Genius MFP Ricoh SmartSDK Client will provide a button inside the client main menu, which will redirect the user to the native scan application.
Enable Native USB Print/Scan: if enabled, the Genius MFP Ricoh SmartSDK Client will provide a button inside the client main menu, which will redirect the user to the native print/scan from USB application.
Native roles need to be set inside Genius Server. For a list of corresponding roles and settings, please refer to How to Enable Access to Native Device Functions.
Note
Note that some of the native apps also need to be configured in the device settings to work correctly.
GoodBye screen timeout (millis): the timeout after which the GoodBye page expires (by default, it is set to 4000 ms).
BPM joining task timeout (millis): the timeout after which an attempt to join task fails (by default, it is set to 30000 ms).
Search filter history size: the max. number of filters on the search filter history (by default, it is set to 10 filters).
Session timeout (ms): the amount of time after which, in case of inactivity, the session expires and the user is automatically logged out.
Update settings after logout: if checked, settings are fetched from server after the logout.
Update settings at application start: if checked, an automatic update of settings occurs at every restart of the device.
Update skin at application start: if checked, an automatic update of the client skin occurs at every restart of the device.
Once the parameters are set, press Save to apply the changes.
5.2.3. Client Administrator
This section is used to configure everything related to the client administrator.
Please note that depending on the device used, the order of the settings might look slightly different.
Password: client administrator password (limited to 5-72 ASCII characters).
Session Inactivity Timeout (seconds): inactivity timeout for sessions in seconds (60-3600 seconds are possible). After this time a logged in admin will be automatically logged out. Changes will be applied on the next login.
Session Max Age (hours): maximum age of a session in hours (values between 1 and 24 are possible). After this time a logged in admin will be logged out, regardless of activity. Changes will be applied on the next login.
Username: client administrator username.
API Password: password for accessing API functions, e.g., mobile login and settings REST API. Password is limited to 5-72 ASCII characters.
API Username: username for accessing API functions, e.g., mobile login and settings REST API.
Once the parameters are set, press Save to apply the changes.
5.2.4. Authentication
This section is used to configure everything related to authentication.
Please note that depending on the device used, the order of the settings might look slightly different.
Allow Card Swipe During Input: if checked, allows for a card swipe when an input field is active (e.g. swiping the card instead of manually logging in).
Authentication id login enabled: if checked, the authentication ID login is enabled.
Auto authentication id registration enabled: if checked, an unknown authentication ID can be registered directly from the device.
Auto card registration enabled: if checked, an unknown card can be registered directly from the device.
Auto pin card registration enabled: if checked, a unique card PIN can be associated to a card directly from the device.
Cost center selection enabled: if checked, a cost center can be chosen from the list (if the user has more than one assigned cost center).
Credential Encryption Key (AES 128): 32 characters long hexadecimal string used in the AES 128 algorithm for credential encryption.
Credential Encryption Key (AES 256): 64 characters long hexadecimal string used in the AES 256 algorithm for credential encryption (if supported).
- Credentials encryption type: The encryption type used to encrypt credentials when sending them over the network.
AES128: the AES cipher algorithm in ECB Mode with a key size of 128 bits (used by default).
AES256: the AES cipher algorithm in ECB Mode with a key size of 256 bits.
AES128_CBC: the AES cipher algorithm in CBC Mode with a key size of 128 bits.
AES256_CBC: the AES cipher algorithm in CBC Mode with a key size of 256 bits.
Emergency Login Enabled: if checked, if no service is available an emergency login can be performed.
Emergency Login PIN: a PIN can be set which needs to be entered in case of an emergency login.
Guest login enabled: if checked, guest login is enabled.
Guest password: the password for the guest user.
Guest username: the username for the guest user.
Manual login enabled: if checked, login via username and password enabled.
Mobile Login enabled: if checked, mobile authentication via QR code scanning is possible.
Mobile Login URL Update Timeout (seconds): updates the mobile login URL periodically. The minimum value is 10 seconds. A scanned barcode will be valid for twice as long as this value, i.e. a minimum of 20 seconds. Requires a client restart.
Mobile Login URL: the URL of the mobile phone authentication service. The value {hostname} can be used as a placeholder and will be automatically replaced. A timestamp and signature will automatically be appended to the URL as query parameters.
Tenant code: the code of one of the tenants registered in the Genius Server.
Unknown Card token displayed: if checked, swiping an unknown card, the token is displayed inside a warning message on the login panel (only if the Auto card registration setting is disabled).
Once the parameters are set, press Save to apply the changes.
5.2.5. Logging
In the Logging section, the Log Level can be set.
Please note that depending on the device used, the order of the settings might look slightly different.
Audit level: if set to ON, the login performance is monitored (by default, it is set to OFF).
Log level: the detail of log messages. The lower levels will only log unexpected failures (ERROR) or handled exceptions (WARN) while the more detailed levels (INFO, DEBUG, TRACE) will mostly be used for debugging problems. The log level Metric should only be activated if a developer asked for it.
Syslog connection keep alive (deprecated): if checked, the Syslog connection is kept alive.
Syslog enabled (deprecated): Enable or disable logging to Syslog server.
Syslog facility (deprecated): A facility code is used to specify the type of program that is logging the message. Messages with different facilities may be handled differently.
Syslog service port (deprecated): Specify the port where the Syslog service is listening.
Syslog protocol (deprecated): The protocol to use, must match with the service which is listening on the given port. Possible values are TCP, TLS or UDP.
Syslog remote host (deprecated): Specify a different server for syslog. Leave empty to use Genius Server.
Once the parameters are set, press Save to apply the changes.
5.2.6. Card Token Customization
In this section everything regarding card token customization is handled.
Please note that depending on the device used, the order of the settings might look slightly different.
Card Token Hex To Dec: Converts an incoming card token from hexadecimal to decimal (e.g. 0x1234 -> 4660).
Card Token Left Padding Character: Character to use for padding of the card token. Must be a single character. (e.g. 'A' and card.token.length.after.padding=8, 0x123 -> 0xAAAAA123).
Card Token Length: Number of characters used from any card token (from the left). A value of 0 means 'take all data'. Counted after the offset (default: 8, e.g. 0x12345678).
Card Token Length After Padding: Length that a card token is expanded to using the 'Card Token Left Padding Character'. Ignored if the card token is already longer than the specified value (e.g. 8 and card.token.left.padding.char='A', 0x123 -> 0xAAAAA123).
Card Token Normalization: Normalize card tokens to be in upper/lower case. The setting value unmodified can be used for legacy environments, i.e. client versions older than 2.22.x.x.
Card Token Offset: The number of characters cut off from the beginning of the token (e.g. 3, 0xfff12345 -> 0x12345).
Card Token Reversion: allows to reverse card tokens. Options are Bytes, Ascii and None. 'Ascii' results in abc -> cba, 'Bytes' means: interpret the input as pairs of hex nibbles, e.g. 12AB34 -> 34AB12. Default value is None
Once the parameters are set, press Save to apply the changes.
5.2.7. Genius Server Connection
This section contains all settings necessary to configure and manage the Genius Server connection.
Please note that depending on the device used, the order of the settings might look slightly different.
Connection pool size per host: the size of connection pool per host used by the client to communicate with Genius Server.
Connection pool size: the size of connection pool used by the client to communicate with Genius Server.
Connection timeout (ms): the maximum amount of time the client waits to setup a connection to Genius Server.
Failover blacklist timeout (ms): the time after which a blacklisted service becomes active again (for further details refer to Failover Blacklist).
Genius Server: IP Address, hostname or FQDN of Genius Server.
Genius Failover Server 1: the first Genius Server failover url (for further details refer to Failover Blacklist).
Genius Failover Server 2: the second Genius Server failover url (for further details refer to Failover Blacklist).
Genius Failover Server 3: the third Genius Server failover url (for further details refer to Failover Blacklist).
Genius Failover Server 4: the fourth Genius Server failover url (for further details refer to Failover Blacklist).
Hint
These field must always contain a URL, so for example: https://IP-of-the-server:8443/server/rest.
Resolve service URL host name: if checked, the service URL hostname is resolved at the login.
Retry attempts count: the number of retry attempts to connect to the server (for each service URL) before a failure message appears (by default, it is set to 0).
Socket timeout (ms): the maximum amount of time the client waits for individual packets from Genius Server.
Stale connection check enabled: if checked, the client checks the connection before contacting the Genius Server.
Warning
A high number of retry attempts may slow down the login performance.
Once the parameters are set, press Save to apply the changes.
5.2.8. Digital Messages
This section contains all necessary settings for digital messages.
Please note that depending on the device used, the order of the settings might look slightly different.
With digital messages the administrator can create messages which will show up on the login page of the MFP device.
To show a digital message on the MFP, the Genius MFP Ricoh SmartSDK Client performs two different calls: one to the digital message URL (where there are digital messages for all devices) and then a call to a subcategory to check if there are digital messages for a specific device.
To create a digital message, fill in the following settings:
Digital message enabled: if checked, a list of digital messages is shown on the Genius MFP Ricoh SmartSDK Client Login Page.
Digital messages file name: the name of the digital messages file. This is where the messages are stored.
Digital messages refresh timeout (ms): the time after which messages are refreshed on the Genius Login Page.
Digital messages Server URL: the digital messages server URL, where messages are stored.
Digital message update timeout (ms): the time after which the list of messages is updated.
To create a digital message, use a UTF-8 encoded CSV file with the following parameters:
created: the date in which the digital message has been created.
Note
Dates have to be written in one of the following format:
HH:mm:ss dd/MM/yyyy (hours in day 0-23),
hh:mm:ss a yyyy/MM/dd (a=AM/PM, hours in day 1-12),
hh:mm:ss a MM/dd/yyyy (a=AM/PM, hours in day 1-12) and
HH:mm:ss dd.MM.yyyy (hours in day 0-23).
startlife: the date in which the digital message starts to be displayed.
endoflife: the digital message expiration date.
type: the digital message severity level. Three types of message are available: INFO, WARNING and ALERT (write them in capital letters). If no level is specified, the default one is selected (it has the same behaviour of the INFO level).
title: the title of the digital message.
message: the content of the digital message.
device: the device where the digital message opens. Three types of configuration are available:
empty: if the field is empty, the digital message is shown on all devices (by default).
Serial number: entering the device serial number, the digital message is shown only on that device.
Device type name: entering the device type name, the digital message is shown only on that device type.
Once the parameters are set, press Save to apply the changes.
Here an example of how to write a CSV file:
startlife,endoflife,type,message,device
16:04:41 01/01/1970,16:04:41 01/01/1980,WARNING,Toner level is low.,367-1/9713802408
16:04:41 01/01/1980,15:00:00 31/12/1990,ALERT,You have to do the medical visit!,
16:04:41 01/01/1990,16:00:00 31/12/1999,INFORMATION,You are here,
16:04:41 01/01/1999,16:01:00 31/12/2009,EMERGENCY,Your office is on fire!,Aficio MP C2051
5.2.9. HTTP
This section contains all necessary HTTP/HTTPS settings.
Enable HTTPS Redirection: if checked, HTTPS is automatically used when accessing the Genius MFP Ricoh SmartSDK Client web configuration page.
Once the parameters are set, press Save to apply the changes.
5.2.10. Service
This section contains all settings used for the client service.
Please note that depending on the device used, the order of the settings might look slightly different.
Heartbeats Updated per Interval: the number of heartbeats which are updated by the watchdog in each interval.
Heartbeats Threadpool Size: the maximum number of threads used to run heartbeat updates.
Heartbeats Watchdog Interval (ms): the watchdog interval after which heartbeats are checked and updated.
Transfer job max history size: the maximum number of transfer jobs in its history.
Transfer job thread pool size: the maximum number of threads available for transfer jobs to the Genius Server (e.g. scanned documents).
Once the parameters are set, press Save to apply the changes.
5.2.11. SmartSDK Advanced Settings
This section contains all settings necessary for device usage.
Please note that depending on the device used, the order of the settings might look slightly different.
High compression pdf switch: if the firmware is updated and the high compression behavior changes, enabling this setting will make sure that the pdf becomes compressed again.
Auto correct job settings: if checked, auto correction of job settings is enabled (default: enabled). It will correct incompatible settings. If not set it can be used for troubleshooting since the device will not perform adjustments to the users chosen settings.
Settings validate only: if set, the device will receive a command but only validate it. Used for troubleshooting only.
Compression level for Mono-/Multipage PDF: drop down menu for the compression level. To reduce the size of pdf files a compression level can be set here. The higher the number, the higher the compression level.
Delay card event on restricted screen (ms): this setting delays card events in sleep mode on restricted screens. Set to 0 to disable and ignore the event.
Once the parameters are set, press Save to apply the changes.
5.2.12. Client-Side Job-Based Accounting
This section contains settings for job-based accounting.
Please note that depending on the device used, the order of the settings might look slightly different.
Job Accounting: if checked, job-based accounting is enabled as a feature in general (to transmit accounting data at least one of the function-based accounting settings has to be enabled). Requires device reboot to take effect.
Scan Job Accounting: if checked, job-based scan accounting is enabled. Activate, if scan jobs should be accounted. Requires general Job Accounting setting to be enabled. Requires device reboot to take effect.
5.2.13. Pull Printing
This section contains all settings regarding pull printing.
Please note that depending on the device used, the order of the settings might look slightly different.
Notify pull printing color mode enabled (requires 'Client Pull Printing edit role'): if checked, printing at least one print job in color results in warning popup with the information that the user is about to print in color appears. The user can choose to “Proceed”, “Force to Print Black & White” or to “Cancel” (by default this feature is disabled).
Note
Note that the warning popup only appears if: at least one of the selected jobs has color enabled, the user has the client pull printing edit role, jobanalysis is enabled in Genius Server and this setting is enabled.
Notify pull printing deletion enabled: if checked, when trying to delete a pull printing job, a warning alert opens.
Hide delegated print jobs in pull printing job list: if checked, the pull printing job list shows only jobs for the current user and another user can be selected from a list.
Enable filtering of the pull printing job list by delegating users: if checked, the pull printing list can be filtered by delegating users.
Note
Note that delegation jobs and normal jobs aren't distinctive in the pull printing history. They can only be shown separately in the pull printing view.
Warn if invalid job modification settings are applied to selected print jobs: if checked, a warning message will be displayed to the user, if print job modification cannot be applied.
Pull printing strategy: the pull printing strategy. Choose one of the following:
PULL: the Genius MFP Ricoh SmartSDK Client fetches print jobs from Genius Server and forwards them to the device (cloud installation only).
PUSH: the Genius Server pushes print jobs to the device (used by default).
LPR port: the LPR port used to send print jobs to the device (pull strategy).
LPR queue: the LPR queue used to send print jobs to the device (pull strategy).
Pull printing max attempt: the maximum number of attempts to print a print job to the pull printing queue (pull strategy).
Pull printing time between attempt (ms): the time after which another attempt to print a print job is performed (pull strategy).
Pull printing time between print job (ms): the time after which another print job can be printed (pull strategy).
Once parameters are set, press Save to apply the changes.
5.2.14. SSL
This section contains all necessary SSL settings.
Reverse DNS Workaround: should only be checked if it is a known issue that the first login is much slower than follow up logins (see also the troubleshooting section). Leave this setting deactivated if the problem does not exist in your environment. Changes require a device restart to take effect.
Trust all server certificates: if checked, all server certificates are considered as trusted. Changes require a device restart to take effect.
Verify server hostname: if checked, the server hostname will be verified with the default JVM hostname verifier. Changes require a device restart to take effect.
Once the parameters are set, press Save to apply the changes.
5.3. Update Skin From Server
Note
This chapter describes the process for Genius Server version 2.x. If the Genius Server version 3.x is in use please consult the Genius Server manual. Details can be found in section Genius Conf -> Web Conf Introduction -> Tenants -> Client Skin.
Genius MFP Ricoh SmartSDK Client allows the administrator to customize the layout of the Ricoh MFP device panel in a quick and easy way. To change the layout, modify the layout.properties file in the following folder:
<Base path>\skin\embedded_mfp\367\android
By default the <Base path> is <GeniusServer-folder>\conf\cdds\client, but it is modifiable in the Genius Server Configuration Tool.
Note
Please note that the images are not always immediatly applied after an update skin action has been performed. They will appear after the skin has been refreshed on the device e.g. after a user login/logout.
For further details see the Device Client section in the Genius Server manual.
5.3.1. Image Customization
Through the Genius MFP Ricoh SmartSDK Client the administrator can personalize the icons on MFP devices.
The only supported image files on Ricoh SmartSDK platform are .png.
Move the icon(s) into the image folder of the server installation directory:
<Base path>\skin\embedded_mfp\367\android\images\
By default the <Base path> is <GeniusServer-folder>\conf\cdds\client, but it can be modified in the Genius Server Configuration Tool.
For further details see the Device Client section in the Genius Server manual.
Click Update skin from server on the home page to apply the changes.
Note
The error message “Service not available” opens when no service is found. Check if the Genius Server URL is set correctly. If everything is correct and the client can reach the server, the client automatically updates the graphic visualization after the skin download.
To automatically update the client skin at every device restart, activate the setting Update skin at application start in the application section of the Genius MFP Ricoh SmartSDK Client configuration page.
Note
The update can only be performed if no user is currently logged in on the Genius MFP Ricoh SmartSDK Client.
5.4. Update Settings From Server
Note
This chapter describes the process for Genius Server version 2.x. If the Genius Server version 3.x is in use please consult the Genius Server manual. Details can be found in section Genius Conf -> Web Conf Introduction -> Tenants -> Client Settings.
This feature allows the administrator to force the client to update its settings from a property file placed in the Genius Server. Thus, it is possible to change and update settings on all MFPs in a faster and easier way.
The file name is settings.properties and its location is:
<Base path>\settings\embedded_mfp\367\android.
By default the <Base path> is <GeniusServer-folder>\conf\cdds\client, but it is modifiable in the Genius Server Configuration Tool.
For further details see the Device Client section in the Genius Server manual.
Note
The error message “Service not available” opens when no service is found, check if the Genius Server URL is set correctly. If everything is set correctly and the client can reach the Genius Server, the client automatically updates itself after the settings download.
To automatically update the client settings at every device restart, activate the setting Update settings at application start in the application section of the Genius MFP Ricoh SmartSDK Client configuration page.
5.4.1. Settings for Device Groups
In the settings folder, the administrator can create a property file for each group of devices (for further details, please see the Genius Server Administrator Manual on device groups). The device group is defined in the Genius Server Administrator Console in Device Management into Groups. A settings-<DEVICE-GROUP>.properties file overwrites the settings.properties only for devices associated to the group.
5.4.2. Settings for Devices
In the setting folder, the administrator can create a property file for each device. The file name is settings-<SERIAL-NUMBER>.properties (where <SERIAL-NUMBER> is the device’s serial number).
The settings-<SERIAL-NUMBER>.properties file overwrites both the settings-<DEVICE-GROUP>.properties and the settings.properties files.
5.5. Certificates
Genius MFP Ricoh SmartSDK Client provides also an SSL Certificates System management. Selecting Certificates from the navigation on the top of the page leads to the following page:
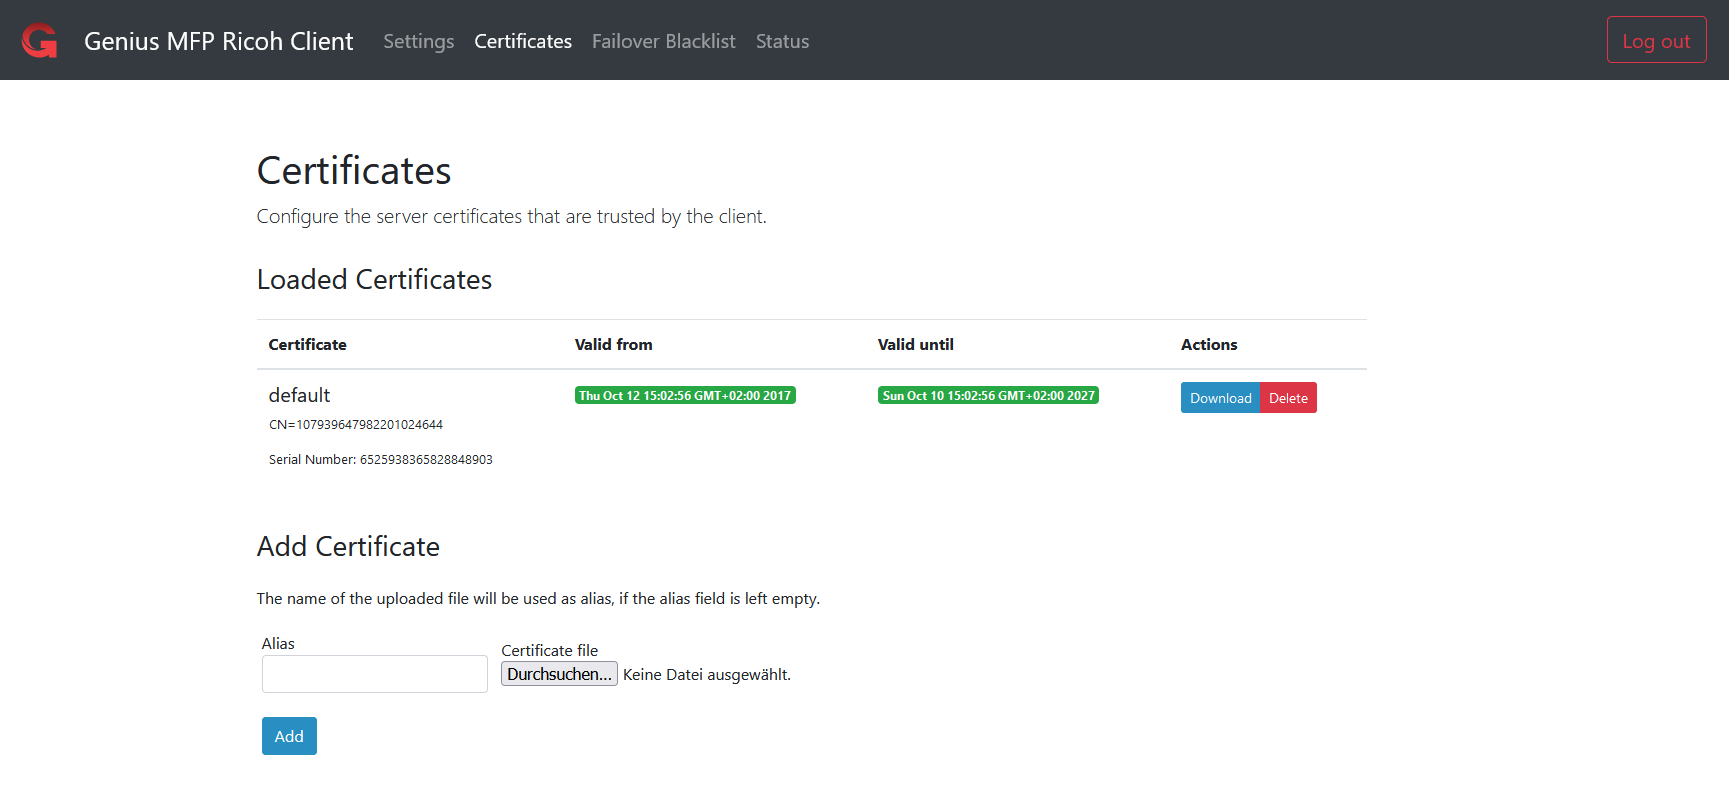
In this section, the administrator can check the SSL certificates used by the client, the name and valid dates.
To download a certificate, press Download.
To delete a certificate, press Delete.
A new certificate can be added in the Add certificate section on the bottom of the page. Choose an Alias and search for the certificate. Then press Add.
5.6. Failover Blacklist
Selecting Failover Blacklist from the Configuration menu, the following page opens:
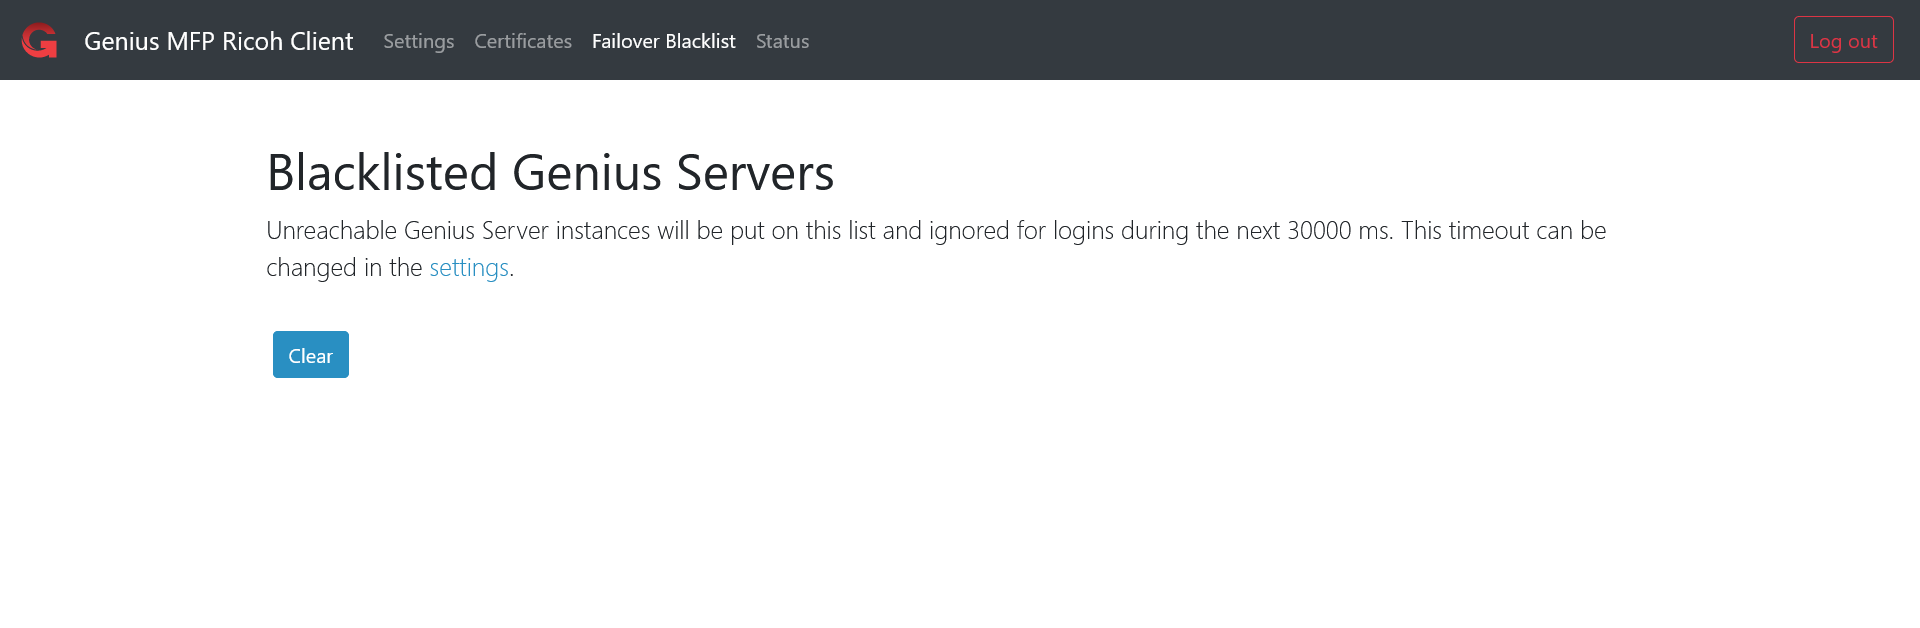
Unreachable servers are stored in the Failover Blacklist section until the list expiration time is reached. By default, the Genius MFP Ricoh SmartSDK Client contacts the Main Genius Server Service URL configured in the settings page.
If this server is not available, the Genius MFP Ricoh SmartSDK Client tries to contact the other four servers configured in the Advanced settings, going from top to bottom. The client stores unreachable servers in the Failover Blacklist to ensure continuity of service and will not contact them in the future authentication requests in order to enhance the login performance.
After the configured expiration time (via the setting Failover blacklist timeout (ms)), the list is automatically cleaned and the client can try to contact the configured servers again on a login attempt.
Additionally, the administrator can manually clean the list before the timeout, by pressing the Clear button.
5.7. Status
Selecting Status from the Configuration menu, the following page opens:
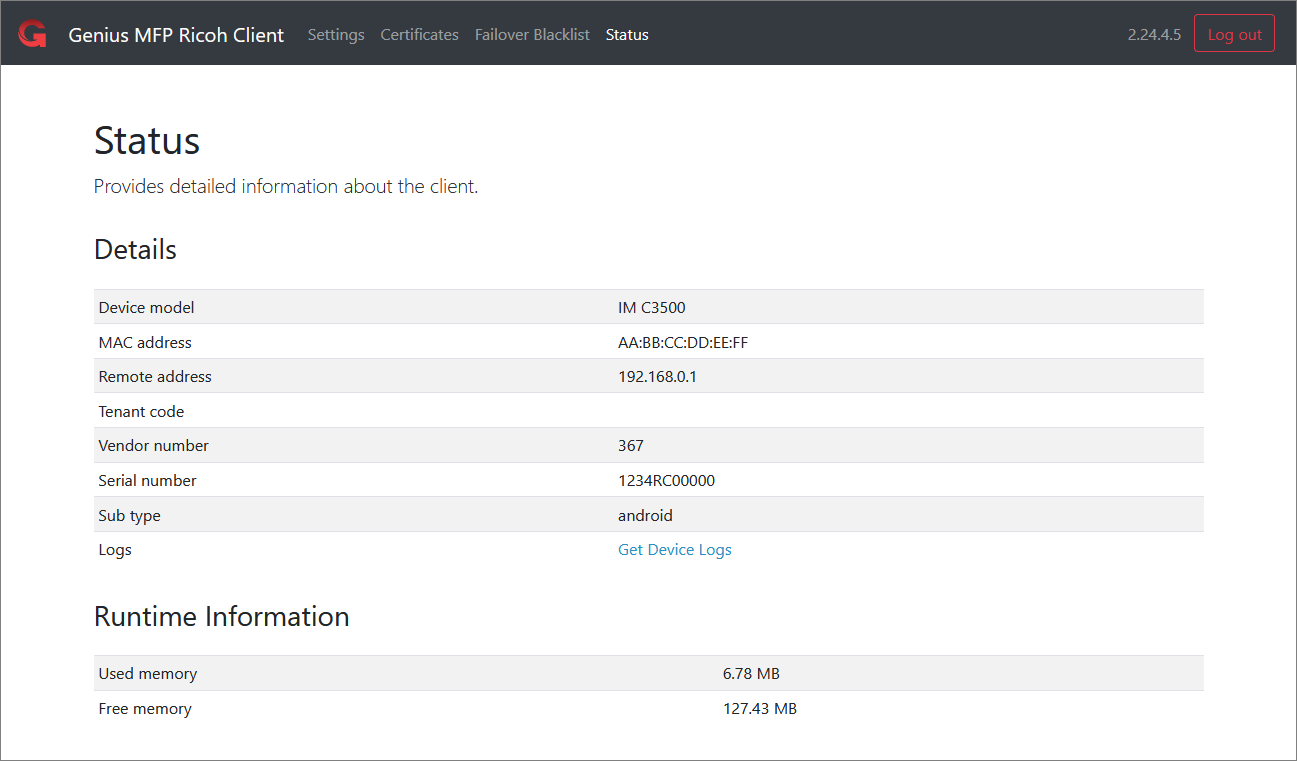
The Status section provides detailed and runtime information about the client like Device model, MAC address, Remote address, Tenant code, Vendor number, Serial number, Sub type, Logs, Used memory, Free memory.
Additionally, the administrator can download logs, by selecting the Get Device Logs entry.