4. Client Installation
There are three ways to install the Genius MFP Ricoh SmartSDK Client. The installation via the Ricoh Deploy and Settings Tool (RDST for short), web installation and device installation. We recommend the installation via RDST, which comes with its own technical documentation. You will find a short instrcution of the three installation methods below.
Before installing Genius MFP Ricoh SmartSDK Client make sure that the devices are correctly configured as described in the previous chapter.
4.1. RDST Installation (Recommended)
We recommend to use the Genius MFP Ricoh DST as installation method. With this tool, the installation and configuration of the Genius MFP Ricoh SmartSDK Client is more convenient, since multiple devices can be installed, updated, configured or uninstalled at the same time.
The installation via Genius MFP Ricoh DST requires the configuration of an application.yml file as well as a list of devices in the devices.csv file. Since an explanation of the tool would exceed the scope of this manual a seperate technical manual exists. This seperate manual can be downloaded from the download area.
Genius MFP Ricoh DST version 2.24.4.2 or higher is required for installation.
4.2. Device Installation
To install the Genius MFP Ricoh SmartSDK Client at the device, complete the following steps:
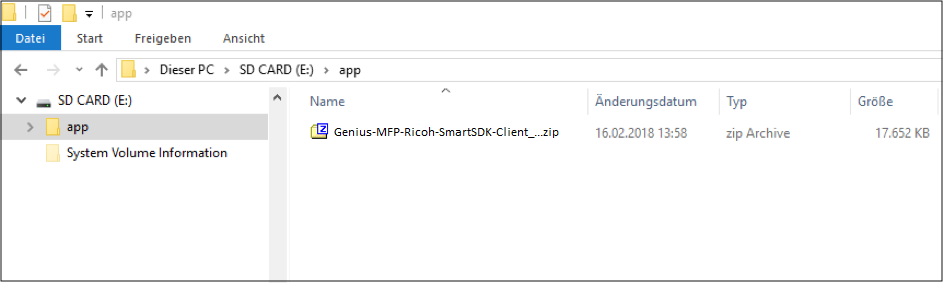
Take an SD Card (FAT32 formatted).
Create a folder named app in the root directory of the SD Card.
Upload the client installation file inside the app folder.
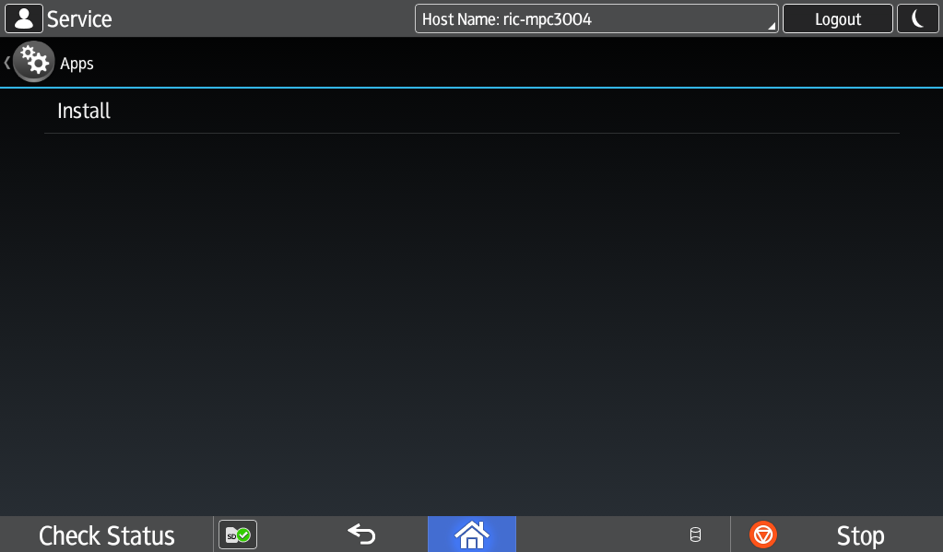
Enter the SD Card in the SD Card slot on the left side of the Ricoh MFP panel. Then access the Smart Operation Panels service mode (for further information about how to perform the access, contact Ricoh assistance).

Press Apps and then Install.
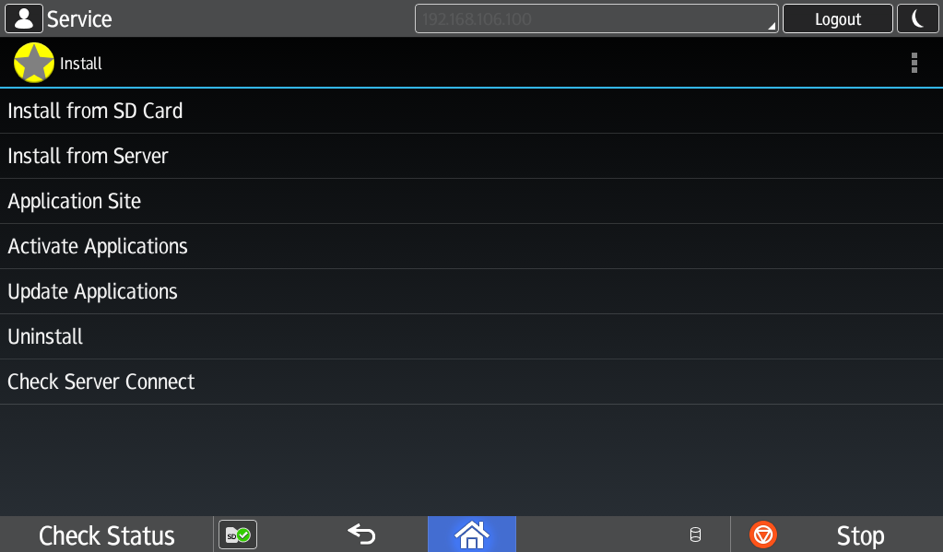
Press Install from SD Card.
Select Genius MFP and press Install.
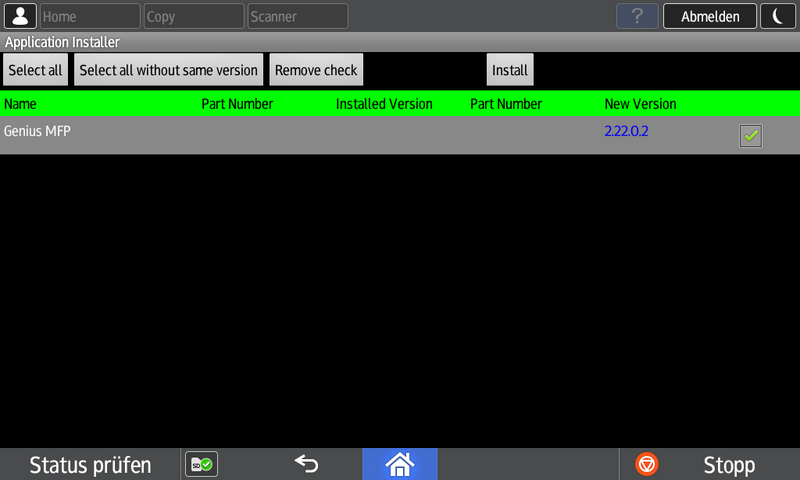
Once installed, an "installation successful" message opens.
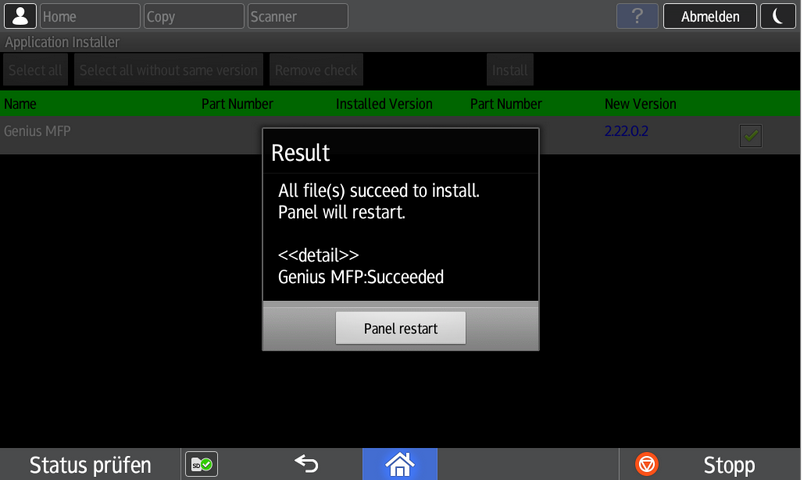
Press Panel restart and the installation procedure is successfully completed.
At the end of the installation remove the SD Card and restart the device by pressing the main switch.
4.3. Web Installation
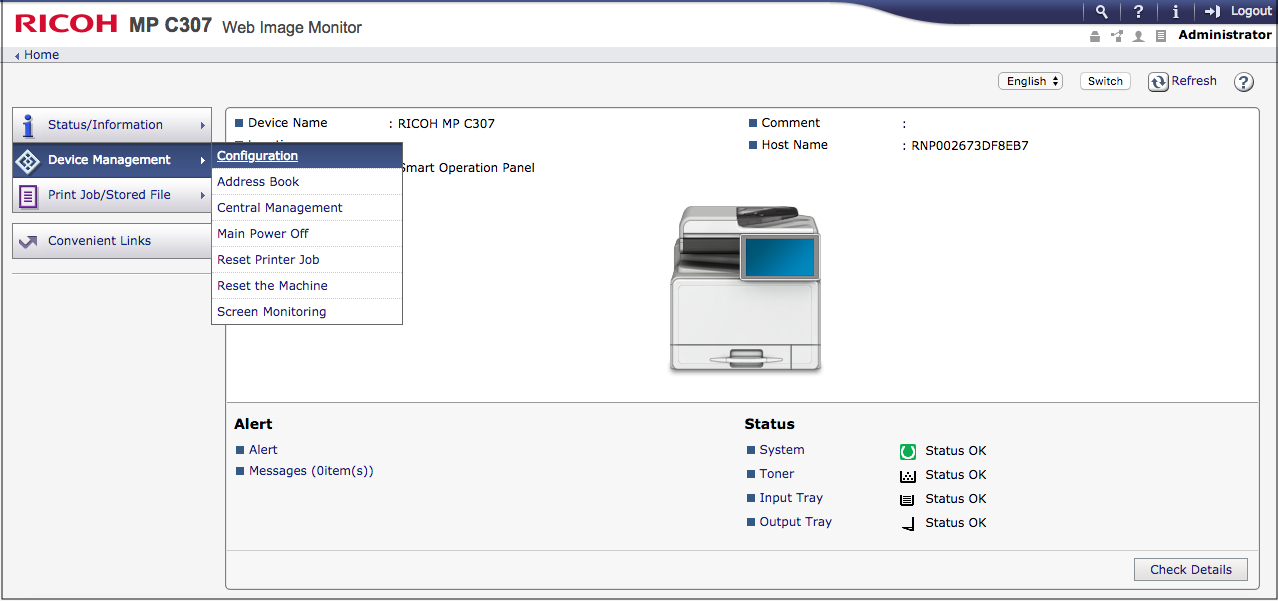
Open the MFP administration page (
https://<device-ip>) and login as administrator:

Click on Device Management and then Configuration:
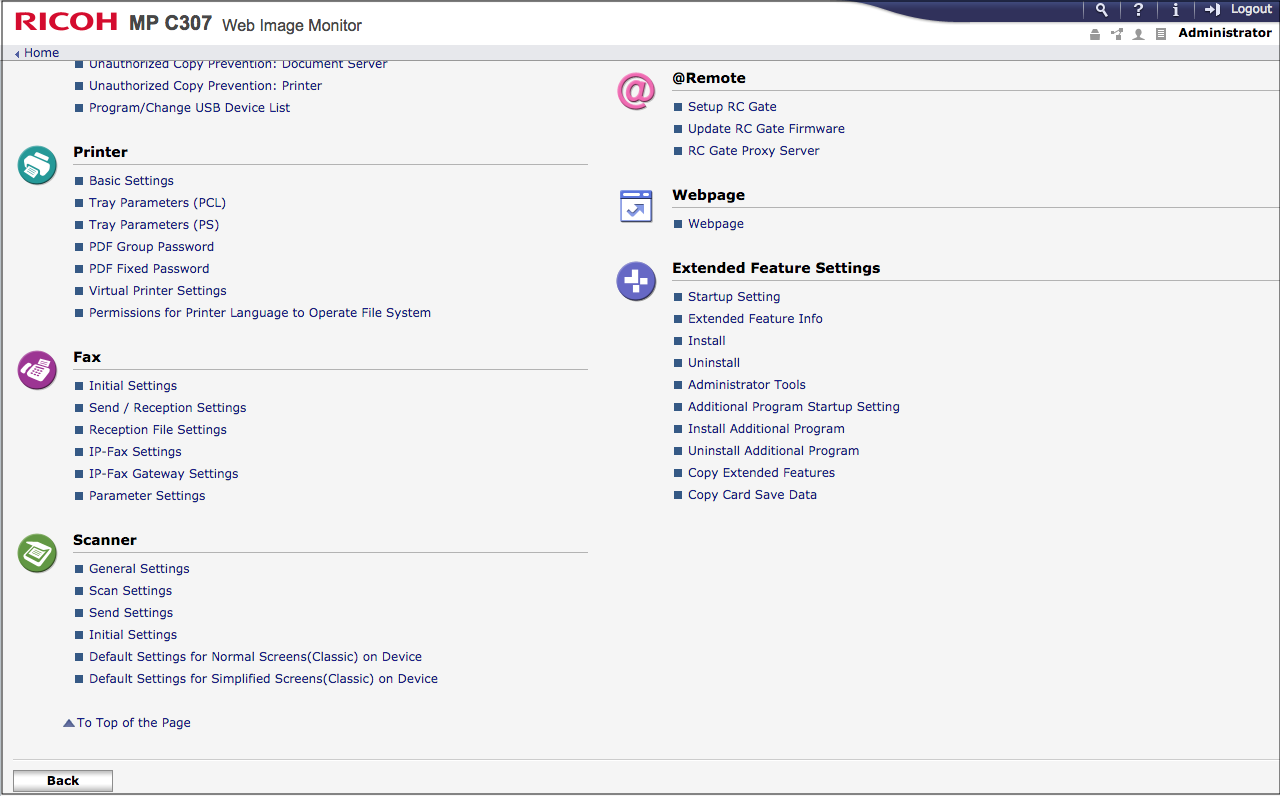
Scroll down and select Install in the Extended Feature Settings section:
Select Local File and press the Choose File button:
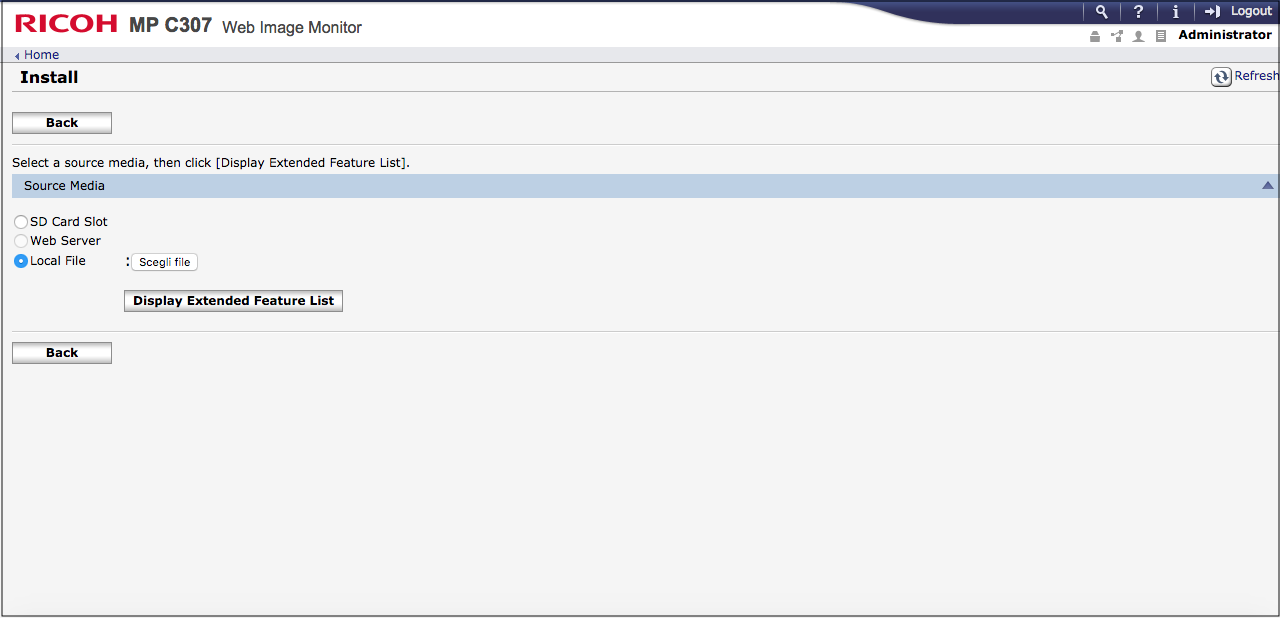
Once the .zip file has been selected, wait for the file upload and then press the Display Extended Feature List button:
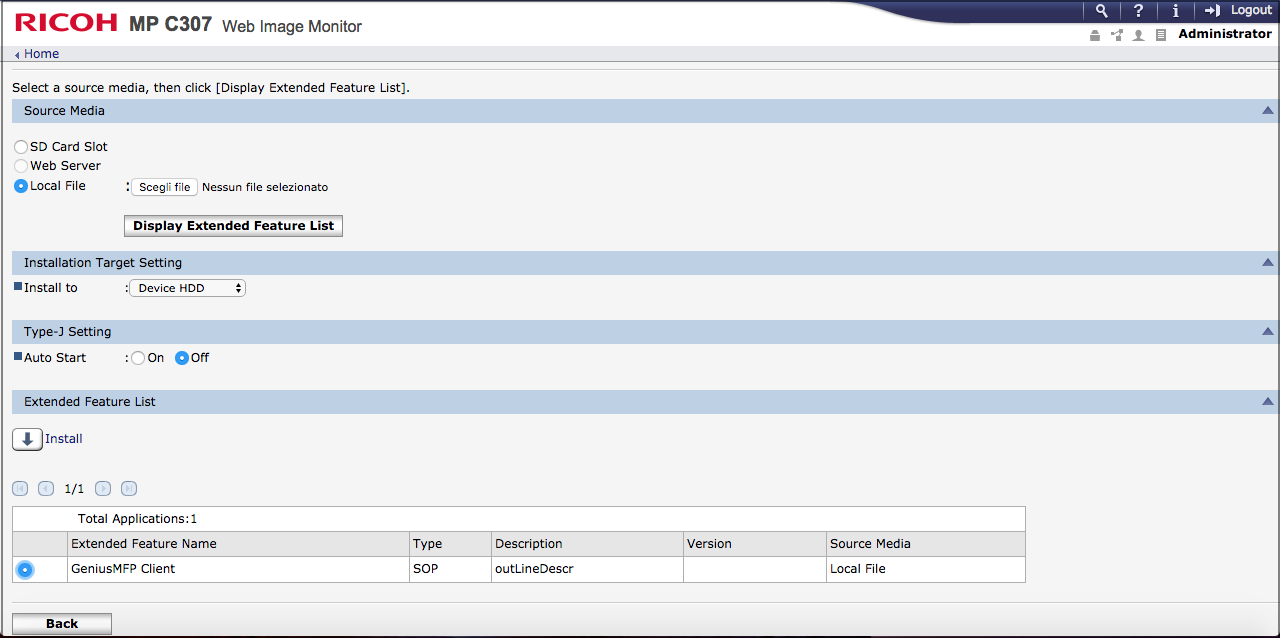
Select the Genius MFP Ricoh SmartSDK Client from the application list and press Install.
Note
Install to and Auto start are not selection items of the Smart Operation Panel application, so settings are not needed. (Even if settings are specified they are ignored.)
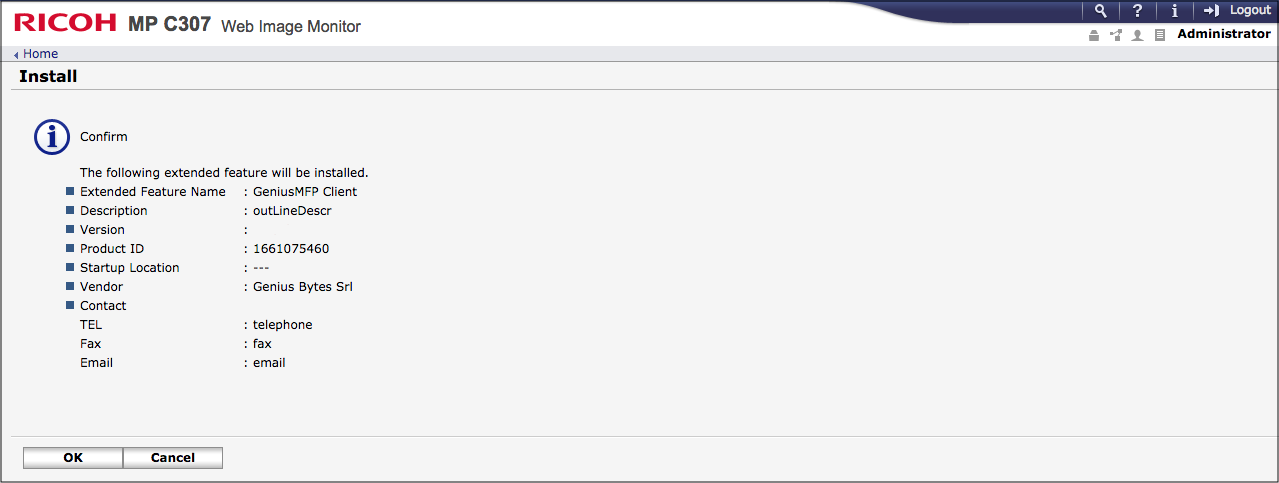
When the confirmation page opens, press OK.
Reboot the device via main switch.